Black Decker BDOH200 Bruksanvisning

Les nedenfor 📖 manual på norsk for Black Decker BDOH200 (13 sider) i kategorien varmeaparat. Denne guiden var nyttig for 2 personer og ble vurdert med 4.5 stjerner i gjennomsnitt av 2 brukere

Side 1/13
PLEASE READ AND SAVE THIS USE AND CARE BOOK.
POR FAVOR LEA ESTE INSTRUCTIVO ANTES DE USAR EL PRODUCTO.
VEUILLEZ LIRE ET CONSERVER CE GUIDE D’ENTRETIEN ET D’UTILISATION.
Digital 9-fin oil-filled
heater
Calentador de aceite
con 9 aletas y digital
Radiateur à l’huile,
à 9 ailettes et à
affichage numérique
Models/Modelos/Modèles
BDOH200 , BDOH200C
?
USA/Canada 1-800-231-9786
Mexico 01-800-714-2503
www.blackanddecker.com
Accessories/Parts
(USA/Canada) 1-800-738-0245
Accesorios/Partes
(EE.UU/Canadá)
Accessoires/Pièces (É.-U./Canada)
BDOH200.Pub179200RV2 5/18/05 9:11 AM Page 1
2
1
WARNING: To reduce the risk of fire:
Keep combustible materials, such as furniture, pillows, bedding, papers,
clothes and curtains at least 3 feet (0.9m) from the front, sides and rear
of heater when the heater is plugged in.
Do not place heater near a bed, because objects such as pillows or
blankets can fall off the bed and be ignited by heater.
Always unplug from electrical outlet whenever heater is not in use.
Avoid the use of an extension cord because it may overheat and cause a
risk of fire. However, if an extension cord must be used, it shall be of a
minimum size of 14 AWG and rated not less than 1875 watts.
CAUTION: Risk of fire - Do not operate without casters attached.
When using any electrical appliance, basic precautions should always be
followed to reduce the risk of fire, electrical shock, and injury to persons
including the following:
Read all instructions before using heater.
Heater is hot when in use. To avoid burns, do not let bare skin touch
hot surface. Unplug and let heater cool down for at least ten (10)
minutes before moving it. Use handles provided.
Extreme caution is necessary when any heater is used by or near
children or invalids, and whenever heater is left operating and
unattended.
Do not operate any heater with a damaged cord or plug or after it
malfunctions or is dropped or damaged in any manner. Return heater
to the nearest authorized service facility for examination, repair, or
electrical or mechanical adjustment. Or call appropriate toll-free
number listed on the cover of this manual.
Do not use outdoors.
Heater is not intended for use in wet or moist locations such as
bathrooms, laundry areas or similar indoor locations. Never locate
heater where it may fall into a bathtub or other water container.
Do not run cord under carpeting. Do not cover cord with throw rugs,
runners, or similar coverings. Arrange cord away from traffic areas, and
where it will not be tripped over.
To disconnect heater, press OFF button, then remove plug from outlet
by pulling the plug, not the cord.
Do not insert or allow foreign objects to enter any ventilation or exhaust
opening, as this may cause an electric shock or fire, or damage the
heater.
IMPORTANT SAFETY
INSTRUCTIONS
SAVE THESE INSTRUCTIONS.
A heater has hot and arcing or sparking parts inside. Do not use it in
areas where gasoline, paint or flammable liquids are used or stored.
Use heater only as described in this manual. Any other use not
recommended by the manufacturer may cause fire, electric shock or
injury to persons.
Avoid using heater when sleeping.
To prevent a possible fire, do not block air intakes or exhaust in any
manner. Do not use on soft surface, like bed, where openings may
become blocked.
POLARIZED PLUG
This appliance has a polarized plug (one blade is wider than the other). To reduce the
risk of electric shock, this plug will fit into a polarized outlet only one way. If the plug
does not fit fully in the outlet, reverse the plug. If it still does not fit, contact a
qualified electrician. Do not attempt to modify the plug in any way.
TAMPER-RESISTANT SCREW
This unit is equipped with tamper-resistant screws. To reduce the risk of shock, do not
attempt to remove the front or back housing. There are no user serviceable parts
inside. Repair should be done only by authorized service personnel.
SPECIAL ATTENTION:
The use of an extension cord is not recommended. However, if it is absolutely
necessary, be sure that the cord is (1) No. 14 AWG minimum size and rated no
less than 1875 watts; (2) UL Listed; (3) as short as possible (long cords can
overheat, as well as trip circuit breakers); (4) not used for operating more than one
appliance at a time.
Note: If the power supply cord is damaged, it must be replaced by the
manufacturer or its service agent or a similarly qualified person in order to
avoid a hazard.
BDOH200.Pub179200RV2 5/18/05 9:11 AM Page 2
How to Use
This appliance is intended for household use only.
Important: For warranty verification, please do not remove line cord sticker.
Note: This heater is packed with two caster assemblies that must be installed between the
radiator fins at each end of base pipe to make unit portable and operable. Do not use
heater in any other orientation other than upright as shown in this manual.
To assemble:
1. Be sure heater is unplugged and off.
2. Keep cord out of way by winding it around cord wrap.
3. Turn heater upside down and place the two metal U-shaped screws over base pipe,
between the radiator fins on either end of heater, so the screw threads extend beyond
the pipe.
4. Position assembly bracket so the two slots on the bracket line up with the two screws
on end of heater.
5. Set each assembly bracket over threaded end of each U-shaped screw and fasten them
securely in place with wing nuts (A).
6. Set heater right side up.
The Advanced Safety Technology™ (AST) system features unique technology built into your
heater that offers protection detailed in the "Special Features" section.
Important: Portable electric heaters are designed for space heating or as a supplementary
heat source. They are not intended to be a main source of heat. Do not use heater as an
integral part of any life support or equipment protection system, where a functional failure
or misapplication of heater could jeopardize the people or things being protected. Do not
touch or attempt to move heater when it is plugged in.
Always unplug and allow heater to cool before handling. Never pull unit by cord — use
handle. During the first few minutes of initial use, you may notice a slight odor. This is
normal and will quickly disappear.
Use heater only on floor. It radiates heat in all directions. Always leave ample space
around it so it’s not too close to a wall.
1. You don't have to set the clock before using heater. Plug heater into a standard AC
outlet.
Caution: Be sure that no other appliances are plugged into same circuit with heater as a
circuit overload could occur.
2. Press ON/OFF button to activate heater. The red lights by POWER and TEMP SETTING
buttons will turn on (B).
3. Press POWER button to select appropriate setting: LO for a small (approx. 10’x10’/3m
x 3m), MED for a medium (approx. 12’x12’/3.8m x 3.8m), or HI for a large room
(approx. 12’x 16’/3.8m x 5m).
4. Press TEMP SETTING button to MAX. Once desired room temperature is achieved,
lower temperature setting. Leave temperature control at this position since heater will
automatically cycle on and off to maintain your chosen room temperature.
5. This heater will continue to operate as long as one of the 3 red lights next to POWER
button is illuminated. Be sure to press ON/OFF button to turn heater off when finished.
Note: Oil in unit is permanently sealed. You do not need to refill it.
To set clock for current time of day:
1. Plug heater in. The digital clock will flash 12:00 AM until correct time is set.
2. Press FUNCTION button until clock light and hour LED start flashing.
3. Set hour by pressing down ( ) or up ( ) arrow buttons. (If setting for PM time, make
sure PM light is on.) Press FUNCTION button again to set. The minute LED will start
flashing.
4
3
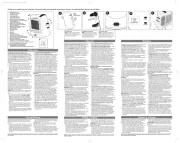
Product may vary slightly from what is illustrated.
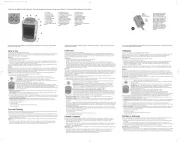
1. Fins
†2. Casters (Part #178451-00)
†3. Assembly Bracket (Part #178453-00)
4. Cord Wrap
5. Vents
6. Handle
7. Digital control panel
†8.Wing Nuts (Part #178452-00)
†9. U-Shaped Screw (Part #178454-00)
10. Base Pipe
Consumer replaceable
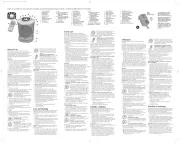
A
Digital Display
Function button
Temperature button
On/Off button
Power button
Timer I
Clock
Timer II
B
BDOH200.Pub179200RV2 5/18/05 9:11 AM Page 4

Produkspesifikasjoner

Merke: Black Decker
Kategori: varmeaparat
Modell: BDOH200

Trenger du hjelp?

Hvis du trenger hjelp med Black Decker BDOH200 still et spørsmål nedenfor, og andre brukere vil svare deg


varmeaparat Black Decker Manualer
varmeaparat Manualer

Nyeste varmeaparat Manualer