Bora PUXA Bruksanvisning
Les nedenfor 📖 manual på norsk for Bora PUXA (60 sider) i kategorien Komfyr. Denne guiden var nyttig for 3 personer og ble vurdert med 4.5 stjerner i gjennomsnitt av 2 brukere
Side 1/60

EN
PUREUMEN-101
www.bora.com
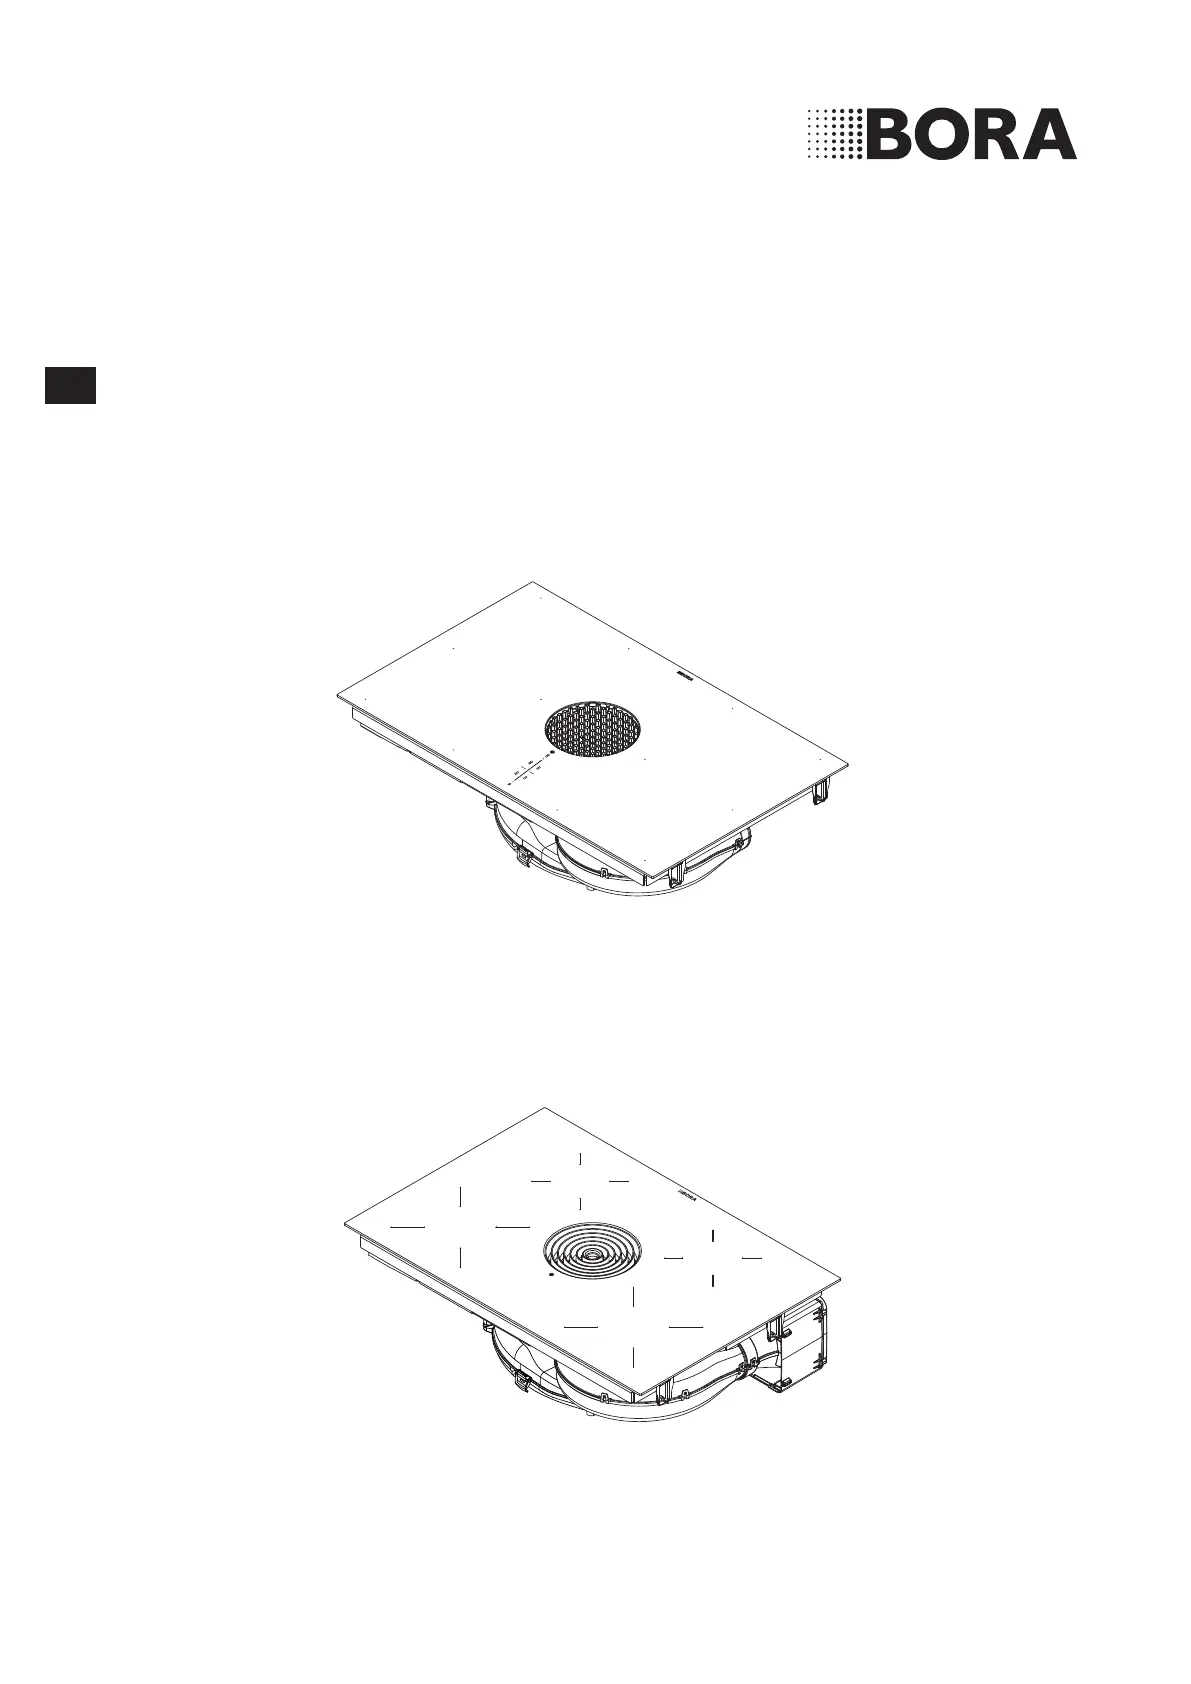
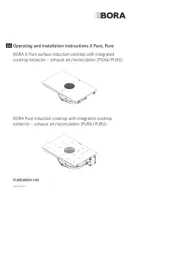
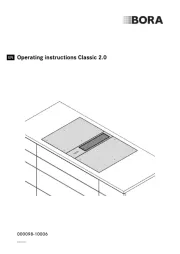
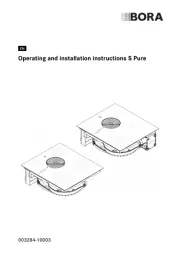
Operating and installation instructions X Pure, Pure
BORA X Pure surface induction cooktop with integrated
cooktop extractor – exhaust air/recirculation (PUXA/PUXU)
BORA Pure induction cooktop with integrated cooktop
extractor – exhaust air/recirculation (PURA/PURU)

EN
2
www.bora.com
5.6.1 Safety shut-down ........................................................... 20
– Cooktop extractor .........................................................20
– Cooktops ......................................................................20
5.6.2 Overheating protection .................................................. 21
6 Installation 22
6.1 General installation instructions .................................. 22
6.1.1 Simultaneous operation of the cooktop extractor
in the exhaust air mode and a fireplace dependent
upon the air supply in the room ..................................... 22
6.1.2 Home In module PUHIM (optional) ................................ 23
6.2 Scope of delivery ........................................................... 23
6.2.1 Checking the scope of delivery ...................................... 23
6.3 Tool and aids .................................................................. 23
6.4 Assembly instructions ...................................................23
6.4.1 Required clearance distances ........................................ 23
6.4.2 Minimum unit dimensions for X Pure (PUXA, PUXU) ..... 23
6.4.3 Minimum unit dimensions for Pure (PURA, PURU) ........ 24
6.5 Worktop cut-out .............................................................24
6.5.1 X Pure cut-out dimensions (PUXA, PUXU) ..................... 24
– X Pure flush installation (PUXA, PUXU) .........................24
– X Pure surface mounting (PUXA, PUXU) .......................24
6.5.2 Pure cut-out dimensions (PURA, PURU) ........................ 25
– Pure flush installation (PURA, PURU) ............................25
– Pure surface mounting (PURA, PURU) ..........................25
6.6 Installing the appliance in exhaust air mode
(PUXA, PURA) ................................................................. 25
6.6.1 Preparing kitchen units for the exhaust air model ......... 25
– Installation dimensions .................................................26
– Adjusting the back wall of the unit ................................26
6.6.2 Preparing the cooktop .................................................... 26
– Attaching the sealing tape ............................................26
– Fitting the installation clamps .......................................26
6.6.3 Inserting the cooktop ..................................................... 27
– Height adjustment plates for flush installation(optional) 27
6.6.4 Securing the cooktop ..................................................... 27
6.6.5 Connecting the device to the duct system .................... 28
6.7 Installing the recirculation model (PUXU, PURU)
of the appliance ............................................................. 28
6.7.1 Recirculation of air from the kitchen unit ...................... 28
6.7.2 Installation variants (A and B) for
recirculation appliances ................................................. 29
– A: floor unit with continuous back wall .........................29
– B: floor unit with false floor under the cooktop .............29
6.7.3 Preparing kitchen units for installation variant A
(floor unit with continuous back wall) ............................ 30
– Installation dimensions .................................................30
– Adjusting the back wall of the unit ................................30
6.7.4 Preparing kitchen units for installation variant B
(floor unit with false floor under the cooktop) ............... 31
– Installation dimensions .................................................31
– Adjusting the back wall of the unit ................................31
6.7.5 Preparing the cooktop .................................................... 31
– Attaching the sealing tape ............................................31
– Fitting the installation clamps .......................................31
6.7.6 Extending the telescopic pull-out of the
air cleaning box (PULBTA) .............................................. 32
6.7.7 Inserting the cooktop .................................................... 33
– Height adjustment plates for flush installation
(optional) ......................................................................33
1 General information 4
1.1 Liability ............................................................................. 4
1.2 Validity of the operating and installation instructions . 4
1.3 Product conformity ......................................................... 4
1.4 Presentation of information............................................ 4
2 Safety 5
2.1 Use as intended ............................................................... 5
2.2 People with limited abilities ........................................... 5
2.3 General safety instructions ............................................ 5
2.4 Safety instructions for installation ................................. 6
2.5 Safety instructions – operation ...................................... 8
2.6 Safety instructions – cleaning and maintenance ......... 9
2.7 Safety instructions – repairs, servicing and
spare parts ..................................................................... 10
2.8 Safety instructions – disassembly and disposal ........10
3 Technical data 11
3.1 X Pure (PUXA, PUXU) ....................................................11
3.2 Pure (PURA, PURU) ....................................................... 12
4 Energy labelling 14
5 Device description 15
5.1 Model description ..........................................................15
5.2 System description ........................................................15
5.2.1 Structure ........................................................................ 15
5.2.2 Operating panel and operating principle........................ 15
5.2.3 Symbols .......................................................................... 16
5.2.4 7-segment display .......................................................... 17
5.2.5 Lighting ........................................................................... 17
5.2.6 Sounds ........................................................................... 17
5.3 How the cooktop extractor works ...............................17
5.4 How the induction cooktop works ............................... 17
– Power levels ..................................................................18
– Suitable cookware ........................................................18
– Noises ..........................................................................18
5.5 Overview of features and functions .............................18
– Electronic power adjustment ........................................19
– Short-time timer (egg timer) .........................................19
5.5.1 Cooktop extractor functions ......................................... 19
– Automatic extractor control ..........................................19
– Automatic after-run .......................................................19
– Cooktop extractor power setting...................................19
– Filter service display .....................................................19
5.5.2 Cooktop functions .......................................................... 19
– Automatic heat up function...........................................19
– Pan size recognition......................................................19
– Permanent pan size recognition .................................... 19
– One-level warming function ..........................................19
– Variable warming function (3 levels) .............................20
– Bridging function ..........................................................20
– Automatic bridging function ..........................................20
– Cooking zone timers (automatic cut-off) .......................20
– Pause function ..............................................................20
– Cooktop power setting..................................................20
5.6 Safety devices ................................................................20
– Childproofing feature ....................................................20
– Control lock ..................................................................20
– Cleaning lock (wipe function) ........................................20
– Residual heat display ....................................................20
Table of Contents

EN
3
www.bora.com
7.6.5 Menu item 5:
Touch zone reaction speed ............................................ 46
7.6.6 Menu item 6:
LED test .......................................................................... 46
7.6.7 Menu item 7:
Permanent pan size recognition .................................... 46
7.6.8 Menu item 8:
Show software/hardware version ................................. 47
7.6.9 Menu item 9:
Safety shut-down ........................................................... 47
7.6.10 Menu item A:
Super simple mode ........................................................ 47
7.6.11 Menu item 0:
Reset to factory settings ................................................ 48
8 Cleaning and Maintenance 49
8.1 Cleaning agents .............................................................49
8.2 Cooktop and extractor care ..........................................49
8.3 Cleaning the cooktop ....................................................49
8.4 Cleaning the cooktop extractor ....................................50
8.4.1 Removing the components ............................................ 50
– Removing the X Pure air inlet nozzle .............................50
– Removing the Pure air inlet nozzle ................................50
– Removing the stainless steel grease filter .....................50
8.4.2 Cleaning the air inlet nozzle and stainless steel
grease filter .................................................................... 50
8.4.3 Fitting the components .................................................. 50
– Inserting the stainless steel grease filter .......................50
– Inserting the air inlet nozzle ..........................................50
8.4.4 Removing liquids from the device .................................. 51
8.5 Cleaning the air guiding housing..................................51
– Opening the air guiding housing. ...................................51
– Closing the air guiding housing .....................................51
8.6 Replacing the activated charcoal filter ........................ 52
– Removing the activated charcoal filter ..........................52
– Inserting the activated charcoal filter ............................52
9 Troubleshooting 54
10 Decommissioning, disassembly and
disposal 55
10.1 Decommissioning .......................................................... 55
10.2 Disassembly ...................................................................55
10.3 Environmentally-friendly disposal ................................ 55
11 Warranty, technical service, spare
parts, accessories 56
11.1 BORA manufacturer’s warranty....................................56
11.1.1 Warranty extension ........................................................ 56
11.2 Service ............................................................................56
11.3 Spare parts .................................................................... 56
11.4 Accessories .................................................................... 57
12 Notes 58
6.7.8 Securing the cooktop ..................................................... 33
6.7.9 Making a connection with the back wall
(only in installation variant A) ......................................... 33
6.7.10 Inserting the activated charcoal filter ............................ 34
6.8 Establishing the power connection ..............................35
6.9 Initial operation .............................................................36
6.9.1 Dealer and service menu ............................................... 36
– Dealer and service menu overview ...............................36
– Calling up the dealer and service menu ........................36
– Menu item B: configuration of the extraction system ....36
– Menu item C: power management ................................37
– Menu item D: demo mode ............................................37
– Closing the dealer and service menu ............................37
6.9.2 Function test .................................................................. 37
6.10 Sealing the device .........................................................38
6.11 Handover to user ........................................................... 38
7 Operation 39
7.1 General operating instructions .....................................39
7.2 Touch control .................................................................39
7.3 Operating the system ....................................................39
7.3.1 Switching on ................................................................... 39
7.3.2 Switching off .................................................................. 39
7.3.3 Control lock .................................................................... 39
7.3.4 Childproofing feature ..................................................... 40
7.3.5 Pause function ............................................................... 40
7.3.6 Short-time timer (egg timer) .......................................... 40
7.3.7 Cleaning lock (wipe function) ......................................... 40
7.4 Operating the cooktop extractor..................................41
7.4.1 Setting the fan power level ............................................ 41
7.4.2 Fan power setting ........................................................... 41
7.4.3 Automatic extractor control ........................................... 41
7.4.4 Switching the fan off ...................................................... 41
7.5 Operating the cooktop .................................................. 41
7.5.1 Selecting a cooking zone ............................................... 41
7.5.2 Setting cooking zone power levels ................................. 41
7.5.3 Automatic heat up function ............................................ 42
7.5.4 Cooktop power setting ................................................... 42
7.5.5 Setting the warming level ............................................... 42
7.5.6 Setting the variable warming level ................................. 42
7.5.7 Bridging function ............................................................ 42
7.5.8 Automatic bridging function ........................................... 43
7.5.9 Cooking zone timer ........................................................ 43
7.5.10 Switching off the cooking zone ...................................... 44
7.6 User menu ......................................................................44
– Calling up the user menu ..............................................44
– Closing the user menu ..................................................44
– Navigating the user menu .............................................44
– User menu overview .....................................................44
7.6.1 Menu item 1:
Volume of the acoustic signals ...................................... 44
7.6.2 Menu item 2:
Childproofing feature ..................................................... 45
7.6.3 Menu item 3:
Showing and resetting the filter status
(only in recirculation mode) ........................................... 45
7.6.4 Menu item 4:
Duration of the automatic after-run function ................. 45
Produkspesifikasjoner
Merke: | Bora |
Kategori: | Komfyr |
Modell: | PUXA |
Trenger du hjelp?
Hvis du trenger hjelp med Bora PUXA still et spørsmål nedenfor, og andre brukere vil svare deg
Komfyr Bora Manualer
17 September 2025
17 September 2025
17 September 2025
17 September 2025
17 September 2025
17 September 2025
17 September 2025
17 September 2025
17 September 2025
17 September 2025
Komfyr Manualer
- Komfyr MSW
- Komfyr Teka
- Komfyr Maytag
- Komfyr Thomson
- Komfyr Uniprodo
- Komfyr Miele
- Komfyr Whirlpool
- Komfyr Etna
- Komfyr KitchenAid
- Komfyr Pelgrim
- Komfyr Royal Catering
- Komfyr LG
- Komfyr Bosch
- Komfyr BEKO
- Komfyr Exquisit
- Komfyr Hisense
- Komfyr Electrolux
- Komfyr Café
- Komfyr Balay
- Komfyr Siemens
- Komfyr Arcelik
- Komfyr Danby
- Komfyr Bartscher
- Komfyr Smeg
- Komfyr Hoover
- Komfyr Hotpoint
- Komfyr Nabo
- Komfyr Amica
- Komfyr AEG
- Komfyr Rosieres
- Komfyr Inventum
- Komfyr Artusi
- Komfyr Navitel
- Komfyr Samsung
- Komfyr Neff
- Komfyr Delonghi
- Komfyr Kogan
- Komfyr Caple
- Komfyr Faber
- Komfyr Marvel
- Komfyr Xiaomi
- Komfyr Midea
- Komfyr Candy
- Komfyr Viking
- Komfyr Kuppersbusch
- Komfyr Gorenje
- Komfyr Summit
- Komfyr Gram
- Komfyr Monogram
- Komfyr Vox
- Komfyr Westinghouse
- Komfyr Sencor
- Komfyr Bertazzoni
- Komfyr Bauknecht
- Komfyr Frigidaire
- Komfyr Breville
- Komfyr Defy
- Komfyr Euromaid
- Komfyr GE
- Komfyr Caso
- Komfyr Cambridge
- Komfyr Edilkamin
- Komfyr Omega
- Komfyr Fisher Paykel
- Komfyr Fulgor Milano
- Komfyr Tripp Lite
- Komfyr Boretti
- Komfyr Bromic
- Komfyr Indesit
- Komfyr Asko
- Komfyr Blaupunkt
- Komfyr Lamona
- Komfyr Dacor
- Komfyr Cylinda
- Komfyr Tristar
- Komfyr Respekta
- Komfyr Blaze
- Komfyr Nedis
- Komfyr Philco
- Komfyr Jenn-Air
- Komfyr Jata
- Komfyr ATAG
- Komfyr V-Zug
- Komfyr Palazzetti
- Komfyr Cata
- Komfyr Witt
- Komfyr Avanti
- Komfyr Jotul
- Komfyr Glem Gas
- Komfyr Wilfa
- Komfyr Hansa
- Komfyr Thor
- Komfyr Rommelsbacher
- Komfyr Innoliving
- Komfyr Kenmore
- Komfyr Fagor
- Komfyr Edesa
- Komfyr Cadel
- Komfyr Gaggenau
- Komfyr KKT Kolbe
- Komfyr Duracraft
- Komfyr Wolf
- Komfyr Ilve
- Komfyr Rommer
- Komfyr Corberó
- Komfyr Atosa
- Komfyr Perel
- Komfyr Rangemaster
- Komfyr Harvia
- Komfyr Biltema
- Komfyr Hestan
- Komfyr Ecotronic
- Komfyr Thermador
- Komfyr Ardes
- Komfyr Honeywell
- Komfyr Econo-Heat
- Komfyr Crosley
- Komfyr Pitsos
- Komfyr Ravanson
- Komfyr Nutrichef
- Komfyr Sogo
- Komfyr Sonnenkonig
- Komfyr JennAir
- Komfyr Yamazen
- Komfyr Kaiser
- Komfyr Blomberg
- Komfyr ZLine
- Komfyr De Dietrich
- Komfyr Orima
- Komfyr Imperial
- Komfyr Hanseatic
- Komfyr Fuave
- Komfyr Zojirushi
- Komfyr Rowi
- Komfyr Oster
- Komfyr Oranier
- Komfyr APW Wyott
- Komfyr Backyard Pro
- Komfyr Globe
- Komfyr Vestfrost
- Komfyr Avantco
- Komfyr Ariston Thermo
- Komfyr Grunkel
- Komfyr La Nordica
- Komfyr Jøtul
- Komfyr Blumfeldt
- Komfyr Essentiel B
- Komfyr InAlto
- Komfyr Sunfire
- Komfyr BlueStar
- Komfyr Veripart
- Komfyr Vestel
- Komfyr Jocca
- Komfyr Vulcan
- Komfyr Livn
- Komfyr Leisure
- Komfyr Cadco
- Komfyr Nemco
- Komfyr Vollrath
- Komfyr Haden
- Komfyr Elvita
- Komfyr Cooking Performance Group
- Komfyr Spring USA
- Komfyr Premier
- Komfyr Tognana
Nyeste Komfyr Manualer
17 September 2025
17 September 2025
17 September 2025
17 September 2025
17 September 2025
17 September 2025
17 September 2025
17 September 2025
17 September 2025
17 September 2025