Fusion XS-SL10SPGW Bruksanvisning
Les nedenfor 📖 manual på norsk for Fusion XS-SL10SPGW (11 sider) i kategorien Subwoofer. Denne guiden var nyttig for 14 personer og ble vurdert med 3.5 stjerner i gjennomsnitt av 7.5 brukere
Side 1/11

®
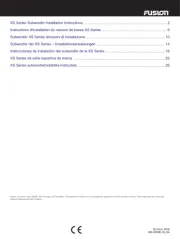
XS Series Subwoofer Installation Instructions .................................................................................. 2
Instructions d'installation du caisson de basse XS Series ................................................................ 6
Subwoofer XS Series Istruzioni di installazione .............................................................................. 10
Subwoofer der XS Series – Installationsanweisungen ................................................................... 14
Instrucciones de instalación del subwoofer de la XS Series ...........................................................18
XS Series da série esportiva da marca ...........................................................................................22
XS Series subwooferinstallatie-instructies ...................................................................................... 26
Garmin
®
, the Garmin logo, FUSION
®
, the Fusion logo, and True-Marine
™
are trademarks of Garmin Ltd. or its subsidiaries, registered in the USA and other countries. These trademarks may not be used
without the express permission of Garmin.
October 2018
190-02481-91_0A

XS Series Subwoofer Installation
Instructions
Important Safety Information
WARNING
Failure to follow these warnings and cautions could result in
personal injury, damage to the vehicle or vessel, or poor product
performance.
See the Important Safety and Product Information guide in the
product box for product warnings and other important
information.
This device must be installed according to these instructions.
Disconnect the vehicle's or vessel's power supply before
beginning to install this product.
CAUTION
Continuous exposure to sound pressure levels over 100 dBA
may cause permanent hearing loss. The volume is typically too
loud if you cannot hear people speaking around you. Limit the
amount of time you listen at high volume. If you experience
ringing in your ears or muffled speech, stop listening and have
your hearing checked.
Always wear safety goggles, ear protection, and a dust mask
when drilling, cutting, or sanding.
NOTICE
When drilling or cutting, always check what is on the opposite
side of the surface.
It is strongly recommended that you have your audio system
installed by a professional installer to ensure optimum
performance.
You must read all installation instructions before beginning the
installation. If you experience difficulty during the installation, go
to www.fusionentertainment.com for product support.
After installing the subwoofer, you should run the subwoofer at
low to medium volumes for the first few hours of use. This helps
to improve the overall sound by gradually loosening up the
moving components of the subwoofer, such as the cone, spider,
and surround
What's In the Box
• 1 subwoofer
• 6 Phillips stainless steel, 4.8 mm x 50 mm (10 gauge x 2 in.)
mounting screws
• Mounting template
• Grilles
Tools Needed
• Electric drill
• Drill bit (size varies based on surface material)
• Phillips screwdriver
• Wire strippers
• Crimping tool
• Electrical tape
• Appropriate saw or utility knife to cut surface material
• Marine sealant (optional)
• Suitable gauge speaker wire for the length required
NOTE: For customized installations, additional tools and
materials may be needed.
Mounting Considerations
Selecting the correct mounting location is critical to optimize the
performance of the audio system. This FUSION
®
subwoofer is
designed to perform in the widest possible range of mounting
locations, but the more you plan the installation, the better the
subwoofer sound will be.
• The audio system must be turned off before making any
connections. Failure to do so could result in permanent
damage to the audio system.
• You should protect all terminals and connections from
grounding and from each other. Failure to do so could result
in permanent damage to the audio system and voids the
product warranty.
• You should protect the wires from sharp objects and always
use rubber grommets when wiring through panels.
• The mounting location must avoid potential obstacles, such
as fuel and hydraulic lines and wiring.
• The mounting location must provide sufficient clearance for
the mounting depth of the subwoofer as specified in the side
view drawings and the specifications.
• When possible, the area behind each subwoofer should be
enclosed.
• To avoid interference with a magnetic compass, the
subwoofer should not be installed closer to a compass than
the compass-safe distance value listed in the product
specifications.
• You should select a flat mounting surface for the best seal.
• For better bass performance, the subwoofer should be
mounted in an area that provides just enough room behind
the subwoofer. Too small an area restricts bass, and too
large an area compromises bass performance. Refer to the
specifications for optimum volume recommendations.
• When a subwoofer is not exposed to the outside
environment, a better bass performance can be achieved
using an enclosure that has a ported design.Theile Small
parameters are provided in the specifications to assist with
enclosure and port design.
• If you intend to mount the subwoofer outside the boat, follow
these considerations.
◦ When mounted correctly, the subwoofer is rated IP65 for
protection in the marine environment from the front of the
subwoofer. Water exposure and damage to the rear of the
subwoofer voids the warranty.
◦ The subwoofer must be mounted in a location well above
the waterline, where it is not submerged.
◦ The subwoofer must be mounted in a location where it
cannot be damaged by docks, pilings, or other pieces of
equipment.
◦ The subwoofer should be mounted in a sealed enclosure,
especially if it is exposed to wash down. A port or vent
may allow water to collect in the enclosure and damage
the subwoofer.
Mounting the Subwoofer
Before mounting the subwoofer, you must choose a location
following the mounting considerations above.
Before cutting the mounting surface, you should verify that there
is enough clearance for the speaker behind the surface. Refer to
the specifications for clearance information.
NOTICE
Do not apply grease or lubricant to the screws when fastening
the subwoofer to the mounting surface. Grease or other
lubricants can cause damage to the subwoofer housing.
1
Route the wires from the source to the mounting location,
away from sources of electrical interference.
2
Trim the template and make sure it fits in the selected
location.
3
Orient the template so the FUSION logo is level in the
selected location.
2 Installation Instructions
Produkspesifikasjoner
Merke: | Fusion |
Kategori: | Subwoofer |
Modell: | XS-SL10SPGW |
Trenger du hjelp?
Hvis du trenger hjelp med Fusion XS-SL10SPGW still et spørsmål nedenfor, og andre brukere vil svare deg
Subwoofer Fusion Manualer
5 September 2025
3 September 2025
2 September 2025
2 September 2025
2 September 2025
2 September 2025
2 September 2025
2 September 2025
2 September 2025
2 September 2025
Subwoofer Manualer
- On-Q
- Pioneer
- Wet Sounds
- Canton
- Nubert
- Dual
- Bowers Wilkins
- SoundTube
- Yamaha
- Rockville
- Phase Technology
- Kicker
- Yorkville
- Wharfedale
- Max
Nyeste Subwoofer Manualer
18 Oktober 2025
18 Oktober 2025
18 Oktober 2025
18 Oktober 2025
18 Oktober 2025
18 Oktober 2025
18 Oktober 2025
18 Oktober 2025
18 Oktober 2025
18 Oktober 2025