Hisense 75A7GQ Bruksanvisning

Hisense Fjernsyn 75A7GQ

Les nedenfor 📖 manual på norsk for Hisense 75A7GQ (65 sider) i kategorien Fjernsyn. Denne guiden var nyttig for 22 personer og ble vurdert med 4.5 stjerner i gjennomsnitt av 2 brukere

Side 1/65
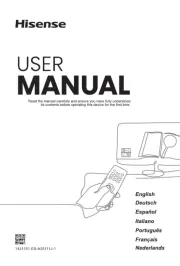
Read the manual carefully and ensure you have fully understood
its contents before operating this device for the first time.
English
Contents
Live TV
Channel Scan..................................................................................................................................... 3
Channel List........................................................................................................................................4
Channel Edit....................................................................................................................................... 5
Favourite............................................................................................................................................. 6
Guide (EPG)....................................................................................................................................... 7
PVR.....................................................................................................................................................8
Recording List...................................................................................................................................10
Timeshift........................................................................................................................................... 11
Connection
Wired Internet Connection............................................................................................................... 13
Wireless Internet Connection........................................................................................................... 13
Connecting Bluetooth Devices......................................................................................................... 14
Connecting Headphones.................................................................................................................. 16
Connecting USB Devices.................................................................................................................16
Connecting an Antenna....................................................................................................................17
Connecting Audio Visual (AV) Devices............................................................................................17
Connecting Speakers or Other Audio Receivers............................................................................. 18
Connecting a Digital Audio System with ARC/eARC.......................................................................19
Using HDMI & CEC......................................................................................................................... 20
Connecting a PC or Game Console................................................................................................ 21
Using External Devices.................................................................................................................... 21
Multi-screen
Screen Sharing.................................................................................................................................23
Content Sharing................................................................................................................................23
Smart Functions
Getting Familiar with the Home Screen...........................................................................................25
Using a VIDAA Account...................................................................................................................27
Using Voice Service......................................................................................................................... 28
Media................................................................................................................................................ 31
App....................................................................................................................................................35
Using the Art App.............................................................................................................................35
Enjoy the Internet............................................................................................................................. 36
Data Protection and Security........................................................................................................... 37
Installing the Mobile App to Control your TV...................................................................................37
Picture and Sound
Adjusting the Picture Quality............................................................................................................39
1
Contents
Game Mode Settings....................................................................................................................... 43
Adjusting the Sound Quality.............................................................................................................44
SoundBar Settings............................................................................................................................46
Speaker Settings.............................................................................................................................. 47
Using Headphones........................................................................................................................... 48
Accessibility and System
Accessibility...................................................................................................................................... 49
Setting Time..................................................................................................................................... 49
Using Timer...................................................................................................................................... 50
Using Parental Controls................................................................................................................... 50
Setting Language and Location....................................................................................................... 51
Setting Power Indicator Mode..........................................................................................................51
Screen Magnification........................................................................................................................ 52
Setting Usage Mode.........................................................................................................................52
Using Remote Control Service.........................................................................................................52
Checking the Software Version........................................................................................................53
Software Upgrade.............................................................................................................................53
HbbTV...............................................................................................................................................53
Setting the TV Name........................................................................................................................54
Enjoying Safe Use of the TV........................................................................................................... 54
Checking the TV Running Time.......................................................................................................54
Reset to Factory Default.................................................................................................................. 54
Troubleshooting
Picture Issues................................................................................................................................... 55
Sound Issues....................................................................................................................................55
Network Issues................................................................................................................................. 56
External Device Connection Issues................................................................................................. 56
HDMI & CEC Issues........................................................................................................................ 57
Media Files....................................................................................................................................... 58
Voice Service Issues........................................................................................................................58
TV Status Diagnosis.........................................................................................................................58
Recording/Timeshift Issues.............................................................................................................. 59
Other Issues..................................................................................................................................... 59
Using the E-Manual
Launching the E-Manual.................................................................................................................. 61
Using the buttons in the E-Manual.................................................................................................. 61
Guidelines......................................................................................................................................... 61
2
Live TV
Channel Scan
You can scan for channels automatically or manually.
Note:
Satellite/antenna/cable function may not be applicable in some models/countries/regions.
Auto Scan
Automatic channel scan.
/ > TV
Alternatively, in Live TV, / > Settings > Channel > Auto Scan.
If no TV channels were saved before, you will be prompted to do a channel search.
Satellite
Single satellite: You can use single satellite if you only have one satellite installed.
DiSEqC: You can choose DiSEqC if you have DiSEqC equipment. Up to four satellites in DiSEqC 1.0
mode can be installed.
If you are using a motorised antenna, you can use DiSEqC 1.2 mode.
Unicable: If your home is equipped with Unicable satellite distribution, you should use this option.
Please make sure that you know the Unicable band and frequency to be used. The information should be
available on the equipment or the landlord can provide it.
Antenna
Channel: Select from All Channels or Free Channels. This option may not be available depending on
countries/regions/operators.
Scan Mode: Select from digital channels only (DTV), digital and analogue channels (DTV+ATV) or
analogue channels only (ATV).
If you receive DVB-T or DVB-T2 signal, you can use DTV.
LCN: Switch on/off LCN (Logical Channel Number).
Please note that some operators are restricted to manually change the channel order. If you switch off
LCN, then the channel list can be edited after channel scan.
This function may not be applicable in some models/countries/regions.
Cable
Channel: Select from All Channels or Free Channels. This option may not be available depending on
countries/regions/operators.
Scan Mode: Select from digital channels only (DTV), digital and analogue channels (DTV+ATV) or
analogue channels only (ATV).
LCN: Switch on/off LCN (Logical Channel Number).
Please note that some operators are restricted to manually change the channel order. If you switch off
LCN, then the channel list can be edited after channel scan.
This function may not be applicable in some models/countries/regions.
3
Live TV
Manual Scan
Manually scan for channels for DTV or ATV.
In Live TV, / > Settings > Channel > Advanced Settings > Manual Scan
DTV Manual Scan
Manually scan for DTV services.
When the DTV Manual Scan screen appears, press / button to select Antenna, Cable or Satellite and
select Start to commence the search of that channel. When the signal has been received, the signal strength
will be displayed on the screen.
ATV Manual Scan
Manually scan for ATV services.
Frequency: Input the channel frequency you want.
Picture System: Select the Colour System.
Sound System: Select the Sound System.
Live TV tutorial
After channel scanning has completed for the first time, the Live TV operating tutorial will be displayed, this will
include:
/ / : Load the info bar
/ : Load the channel list
/ : Open the electronic programme guide (only available in some models/countries/regions)
/ : Load on-screen menu
: Call up search function
: Jump to the previous channel
Note:
The remote control buttons may vary depending on models/countries/regions.
Channel List
Displaying the channel list
In Live TV, press / button to display the Channel List menu.
Alternatively, in Live TV, / > Channel List.
Entering the sub-menu of channel list
In Live TV, / >
4
Live TV
Introducing the sub-menu
In Live TV, / >
TV List
Display Live TV channel categories, such as Cable and Antenna.
Fav
Display favourite lists 1 to 4.
Filter
Select channels by Content, HD, Child Lock, Scrambled and Sort.
Some options in Filter may not be available in some models/countries/regions.
Edit
Edit the channel list.
Note:
The sub-menu options may vary depending on models/countries/regions.
Channel Edit
Manually edit the channel list to your preference.
Editing Live TV channels
In Live TV, press / > to select a Live TV channel category such as Antenna or Cable, then use D-
pad to select Edit.
Alternatively, in Live TV, press / button, select Settings > Channel > Channel Edit, and select a Live
TV channel category such as Antenna or Cable.
5
Live TV
Press button on the selected channel, then a checkbox will appear. You can select multiple channels
at the same time to move or delete.
Move: Press button to move the selected channel.
Moving the channels could be restricted by the operator. If you want to be able to move channels, it is not
recommended to choose an operator during channel scan, and LCN should be set to Off.
Delete: Press button to delete the selected channel.
Restore: Press [RED] button, or press / button to display the colour menu and select RED
to enter the list of deleted channels. Press button to restore the deleted channel.
Filter: Press [YELLOW] button or press / button to display the colour menu and select
YELLOW, the filter screen will pop up. Press button to select options, the channel list can then be
updated.
Search: Press [BLUE] button or press / button to display the colour menu and select BLUE
to search for a channel.
Exporting to USB
The current channel list can be exported to a USB storage device.
In Live TV, / > Settings > Channel > Channel Edit > Export to USB
Importing from USB
Previously exported channel lists can be imported via a USB storage device.
In Live TV, / > Settings > Channel > Channel Edit > Import from USB
Related information
Connecting USB Devices on page 16
Favourite
Adding a channel to a favourite list
1.
In Live TV, press / button to display the channel list.
6
Live TV
2.
Press / button and select the channel(s) you want to add to the favourite list.
3. Select Add to Favourite and choose from FAV1-FAV4.
4. Then, a heart-shape icon will appear next to the added channel.
Viewing your favourite list
In Live TV, press / > > Fav to display the favourite list.
Editing the favourite list
In Live TV, press / > > Fav > to select FAV1-FAV4, then use D-pad to select Edit.
Alternatively, go to / > Settings > Channel > Channel Edit, and select FAV1 - FAV4.
You can add, move, or remove favourite channels.
Select   Add channels to add the selected channel to the favourite list.
Select a channel in a favourite list, and press button to move it.
Select a channel in a favourite list, and press button to remove it.
Note:
These steps should be operated under the TV input.
Before you edit the favourite lists, Channel Scan must be completed first.
You can add channels from various reception types to the favourite list.
Guide (EPG)
The Guide (EPG) provides a convenient way to check TV programmes for the upcoming 7 days. The
information displayed by the Guide (EPG) is made available by the commercial television networks for digital
channels only. The Guide (EPG) also provides a simple way to record your favourite programmes and a
reminder function, which can switch channels automatically at scheduled time, so that you will not miss
programmes of interest. The availability and amount of programme information will vary depending on the
broadcaster.
Note:
7
Live TV
The Guide (EPG) function is only available for digital channels. Analogue channels are not supported.
In Live TV, press / button, or press / > Guide (EPG) to display channel information Guide.
Watch
In Guide (EPG), when a current programme is selected, press > Watch to switch to the channel you
want to see.
PVR/Reminder
In Guide (EPG), press / button to select the channels. Press / button to select programme
based on the time schedule.
Press button to select PVR or Reminder.
For more information, please refer to Live TV > PVR in this manual.
Note:
Reminder in the Guide (EPG) is only available for programmes that have not been aired yet.
A storage device (space should be no less than 2GB, and the transfer rate should be no less than
4MB/s) must be attached to the TV for recording purposes. It is strongly recommended to use a USB
mobile hard disk drive instead of a USB flash drive as the storage device. For more information, please
refer to Connecting USB Devices in this manual.
The TV can record the programme in standby mode.
The PVR function may not be applicable in some models/countries/regions.
Schedule
In Guide (EPG), press [RED] button or press / button to display the colour menu and
select RED. This will display a list of scheduled reminders and recordings.
Programme Colour
In Guide (EPG), press [GREEN] button or press / button to display the colour menu and
select GREEN. Use the colours to indicate different genres in the Guide (EPG) for quick and easy viewing.
Note:
This function may not be applicable in some models/countries/regions.
24h−
In Guide (EPG), press [YELLOW] button or press / button to display the colour menu and
select YELLOW to select programmes of the previous day.
24h+
In Guide (EPG), press [BLUE] button or press / button to display the colour menu and
select BLUE to select programmes of the next day.
PVR
The PVR function allows you to easily record digital television content for later viewing. The function is only
available for digital channels. To use PVR, you must connect a storage device for recording. The format of
the storage disk can be NTFS or FAT32. The PVR will not function if a data storage device has not been
connected. For more information, please refer to Connecting USB Devices in this manual.
8
Live TV
Schedule Recording
In Live TV, press / > PVR.
Alternatively, press / / button to load the info bar, and select a programme and choose PVR.
If your remote has button, press it and use D-pad to select to set up PVR.
You can select recording mode from time, manual stop and programme.
When you select time, you can set the booking time and period.
In Guide (EPG), press the [RED] button or press / button to display the colour menu and
select RED, to view the scheduled recording. In the schedule recording list, you can readjust the reservation
information that has been set.
Standby Recording
If you press the power button during recording and select Standby Recording, your TV will go into standby
mode, but the recording process will continue. If you press the power button again to wake up the TV, the
recording process will not be affected. After recording, the recorded file will be automatically saved to the
attached USB disk.
Background Recording
When you switch to an App or another source (e.g. HDMI) during recording, the recording process will
continue. When the recording has completed, the recorded programme will be automatically saved to the
attached USB disk.
If you want to manually stop recording, press / > TV to switch back to the channel that is
currently being recorded, and then press / button and select on-screen to stop.
Note:
The storage space of your device should be no less than 2GB (for 15 minutes high-definition video). It is
strongly recommended to use a USB mobile hard disk drive instead of a USB flash drive as the storage
device.
If the transfer rate of your hard disk is too slow, a pop-up notice will be displayed. In this case, you will
need to use another disk with higher speed.
9
Live TV
The PVR function does not support analogue channels.
Some broadcasters may restrict the recording of programmes.
If a recording is made from a locked channel, the system PIN will need to be input to playback the
recorded content.
Some channel-related configuration may conflict with background recording. In this case, a reminder
window will pop up.
The PVR function may not be applicable in some models/countries/regions.
Recording List
Accessing the recording list
View the list of recorded programmes and scheduled list.
To enter the recording list:
In Live TV, / > Recording List
Managing the recording list
In Live TV, / > Recording List > Recorded
You can watch, sort, or delete recorded programmes.
Watch recorded programme
Select a recorded programme in the recording list, and press button to watch it.
Sort recorded programmes
Select All, and you can choose from the list to sort the recorded programmes.
Note:
This function may not be applicable in some models/countries/regions.
Delete recorded programme
Select Edit, select a recorded programme in the recording list, and press button to delete it.
10
Live TV
If you connect more than one storage devices to the TV, Recorded (Disk for Recording) and Recorded (All
Disk) are available on-screen to select.
In Recorded (Disk for Recording), you can watch recorded programme of the storage device that is selected
at / > Settings > System > Advanced Settings > PVR & Time Shift > PVR Setup/Time Shift Setup.
Managing the schedule list
In Live TV, / > Recording List > Scheduled
You can change scheduled recording information and reminder information, or cancel scheduled recordings or
reminders.
Delete scheduled recording or reminder
Select Edit, select a scheduled recording or reminder in the schedule list, and press button to delete it.
Edit scheduled recording or reminder
Select scheduled recording or reminder in the schedule list, then press button to edit.
Note:
The Recording List function may not be applicable in some models/countries/regions.
Related information
Connecting USB Devices on page 16
Recording/Timeshift Issues on page 59
Timeshift
This option allows you to pause and rewind Live TV. This function operates by recording temporarily to
a storage device. Please ensure your storage device is connected and there is enough free disk space.
Otherwise, the Timeshift function will not commence.
In Live TV, press / > Timeshift, and then the playback bar will appear.
If your remote has button, press it and press button to launch Timeshift.
11
Live TV
1 Unwatched time for buffered content
2 Current time
3 Total time
4
Record: to convert a Timeshift to a live recording of the current broadcast channel. Select
and the programme content you have watched in Timeshift will also be saved to the storage device.
5
Fast backward: you can choose 2×, 4×, 8× or 16×.
6
Pause/ Play
7
Fast forward: you can choose 2×, 4×, 8× or 16×.
8
Stop Timeshift: to exit the function and watch the current broadcast.
Note:
The Timeshift function does not support analogue channels.
The storage space of the device should be no less than 2GB. It is strongly recommended to use a USB
mobile hard disk drive instead of a USB flash drive as the storage device.
The Timeshift function may not be applicable in some models/countries/regions.
Related information
Connecting USB Devices on page 16
Recording/Timeshift Issues on page 59
12
Connection
Wired Internet Connection
Connecting to a wired (Ethernet) network
To get access to the Internet using a wired connection, it is recommended to use a modem or router that
supports Dynamic Host Configuration Protocol (DHCP). Modems and routers that support DHCP automatically
provide the IP address, subnet mask, gateway, and DNS, so you do not have to enter them manually. Most
home networks already have DHCP.
See the illustration below.
After connecting to a wired (Ethernet) network:
/ >  Settings > Network > Network Configuration
Set the TV network by selecting Network Configuration and press button to enter the submenu.
Connection Type
Choose a wired (Ethernet) network connection to access the Internet.
Ethernet
Display network status.
IP Settings
Configure the IP setting for your network connection.
Wake on LAN
/ >  Settings > Network > Wake on LAN
With a wired Ethernet connection and enabling Wake on LAN, you can switch on the TV from standby and
push content to be viewed on the TV with a mobile device Application supporting the screencast function.
Note:
To use this function, make sure your TV and mobile device are connected to the same network
environment.
Enabling this function may result in higher energy consumption.
Wireless Internet Connection
Connecting to a wireless network
To connect to an available wireless network, make sure that you turn on your wireless router and have the
wireless router's SSID and password before attempting to connect.
13
Connection
To get access to the Internet using a wireless connection:
/ >  Settings > Network > Network Configuration
Set the TV network by selecting Network Configuration and press button to enter the submenu.
Connection Type
Choose a wireless network connection to access the Internet.
Advanced Settings
Configure the advanced wireless network settings for the TV.
Add
You can add a wireless network.
Refresh
Refresh wireless network.
Note:
If no wireless router is found, select Add and enter the network name in the SSID.
If no wireless router is found, select Refresh.
Wake on wireless network
/ >  Settings > Network > Wake on Wireless Network
With a wireless network connection and enabling Wake on Wireless Network, you can switch on the TV from
standby and push content to be viewed on the TV with a mobile device Application supporting the screencast
function.
For more information about the screencast feature, please refer to Multi-screen > Screen Sharing or Content
Sharing in this manual.
Note:
To use this function, make sure your TV and mobile device are connected to the same network
environment.
Enabling this function may result in higher energy consumption.
Related information
Network Issues on page 56
Connecting Bluetooth Devices
You can connect to devices using Bluetooth technology.
14
Connection
Note:
Compatibility issues may occur depending on the Bluetooth device.
The TV and Bluetooth devices may become disconnected if the distance between them is too high.
TV Bluetooth speaker
/ >  Settings > Network > Bluetooth > TV Bluetooth Speaker
Mobile devices are connected to the TV via Bluetooth and audio is played via the TV speaker.
When your mobile device is connected to the TV via Bluetooth, you can play your mobile phone's music
through the TV built-in speakers.
Go to your mobile Settings to enable Bluetooth and choose the TV to connect.
To use this function, make sure to select TV Speaker at / >  Settings > Sound > Speakers >
Audio Output.
Related information
Speaker Settings on page 47
Connecting Headphones
You can connect a pair of headphones (not provided) to the HEADPHONE port on your TV. While the
headphone is connected, the sound from the built-in speakers will be disabled.
Note:
Headphone port may not be available in some models.
Headphones with microphones are not supported.
If Headphone with Speakers is selected manually in / >  Settings > Sound > Headphone >
Headphone Mode, the headphone and the TV will have sound output at the same time.
For more information about headphone settings, please refer to Picture and Sound > Using Headphones in
this manual.
Connecting USB Devices
Connect USB devices, such as hard drives and USB sticks for browsing photos or listening to music.
16
Connection
Note:
USB disk sizes 4GB, 8GB, 16GB, 32GB, 64GB, 128GB and other common market sizes are supported.
Up to 8TB hard drives are supported.
Supported formats: NTFS, FAT32.
Select the content you want to play or view. For more information, please refer to Smart Functions > Media
in this manual.
Connecting an Antenna
You can connect an antenna cable to your TV.
Using your remote, select  Input icon in Home screen and select TV as the input source.
Note:
TV jacks may vary and satellite/antenna/cable function may not be applicable in some models/countries/
regions.
Related information
Channel Scan on page 3
Connecting Audio Visual (AV) Devices
Connecting with a Composite video cable
To connect an AV device with a composite video cable (not provided), see the illustration below.
When the connection is completed, using your remote, select the  Input icon on the Home screen and
select AV as the input source.
17
Connection
Note:
AV IN port(s) may vary depending on model type.
AV IN port(s) may not be available in some models. Please use other port(s) to connect AV devices.
Connecting a HDMI cable
To connect an AV device with a HDMI cable (not provided), see the illustration below.
When the connection is completed, using your remote, select the  Input icon on Home screen, and select
the corresponding HDMI input.
Note:
Please refer to the User Manual of your device for step-by-step instructions.
Some devices, such as DVD players, require the HDMI signal to be set to the correct format in the device
settings. Please consult your device user manual for instructions.
If there is no sound from your TV, configure the device audio settings.
Related information
Using HDMI & CEC on page 20
Connecting Speakers or Other Audio Receivers
To connect speakers or other audio receivers with an audio cable (not provided), see the illustration below.
Ensure the audio connected devices are switched on before switching on the TV.
When the connection is completed, go to / >  Settings > Sound > Speakers > Audio Output, and
select the SPDIF Only option.
When a digital audio system is connected to the DIGITAL AUDIO OUT port, decrease the TV volume, and use
your digital audio system to control the volume.
18
Connection
Note:
If you prefer to use Audio Return Channel/Enhanced Audio Return Channel, please refer to Connection >
Connecting a Digital Audio System with ARC/eARC in this manual.
You can connect the DIGITAL AUDIO OUT port on the back of the TV to the optical port on the amplifier.
Then go to / >  Settings > Sound > Speakers > Digital Audio Output to select Dolby Audio -
Dolby Digital to receive the Dolby Digital audio.
Related information
Speaker Settings on page 47
Connecting a Digital Audio System with ARC/eARC
If you would like to use the Audio Return Channel (ARC)/the Enhanced Audio Return Channel (eARC) feature
to send sound from the TV by a HDMI cable to a digital sound system, you can connect it to the HDMI (ARC/
eARC) port of your TV.
By using this feature, you can also control the sound system with your TV remote instead of using the remotes
for each device.
After the connection:
1. Power on the sound system.
2.
Press / button to select  Settings icon on the Home screen.
3.
Select Sound > Speakers > Audio Output, and select ARC option. If the device supports eARC function,
press / button to select  Settings icon on the Home screen, and select Sound > Speakers >
eARC to set eARC to On.
Note:
Audio receiver must support ARC/eARC function.
If the device has an Input Selector feature, then make sure to change it to TV.
When this port is used for ARC/eARC function, it can be used as signal input when a DVD is connected to
an amplifier and the amplifier is connected to the TV at the same time. Some amplifiers may not support
series connection.
5.1 CH (channel) audio is available when the TV is connected to an external device that supports 5.1
channel surround sound. You can press / button to select  Settings icon on the Home screen,
19
Connection
and select Sound > Speakers > Digital Audio Output to choose Dolby Audio - Dolby Digital Plus to
receive the 5.1 channel audio.
Related information
Speaker Settings on page 47
Using HDMI & CEC
Use the TV remote to control external devices that are connected to the TV by a HDMI cable. The external
devices need to support HDMI & CEC function.
/ >  Settings > System > HDMI & CEC
Connecting an external device through HDMI & CEC function
/ >  Settings > System > HDMI & CEC > CEC Control
Allow HDMI devices to control each other.
1. Set CEC Control to On.
2. Connect a HDMI & CEC compatible device to the TV.
3. Turn on the connected external device. The device will be connected to the TV automatically. After
connection is completed, you can access the menu of the connected device on your TV screen using your
TV remote and control the device.
4. When CEC control is enabled and HDMI & CEC compatible external devices are turned off, the TV will
enter the standby mode. The function needs to be supported by the external device.
Enabling device auto power off
/ >  Settings > System > HDMI & CEC > Device Auto Power Off
Set to On to turn off HDMI & CEC compatible external devices when the TV is turned off.
Enabling device auto power on
/ >  Settings > System > HDMI & CEC > Device Auto Power On
Set to On to turn on HDMI & CEC compatible external devices when the TV is turned on.
This feature is applicable when TV input source is pre-set to the corresponding external device.
Enabling TV auto power on
/ >  Settings > System > HDMI & CEC > TV Auto Power On
Set to On to turn on the TV when HDMI & CEC compatible external devices are turned on.
HDMI format function
/ >  Settings > System > HDMI & CEC > HDMI Format
Please select Enhanced format if your HDMI device supports 4K HDR. If it does not support 4K HDR, please
select Standard format. If you are not sure, please select Auto.
Note:
20
Connection
HDMI cables must be used to connect HDMI & CEC compatible devices to your TV.
The HDMI & CEC feature of the connected device must be turned on.
If you connect an HDMI device that is not HDMI & CEC compatible, all the HDMI & CEC control features
do not work.
Depending on the connected HDMI device, the HDMI & CEC control feature may not work.
The HDMI & CEC feature supports One Touch Play, Routing Control, System Standby, Device OSD Name
Transfer, Remote Control Pass Through, Give Device Power Status, System Audio Control.
Connecting a PC or Game Console
PC
You can connect a PC to the TV with a HDMI cable to use your TV as a PC monitor.
After connecting the PC, press the / button, then select  Input icon on Home screen or press
/ button. Select the connected PC as the input source.
Note:
For better image quality, set the PC's resolution, and make sure the resolution is supported by the TV.
If there is no sound from your TV, change the PC's audio settings.
If you want to connect your PC and TV wirelessly, please refer to Multi-screen > Content Sharing in this
manual.
Game console
You can connect your game console with a HDMI cable to the TV.
To start a game from a game console:
1. Switch on your game console.
2.
Press the / button, select  Input icon on Home screen or press / button. Select
the connected game console as the input source.
3. Start the game.
You can enable the game mode to optimise your TV's settings when playing games with a game console. For
more information, please refer to Picture and Sound > Game Mode Settings in this manual.
Using External Devices
Access to connected external devices including wireless connected devices.
21
Connection
Switch between external devices connected to the TV
1.
Press / button on your remote control or press / button to move the focus to the
 Input icon on the top of the Home screen, press button to enter.
2. Select your desired input source.
Edit the name of input sources
Method 1:
1.
Press / button on your remote control or press / button to move the focus to the
 Input icon on the top of the Home screen, press button to enter.
2.
Move the focus to an input source and press / button on your remote control.
3. Select Rename.
Method 2 (for some models):
Press / button on your remote control, and select  Settings > System > Advanced Settings >
Input Labels to edit the name of input sources.
Note:
Some input sources cannot be renamed.
22
Multi-screen
Screen Sharing
Mirror your mobile device screen to the TV.
Before using Screen Sharing, please set your TV to the wireless network connection.
/ > Screen Sharing
1. Turn on the casting function of your Android/Windows 10 device. The setting icon may vary depending on
the device. The feature may be called "Wireless display", "Smartview", "Wireless projection", etc.
2. Find the TV name in the search list of your device and select it. Wait for the connection progress to
complete and the content on your device will be displayed on the TV.
Press / button on your remote control, select  Settings > System > Mobile Device Connection
> Screen Sharing and switch it to on. Then, you can share your device's screen directly without opening the
Screen Sharing App on your TV.
Note:
Some mobile devices may not support casting.
Related information
Wireless Internet Connection on page 13
Content Sharing
Content Sharing allows you to view media content, like videos, music or photos saved in your Android/iOS/PC
device on your TV screen.
Sharing media content from your Android/iOS/PC device
1. Connect your TV and Android/iOS/PC device to the same network.
2.
Turn on Content Sharing at / >  Settings > System > Mobile Device Connection > Content
Sharing.
3. Turn on the content sharing function in your Android/iOS/PC device.
4. Find the TV name in the search list of your device and select it. Wait for the connection progress to
complete.
5. On your Android/iOS/PC device, choose the media content you want to share on your TV.
23
Multi-screen
Playing media content from your Android/iOS/PC device on the TV
You can connect media content saved in your Android/iOS/PC device to your local network and play the
content on your TV.
1. Connect your TV and Android/iOS/PC device to the same network.
2.
Turn on Content Sharing at / >  Settings > System > Mobile Device Connection > Content
Sharing.
3. Make sure your media content in your Android/iOS/PC device are visible through the local network.
4.
On your TV, select a device with media content at / >  Input, or / > More Apps > Media.
The media content list in your Android/iOS/PC device appears.
5. Select a media content item from the list to play.
Note:
Some Android/iOS/PC devices may not support content sharing function. If your device does not support
content sharing, you can download an app that supports the function to connect to your TV. For more
information, please refer to Smart Functions > Installing the Mobile App to Control your TV in this manual.
Content may not be played depending on the file format.
Content may not be played smoothly, or the function may not work properly due to the network condition.
Related information
Wired Internet Connection on page 13
Wireless Internet Connection on page 13
24
Smart Functions
Getting Familiar with the Home Screen
Press / button on your remote control to enter the Home screen.
All TV functions can be accessed from the Home screen.
To exit the Home screen, press / button on your remote or use the navigation buttons to move
the cursor to the  Input icon on the top of the screen, press button to enter, and select your desired
input source.
1 Navigation bar
2 Apps
Using the navigation bar
The navigation bar refers to indicators and icons on the top of the Home screen.
Note:
Indicators or icons may vary depending on models/countries/regions.
 Search
Search the content you want.
 Input
Select the Input source depending on the device you have connected to your TV.
 Settings
Manage TV configuration.
 Notifications
Allow pop-up notifications to appear for useful information and events that occur with your TV, including:
Advertising, New Arrivals, Warnings and Legal Statements, System Messages and Alexa Notification.
You can enable/disable each of these notifications at Settings in the notification centre.
You can view the list of event messages generated by the TV.
To delete all notifications, select Clear All.
25
Smart Functions
Note:
The Alexa Notification may not be applicable in some models/countries/regions.
When you sign into your VIDAA account, please find Notifications in VIDAA Account on the Home screen.
 VIDAA Account
Sign into your VIDAA account.
A VIDAA account provides all the best features of your Smart TV and ensures that all services are kept up to
date.
For more information about VIDAA account, please refer to Smart Functions > Using a VIDAA Account in this
manual.
 Voice
Quick access to Voice Service. For more information, please refer to Smart Functions > Using Voice Service
in this manual.
 Guide
Quick access to Guide. For more information, please refer to Live TV > GUIDE (EPG) in this manual.
 Live TV
Quick access to Live TV. For more information, please refer to Connection > Connecting an Antenna and
Live TV > Channel Scan in this manual.
Time
You can always view the current time at the top of the Home screen.
Network
Connect your TV to the Internet through a wireless connection or an Ethernet cable , and the
corresponding icon will appear.
Using the Shortcuts
You can add inputs, channels and websites to the Home screen to have quick access to them for your
convenience.
Add inputs to the home screen
1.
Press / button.
2.
Move the focus to an input you want to add to the Home screen, and press / > Add to home > .
The input icon will appear in Shortcuts on the Home screen.
Note:
Some options from Inputs source page cannot be added to the Home screen.
To remove the input from Shortcuts, move the focus to the shortcut, then press and hold button on
your remote control.
Add channels to the home screen
1.
In Live TV, press / button to access the channel list.
26
Smart Functions
2.
Press / button and press button to tick channel(s) that you would like to add on the Home
screen.
3. Select Add to home. The channel icon will appear in Shortcuts on the Home screen.
Note:
To remove the channel from Shortcuts, move the focus to the shortcut, then press and hold button on
your remote control.
Add webpages to the home screen
1. In Browser, visit a website you would like to add on the Home screen.
2.
Use the D-pad to move the focus to  menu icon in the top of Browser navigation bar and select Add to
home.
3. Select Add and this webpage will appear in the Shortcuts on the Home screen.
Note:
To remove webpages from Shortcuts, move the focus onto the shortcut page, then press and hold button
on your remote control.
Up to 8 webpages can be added.
Managing apps
/ > More Apps
Select the item you want to move, press and hold button to manage, then use the D-Pad to select the
desired position and press button to store the new position.
Note:
Some Apps may not be moved.
Using a VIDAA Account
Signing into an account
Before signing into your VIDAA account, make sure your TV is connected to the network. For more about
network settings, please refer to Connection > Wired Internet Connection or Wireless Internet Connection in
this manual.
1.
After the network is connected, press / button on your remote and select  VIDAA Account icon
in the top navigation bar on the Home screen.
2. Register your device to your VIDAA Account. After entering your E-mail and password, select Sign In.
Creating a new account
If you do not have a VIDAA account, create a new one to enjoy the best features of your Smart TV.
Before creating a new account, make sure your TV is connected to the network. For more about network
settings, please refer to Connection > Wired Internet Connection or Wireless Internet Connection in this
manual.
27
Smart Functions
This feature requires Alexa built-in service. Otherwise, use external Alexa-enabled devices (e.g. Alexa
App, Echo) to control your smart TV by using just your voice.
Download and install the remote control app on your mobile device at / >  Settings > Support >
Mobile App Download. Press the Microphone icon in the app to interact with Alexa on your TV.
You can select the language used by Alexa at / >  Settings > System > Voice Service >
Amazon Alexa > Alexa Language. This feature requires Alexa built-in service, which varies depending on
TV models and countries/regions.
VIDAA Voice
VIDAA Voice is a voice assistant to help you control the TV and search content, supporting several languages.
Before using VIDAA Voice, please check the following:
Network connected
Voice remote paired
End User License Agreement and voice feature privacy policy/terms agreed
To access the Voice Service centre and set voice assistant to VIDAA Voice, you can choose one of following
options:
Just press button on your remote.
Press / button on your remote and select  Voice icon in the navigation bar.
Press / button to select  Settings icon and select System > Voice Service.
When VIDAA Voice is selected as your voice assistant, select the language of VIDAA Voice in Voice Service
centre. Then, press and hold the button on your remote to interact with VIDAA Voice.
Note:
VIDAA Voice may not be applicable in some models/countries/regions.
Google Assistant
Setup Google Assistant and enjoy the Google Assistant service. You can ask for information, search for your
favourite movies, control your TV and more, just by asking Google Assistant.
Before setting up Google Assistant, connect your TV to the network.
STEP 1: Set up Google Assistant on TV
1.
Press / button on your remote to select  Settings icon, and select System > Voice Service >
Google Assistant.
2.
Set voice assistant to Google Assistant and press button to set up. If you have selected Google
Assistant in the Guide when you turn on the TV for the first time, it will directly guide you to the set-up step.
3. Then read on-screen terms of service and privacy policy, then select I understand.
4. Next, select Allow to enable information sharing.
STEP 2: Set up in Google Assistant app
Follow the setup instructions on-screen to set up Google Assistant.
1. Download and install the Google Assistant app on your mobile device, then open the app.
29
Smart Functions
2. Speak to Google Assistant app, "Set up my Assistant device", and follow the instruction in the App to set up
Google Assistant and sign into your Google account on the TV.
Google Assistant is set up and ready. Control your smart TV using your voice by just pressing and holding the
button on your remote control.
Note:
The Google Assistant function may not be applicable in some models/countries/regions.
The setup steps above may vary. Please refer to the specific product.
Shipment with voice remote control varies depending on TV models/countries/regions.
If you do not choose to set up Google Assistant in the mobile app, just press button to continue
without signing into your Google account. You can go to TV system settings later to sign into your Google
account to enjoy personal queries by asking Google Assistant, like showing your photos, calendar and
more on this device.
Google Smart Home Service
For specific models and countries/regions, Google Smart Home Service function is available. Set up Google
Smart Home Service to control your smart TV with Google Home devices or the App. You can change
channels or inputs, adjust volume and more.
Before setting up the Google Smart Home Service, connect your TV to the network and sign into your VIDAA
Account at / >  VIDAA Account. More information about how to sign into the VIDAA Account,
please refer to Smart Functions > Using a VIDAA Account in this manual.
STEP 1: Set up Google Smart Home Service on TV
1.
Press / button on your remote to select  Settings icon and select System > Voice Service >
Google Smart Home Service. Select Set up now.
2. Sign into your VIDAA account. If you have signed in before, this step will be skipped.
3. Give your TV a name.
STEP 2: Set up in Google Home app
Follow the setup instructions on-screen to set up the Google Smart Home Service.
1. Download and install the Google Home app on your mobile device, then open the app.
2. Find and select VIDAA Voice service in the app.
3. Follow the instructions in the app to link your VIDAA account signed in on your TV to your Google Account.
Google Smart Home Service is set up and ready. Control your smart TV by using your voice through the
Google Home device or App.
Note:
Google Smart Home Service may not be applicable in some models/countries/regions.
The setup steps above may vary. Please refer to the actual product.
Yandex Smart Home Service
Yandex Alice voice assistant can obey certain commands to help you change the TV's configuration.
30
Smart Functions
Before setting up Yandex Smart Home Service, connect your TV to the network and sign into your VIDAA
Account at / >  VIDAA Account. More information about how to sign into the VIDAA Account,
please refer to Smart Functions > Using a VIDAA Account in this manual.
STEP 1: Set up Yandex on TV
1.
Press / button on your remote to select  Settings icon, then select System > Voice Service >
Yandex. Select Set up now.
2. Sign into your VIDAA account. If you have signed in before, this step will be skipped.
3. Give your TV a name.
STEP 2: Set up in Yandex App
Follow the instructions on the TV to enable Yandex Smart Home Service.
1. Download the Yandex app on your mobile device.
2. Open the app and sign into your Yandex account.
3. In the Yandex app, go to "Devices" > "Smart Home", click add device icon and select "VIDAA Voice".
4. Perform account linking using the same VIDAA account signed in on your TV.
Yandex Smart Home Service is set up and ready. Now you can control your Smart TV with Yandex Alice
devices or the Yandex app to change channel, change inputs, adjust volume and more, just by asking Alice.
Note:
The Yandex function may not be applicable in some models/countries/regions.
The setup steps above may vary. Please refer to the specific product.
Voice service other issues
If you want to turn on your TV with Alexa-enabled devices (e.g. Echo, Echo show) or Google Home devices
(e.g. Google Home, Google Nest Hub), please:
1.
Turn on Wake on LAN and Wake on Wireless Network at / >  Settings > Network.
2. Make sure your TV and Alexa-enabled devices/Google Home devices are connected to the same network
environment.
Note:
Only Alexa (Alexa skill is enabled) and Google Smart Home Service support turning on your TV with Alexa
Echo or Google Home. Google Assistant (built-in) does not support this function.
Related information
Wired Internet Connection on page 13
Wireless Internet Connection on page 13
Media
/ > More Apps > Media
Media is a central location for you to view or listen to different types of content, such as photos, music and
movies. You can view media content through the following methods:
A USB thumb drive or hard drive.
31
Smart Functions
Compatible mobile phone, tablet or other personal devices: you can stream movies, music and photos that
are stored on compatible personal device and play or view the content on your TV.
By default, there is Content Sharing displayed on the Media screen. If your mobile device is connected to the
TV, its name also appears on the Media screen.
For more information about Content Sharing, please refer to Multi-screen > Content Sharing in this manual.
Playing media contents
/ > More Apps > Media > connected devices
Select the content you want to play on the screen, like pictures, videos and music.
1 Search the content you want to play.
2 Arrange the content list by Grid, List.
3 Sort the content list by Name, Date modified, Size.
4 Filter the content list by All Media, Photo, Video, Music, Recorded.
5 Create a photo, music, or video playlist.
Note:
Some options in the above table may not be available in some models/countries/regions.
Playing background music during viewing pictures
1. Choose a picture to display.
2.
Press / button to call out playbar.
3. Select Background Music and choose your music to create a Music Playlist.
Now you can play background music while viewing pictures.
32
Smart Functions
Media format list
Due to differences in programming tools and other factors, some of the file formats that are listed may not be
supported.
The resolution may not be supported depending on the model.
Video Format
For 4k models:
Container Video Codec File Extension Name Resolution and Frame Rate
MPG MPEG-2
MPEG MPEG-2
.mpg .mpeg 1920 x 1080p @ 120fps
MPEG4 1920 x 1080p @ 120fps
H.264(AVC) 3840 x 2160p @ 30fps
H.265(HEVC) 3840 x 2160p @ 60fps
MP4
AV1
.mp4
3840 x 2160p @ 60fps
MPEG4 1920 x 1080p @ 120fps
H.264(AVC) 3840 x 2160p @ 30fps
MOV
H.265(HEVC)
.mov
3840 x 2160p @ 60fps
Mpeg2,4 1920 x 1080p @ 120fps
H.264(AVC) 3840 x 2160p @ 30fps
H.265(HEVC) 3840 x 2160p @ 60fps
MKV
AV1
.mkv
3840 x 2160p @ 60fps
Mpeg2,4 1920 x 1080p @ 120fpsAVI
H.264(AVC)
.avi
3840 x 2160p @ 30fps
H.264(AVC) 3840 x 2160p @ 30fpsFLV
H.265(HEVC)
.flv
3840 x 2160p @ 60fps
VP8 1920 x 1080p @ 120fps
VP9 3840 x 2160p @ 60fps
WEBM
AV1
.webm
3840 x 2160p @ 60fps
For 2k models:
Container Video Codec File Extension Name Resolution and Frame Rate
MPG MPEG-2
MPEG MPEG-2
.mpg .mpeg
1920 x 1080p @ 120fps
MPEG4 1920 x 1080p @ 120fps
H.264(AVC) 1920 x 1080p @ 30fps
H.265(HEVC) 1920 x 1080p @ 60fps
MP4
AV1
.mp4
1920 x 1080p @ 60fps
33

Produkspesifikasjoner

Merke: Hisense
Kategori: Fjernsyn
Modell: 75A7GQ

Trenger du hjelp?

Hvis du trenger hjelp med Hisense 75A7GQ still et spørsmål nedenfor, og andre brukere vil svare deg


Fjernsyn Hisense Manualer

Fjernsyn Manualer

Nyeste Fjernsyn Manualer