Indesit Push&Go IN2FD10CS70WUK Bruksanvisning
Indesit
Oppvaskmaskin
Push&Go IN2FD10CS70WUK
Les nedenfor 📖 manual på norsk for Indesit Push&Go IN2FD10CS70WUK (8 sider) i kategorien Oppvaskmaskin. Denne guiden var nyttig for 11 personer og ble vurdert med 4.0 stjerner i gjennomsnitt av 6 brukere
Side 1/8
EN
1
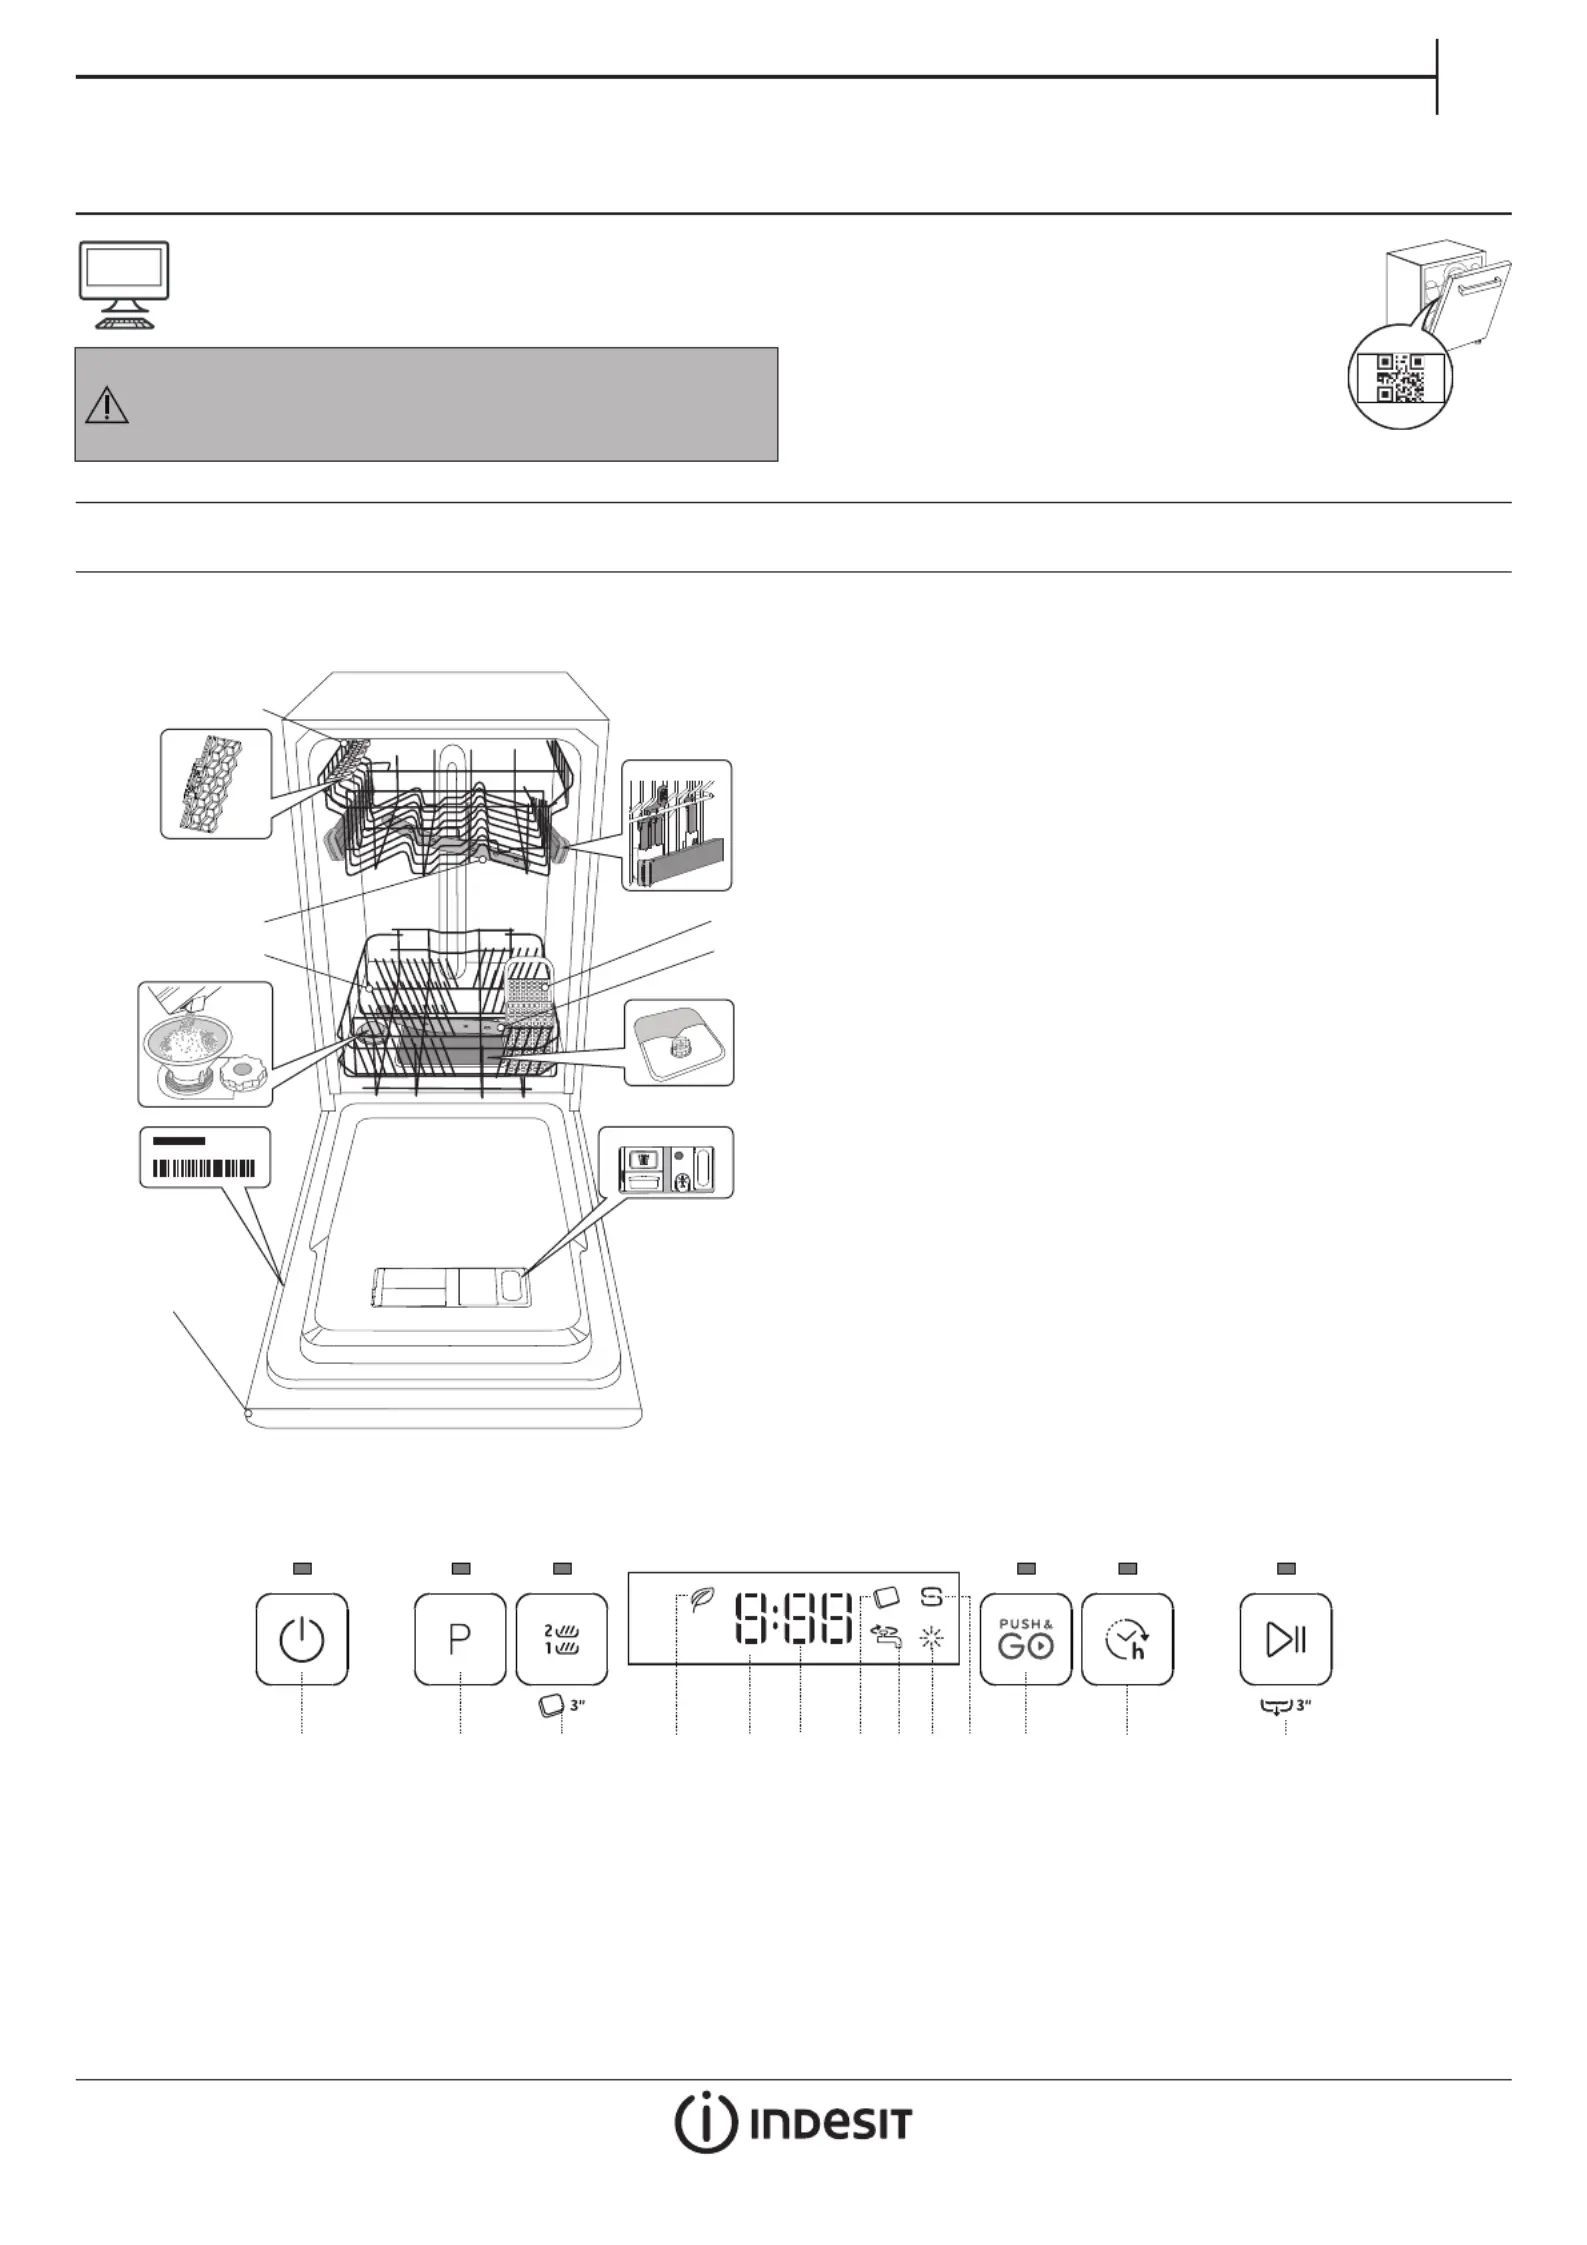
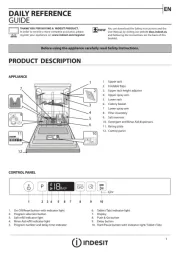
APPLIANCE
THANK YOU FOR BUYING A INDESIT PRODUCT.
In order to receive a more complete assistance, please
register your appliance on: www.indesit.com/register
1. Upper rack
2. Foldable aps
3. Upper rack height adjuster
4. Upper spray arm
5. Lower rack
6. Cutlery basket
7. Lower spray arm
8. Filter Assembly
9. Salt reservoir
10. Detergent and Rinse Aid dispensers
11. Rating plate
12. Control panel
0000 000 00000
Service:
1
2
3
4
5
6
7
9
8
1011
12
4
1
32
965 7 8 1210 1311
1. On-O / Reset button with indicator light
2. Program selection button with indicator light
3. Half Load button with indicator light / Tablet (Tab)
4. Eco program indicator light
5. Display
6. Program number and remaining time indicator
7. Tablet (Tab) indicator light
DAILY REFERENCE
GUIDE
CONTROL PANEL
8. Closed water tap indicator light
9. Rinse Aid rell indicator light
10. Salt rell indicator light
11. Push & Go button with indicator light
12. Delay button with indicator light
13. Start/Pause button with indicator light / Drain out
PRODUCT DESCRIPTION
PLEASE SCAN THE
QR CODE ON YOUR
APPLIANCE IN
ORDER TO HAVE
MORE DETAILED
INFORMATION
Before using the appliance carefully read Safety and Instal-
lation Instructions.
After installation, please remember to remove all transport
protection parts from the dishwasher.
Produkspesifikasjoner
| Merke: | Indesit |
| Kategori: | Oppvaskmaskin |
| Modell: | Push&Go IN2FD10CS70WUK |
Trenger du hjelp?
Hvis du trenger hjelp med Indesit Push&Go IN2FD10CS70WUK still et spørsmål nedenfor, og andre brukere vil svare deg
Oppvaskmaskin Indesit Manualer
15 September 2025
28 August 2025
28 August 2025
28 August 2025
27 August 2025
27 August 2025
27 August 2025
27 August 2025
15 August 2025

14 August 2025
Oppvaskmaskin Manualer
- Danby
- Tisira
- Meireles
- Esatto
- Porter & Charles
- Omega
- Jackson
- Corberó
- Privileg
- Euro Appliances
- Freggia
- Hanseatic
- Grundig
- Pando
- Gaggenau
Nyeste Oppvaskmaskin Manualer
23 Oktober 2025
21 Oktober 2025
21 Oktober 2025
21 Oktober 2025
21 Oktober 2025
21 Oktober 2025

20 Oktober 2025

20 Oktober 2025

20 Oktober 2025

19 Oktober 2025