Liebherr LRB05W1HC Bruksanvisning

Liebherr Kjøleskap LRB05W1HC

Les nedenfor 📖 manual på norsk for Liebherr LRB05W1HC (24 sider) i kategorien Kjøleskap. Denne guiden var nyttig for 17 personer og ble vurdert med 4.5 stjerner i gjennomsnitt av 2 brukere

Side 1/24
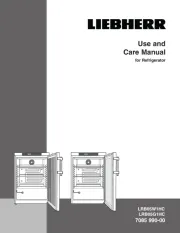
Use and
Care Manual
for Refrigerator
LRB05W1HC
LRB05G1HC
7085 990-00
2
Table of ConTenTs
Table of Contents Page
Please Read and Follow these Instructions ....................... 2
California Proposition 65 .................................................... 2
Disposal of Old Appliance .................................................. 3
Disposal of this Appliance .................................................. 3
Disposal of Carton .............................................................. 3
R600a Refrigerant .............................................................. 3
Important Safety Information .............................................. 4
Electrical Safety .................................................................. 4
Safety Regulations .............................................................. 4
Setting Up ........................................................................... 5
Installing the Equipment ..................................................... 5
Mounting the anti tipping device
(Model LRB05G1HC only) .................................................. 6
Levelling the appliance ....................................................... 6
Installation Dimensions ....................................................... 7
Dimensions ......................................................................... 7
Description of the Appliance............................................... 7
Operating and Control Elements ........................................ 8
Switching the Appliance On and Off .................................. 8
Setting the Temperature ..................................................... 9
Door Open Alarm ................................................................ 9
Setting the Delay Time for the Door Open Alarm .............. 9
Audible Alarm Settings ....................................................... 9
Deactivating the Audible Alarm Function ......................... 10
Alarm Messages ............................................................... 10
Adjusting the Alarm Parameters ....................................... 10
Calling Up Stored Alarm Events and Reading the
Temperature Progression (ALARM LOG) .........................11
Resetting the Recorded Alarm Events HAn ......................11
Resetting the Recorded Temperature Progression rt ......11
Alarm Test ..........................................................................11
Calibrating the Control Sensor ........................................ 12
Product Sensor ................................................................ 12
Calibrating the Product Sensor ........................................ 12
Switching the Temperature Display between Control
Sensor and Product Sensor ............................................. 12
Changing the Network Address ...................................... 12
Resetting the Parameters to Factory Settings ................. 12
Setting the Real Time Clock ............................................. 13
Defrosting .......................................................................... 13
Setting the Display Indication for the Defrost Phase ........ 14
Temperature Display Mode ............................................. 14
Keypad Lock ..................................................................... 14
Interior Light ..................................................................... 15
Safety Lock ....................................................................... 15
Cleaning ............................................................................ 16
Turning Off the Appliance ................................................. 16
Troubleshooting ................................................................ 17
Customer Service ............................................................. 17
External Alarm .................................................................. 18
Changing Over Door Hinges ............................................ 19
Warranty ............................................................................ 21
IMPORTANT
All types and models are subject to continuous
improvement. The manufacturer reserves the right
to make modifications to the shape, equipment and
technology.
Please Read and Follow these
Instructions
These instructions contain Danger, Warning and
Caution notes.
This information is important for safe and efficient instal-
lation and operation.
Always read and comply with all Danger, Warning and
Caution notes!
DANGER!
Danger indicates a hazard which
will cause serious injury or death if
precautions are not followed.
WARNING!
Warning indicates a potentially hazardous
situation which, if not avoided, could
result in death or serious injury.
CAUTION!
Caution indicates a potentially hazardous
situation which, if not avoided, may result
in minor or moderate injury.
IMPORTANT
This indicates information that is especially
relevant to a problem-free installation and
operation.
California Proposition 65
- This product contains chemicals known to the state of
California to cause cancer or reproductive harm.
- This product can expose you to chemicals including
Diisononyl Phthalate (DINP) which is known to the
State of California to cause cancer. For more informa-
tion go to www.P65Warnings.ca.gov.
- This product can expose you to chemicals includ-
ing Di-isodecyl Phthalate (DIDP) which is known to
the State of California to cause birth defects or other
reproductive harm. For more information go to
www.P65Warnings.ca.gov.
3
safeTy
Disposal of Carton
The packaging is designed to protect the appliance and
individual components during transport and is made of
recyclable materials.
WARNING!
Keep packaging materials away from
children. Polythene sheets and bags can
cause suffocation!
If possible, please recycle packaging material at a recy-
cling facility.
Disposal of Old Appliance
DANGER!
Risk of child entrapment.
Child entrapment and suffocation are not problems of
the past.
Junked or abandoned refrigerators are still dangerous –
even if they will sit forjust a few days.
If you are getting rid of your old refrigerator, please
follow these instructions to help prevent accidents.
Before you discard old appliances:
Take off the doors.
Leave the shelves in place so that children
may not easily climb inside.
Cut off the power cable from the discarded
appliance. Discard separately from the
appliance.
Be sure to follow your local requirements for
disposal of appliances.
Contact the trash collection agency in
your area for additional information.
Disposal of this Appliance
This appliance contains flammable gases within
the refrigeration circuit and insulation foam.
Contact the municipality or disposal company
in your area for information on approved
recycling or disposal.
R600a Refrigerant
WARNING!
The refrigerant R600a contained within
the appliance is environmentally friendly,
but flammable. Leaking refrigerant can
ignite.
To prevent possible ignition, follow the warnings
below:
Keep ventilation openings, in
the appliance enclosure or in
the built-in structure, clear of
obstruction.
Do not use mechanical
devices or other means to
accelerate the defrosting
process, other than those recommended by
the manufacturer.
Do not damage the refrigerant circuit.
Component parts and power cords shall be
replaced with like components performed
by factory authorized service personnel
only.
Do not use electrical appliances inside
the food storage compartments of the
appliance, unless they are of the type
recommended by the manufacturer.
4
safeTy
Important Safety Information
If the appliance is damaged on delivery, con-
tact the supplier immediately before connect-
ing it to the power source.
To guarantee safe operation, ensure that
the appliance is set up and connected as
described in this manual.
Disconnect the appliance from the power
source if a fault occurs. Pull out the plug, turn
off or disable the power source.
When disconnecting the appliance, always
pull it out by the plug; never pull on the cable.
Any repairs and work on the appliance
should only be performed by the customer
service department. Unauthorized work may
be dangerous to the user. The power source
cable should only be changed or replaced by
the customer service department.
Do not store explosives or sprays using
combustible propellants such as butane,
propane, pentane, etc. in the appliance.
Electrical components might cause leaking
gas to ignite. You can identify such sprays by
the printed contents or a flame symbol.
To prevent possible injury due to an electrical
shock, be sure to disconnect the power cord
or turn off the circuit breaker before cleaning
the appliance.
To avoid injury or damage to the appliance,
do not use steam cleaning equipment to
clean the appliance.
Do not operate the appliance in the presence
of explosive fumes.
In the event of a power outage, open the
door as infrequently as possible.
To protect the appliance from possible dam-
age, allow it to stand 1/2 to 1 hour in place
before turning on the electricity. This allows
the refrigerant and system lubrication to
reach equilibrium.
Electrical Safety
Connect this appliance to a 15 amp or 20 amp, 110-
120 VAC, circuit which is grounded and protected by a
circuit breaker or fuse.
We recommend using a dedicated circuit for this appli-
ance to prevent circuit overload and the chance of inter-
ruption to the appliance.
This appliance is equipped with a three-prong (ground-
ing) polarized plug for your protection against possible
shock hazards.
Where a two-prong wall receptacle is encountered,
contact a qualified electrician and have it replaced with
a properly grounded three-prong receptacle in accor-
dance with all local codes and ordinances.
WARNING!
Electrocution hazard.
Electrical grounding required.
Do not remove the round grounding
prong from the plug.
Do not use extension cords or
ungrounded (two-prong) adapters.
Do not use a power cord that is frayed or
damaged.
Do not use a power strip.
Failure to follow these instructions may
result in fire, electrical shock or death.
Safety Regulations
The appliance is designed to cool and store laboratory
preparations at temperatures of between 38°F and 6F
(3.3°C and 15.6°C).
If valuable or temperature-sensitive substances or prod-
ucts are stored, a separate, continuously monitoring
alarm system must be used. This alarm system must be
designed so that each alarm status is detected immedi-
ately by an authorized person who can then take appro-
priate action.
5
seTTing Up
IMPORTANT
- The appliance is not intended for outdoor use.
- The appliance is not intended for storage of blood or
blood products.
- The appliance is not intended to be used for storage
of flammable substances.
- The appliance is not intended to be used for medical
applications.
- The appliance is not intended for use in explosion-
hazard areas.
Climate rating
The climate rating indicates at what room temperature
the appliance may be operated to achieve full cooling
capacity and what the maximum humidity level in the
area around the appliance may be to ensure that no
condensation forms on the exterior housing.
Climate Rating Max. ambient
temperature
Max. relative
humidity
7 95°F (35°C) 75%
The minimum room temperature at the place of installa-
tion is 50°F (1C).
Note
If the appliance is operated at the minimum permitted
ambient temperature of 50°F (1C), the adjustable
interior temperatures up to 6F (15.6°C) cannot be
reached.
IMPORTANT
Do not operate the appliance outside the specified
ambient temperature and humidity range.
- The refrigerant circuit has been tested for leaks.
- The appliance complies with current safety regula-
tions C22.2 No. 120-13, UL 471 - 10th Edition
We recommend cleaning the appliance before turning it
on for the first time. See Cleaning.
WARNING!
Do not allow children to play with the
appliance. Children must not climb, sit or
stand on the shelves or door.
Failure to follow these instructions may
result in death or serious injury.
Setting Up
Avoid placing the appliance in direct sunlight or near the
stove, range top, radiators and similar heat sources.
Examine the unit and packaging for shipping damage.
Contact the carrier immediately if you suspect there is
any damage.
IMPORTANT
If several appliances are
installed next to each
other, leave a gap of 12"
(305 mm) between them.
Installing the Equipment
Pull out the shelves and
insert in the desired position.
Screw on the handle. Handle,
screws and key are supplied
in the accessory pack.
Push on pressure
plates until they
engage.
6
feaTUres
Mounting the anti tipping device (Model
LRB05G1HC only)
The anti-tipping bracket must be mounted to prevent
the appliance from tipping when the appliance door is
opened.
1. Remove the power cord from the
compressor compartment.
2. Mark the center of the
appliance on the back
wall.
1.
IMPORTANT
Be sure that there is no plumbing or electrical
wiring located in this area which screws or drills
could damage.
3. Mount the anti-tipping bracket.
IMPORTANT
The screws for fastening the anti-tip device are not
supplied with the appliance. Appropriate screws
must be used for the material (wood, concrete, etc.)
in which the safety device is mounted.
2.
3.
4. Push the appliance slowly to the back wall until
the anti-tipping bracket is inside the opening of
the cover grille.
4.
IMPORTANT
When sliding the appliance backwards, take care
not to damage the power cord.
Levelling the appliance
Compensate floor unevenness using the adjustable feet.
The appliance must be
aligned horizontally and verti-
cally. If the appliance is not
level, the main body of the
appliance can be deformed
and the door will not close
properly.
7
feaTUres
Description of the Appliance
IMPORTANT
The maximum load per grid shelf is 99 lbs (45 kg).
Ventilation opening
Version 1
An opening with a cross-section of min. 31 sq. in. is
re quired in the worktop to ensure ventilation of the rear
of the appliance.
Installation Dimensions
Version 2
If the wortktop is not supplied with a ventilation grille, the
recess must be at least 34 -1/2" (876 mm) high to ensure
adequate heat dissipation to the front.
Dimensions
(1) Operating and control elements
(2) Interior light
(3) Model plate
(4) Adjustable grid shelves
(5) Adustable-height feet
8
operaTion
Operating and Control Elements
 On/Obutton(switchingtheapplianceonandoff)
Up button (for navigating in the menu and
increasing values)
Down button (for navigating in the menu and
decreasing values)
Defrost button (for manually activating the defrost
function)
Keypad lock
AlarmLog button (for calling up stored alarm events
and reading the temperature progression)
 AudiblealarmObutton
Interior light on/off button (LRB05G1HC only)
Enter button
Symbols in the display
Compressor is running
LED flashing. The compressor will start after the
pressure in the refrigerant circuit has equalized.
Fan in the interior is running
Appliance is defrosting
Product sensor is activated
LED flashing and appears in the display. The
real time clock must be reset.
Interior light is on
ALARM LOG function is activated
LED flashing. A power outage or interior temperatures
outside the permitted range have been recorded.
Alarm function
A fault has occurred in the appliance. Contact the
customer service department.
Digital display
Switching the Appliance On and Off
Connect the appliance to the electrical outlet - the OFF
indicator and the temperature display flash alternately.
Switching the appliance on
Keep the button pressed for approx. 3 seconds until
the temperature display lights up.
No alarm sounds or is displayed when the appliance is
switched on for the first time.
If the appliance is disconnected from the electrical outlet
for a long time after it has been switched on for the first
time and if the temperature inside the appliance rises
above the upper alarm limit, this will be detected as a
fault by the electronic control system ( appears in the
display).
When the appliance is switched on again, this display
must be reset as shown below.
Press button .
Press + for 5 seconds. Display = .
The LED will now be lit permanently.
Press for 5 seconds. The electronic control sys-
tem switches back to normal operation.
Switching the appliance off
Keep the button pressed for approx. 3 seconds - the
OFF indicator and the temperature display flash alter-
nately.
9
operaTion
Setting the Temperature
Press for 1 second. The temperature display flash-
es.
To increase the temperature (warmer): press .
Note
Keep the button pressed down to change the tempera-
ture setting continuously.
To reduce the temperature (colder): press .
Press again.
The desired temperature setting is saved.
The temperature can be set at between 3.0°C and
16.0°C (37.4°F and 60.8°F).
Door Open Alarm
If the door is left open for more than 1 minute, the audi-
ble alarm signal will sound and and the tempera-
ture indication flash alternately in the display.
If the door must be opened for a lengthy period in
order to place items into the appliance, cancel the
audible alarm signal by pressing the button.
The alarm switches back to standby when the door is
shut.
Setting the Delay Time for the Door
Open Alarm
The delay time until the audible alarm sounds after the
door has been opened can be adjusted.
Press for 5 seconds. Display = .
Press until appears in the display.
Press . Display = (minute).
Setting range = 1 - 5 minutes.
Use buttons or to select the desired setting.
Press . Display = .
Press for 5 seconds. The electronic control sys-
tem switches back to normal operation.
Audible Alarm Settings
The audible alarm will be muted for the current alarm
after the button has been pressed. Complete the
following steps if you want the audible alarm function to
reactivate automatically.
Press for 5 seconds. Display = .
Press until appears in the display.
Press . Display = .
Press . Display = .
Press . Display = .
Automatic reactivation of the audible alarm is now active.
The delay time until the audible alarm sounds again
must be set.
Press . Display = .
Press . Display = .
Time in minutes after which the audible alarm will
sound again after the button has been pressed.
Setting range = 1 - 120 minutes.
Use buttons or to select the desired setting.
Press . Display = .
Press for 5 seconds. The electronic control system
switches back to normal operation.
11
operaTion
Calling Up Stored Alarm Events
and Reading the Temperature
Progression (ALARM LOG)
Press . Display = .
• Scroll through the list using or .
Number of temperature alarms
Last temperature alarm
Last temperature alarm but one
Temperature alarm before
Number of power outages
Last power outage
Last power outage but one
Power outage before
Period in hours in which the maximum and mini-
mum interior temperatures were measured
Maximum (highest) measured temperature
Lowest measured temperature
• Select the required item using the button. Press
this button again to return to the list.
Note
You can exit the menu at any time by pressing for
5 seconds.
If no button is pressed within 60 seconds, the electronic
control system switches back automatically.
Resetting the Recorded Alarm
Events HAn
Press . Display = .
Press for 5 seconds. Display = .
Press for 5 seconds. The electronic control system
switches back to normal operation.
Resetting the Recorded Temperature
Progression
Complete the following steps if you want to reset the
value saved for in the previous section to 0.
Press . Display = .
Press until appears in the display.
Press . Display = - .
Press for 5 seconds. Display = .
The values for and (highest and lowest mea-
sured interior temperature) are then reset to the cur-
rent interior temperature.
Press for 5 seconds. The electronic control system
switches back to normal operation.
Alarm Test
This test checks the function of the internal and any exter-
nal connected alarm devices. The appliances refrigerat-
ing function remains switched on during this test.
Press + for 5 seconds.
The display changes to a temperature value of 0.2°F
below the set upper alarm limit.
The temperature value now rises by 0.1°F every
2 seconds.
When the upper alarm limit is reached,
appears in the display. An external alarm device
connected to the floating alarm output is now acti-
vated.
The temperature value continues to rise up to 0.2°F
above the upper alarm limit.
The same process then takes place automatically
for the lower alarm limit. appears in the display.
The electronic control system automatically switches
back to normal operation.
Cancelling the test prematurely
Press for 5 seconds.
Note
If the values of the upper and lower alarm limit (AL and
AH in Adjusting the Alarm Parameters are set to 0,
and will appear in the display during this test.
Note
For a realistic temperature alarm test, an additional delay
time (60 minutes) applies as well as the adjustable alarm
parameters AL, AH and Ad.
After a door has been opened or a defrosting process,
the alarm delay Ad will be extended by an additional
delay time (60 minutes). This additional delay time must
not be changed.
This means that a temperature alarm will appear later after
a door has been opened or a defrosting process than is
actually set using parameter Ad.
12
operaTion
Calibrating the Control Sensor
(standard sensor for temperature control)
Possible tolerances of the control sensor (the displayed
temperature compared to the actual interior temperature)
can be offset with this function.
Press for 5 seconds. Display = .
Press until appears in the display.
Press . Display = correction value set at the factory.
Use buttons or to increase or decrease the cor-
rection value in 0.1°F increments.
Press . Display
= actual (corrected) interior tem-
perature.
Press . Display
= .
Press for 5 seconds. The electronic control system
switches back to normal operation.
Resetting the Parameters to Factory
Settings
The alarm limits and sensor calibration values can be
reset to the factory settings using this function.
Disconnect the power cord.
Keep pressed down and connect the power cord.
Display = .
Press . Display = .
The electronic control system automatically switches
back to normal operation.
Changing the Network Address
When connecting several appliances via the RS485
interface, each appliance must have its own network
address.
Press for 5 seconds. Display = .
Press until appears in the display.
Press . Display = .
Use button or to change the network address
(1 - 207).
Press . Display = .
Press for 5 seconds. The electronic control system
switches back to normal operation.
Switching the Temperature Display
between Control Sensor and Product
Sensor
Press for 5 seconds. Display = .
Press . Display = .
Press .
Display = (control sensor).
Press . Display = (product sensor).
Press .
Display = .
Press for 5 seconds. The electronic control system
switches back to normal operation.
If the product sensor is activated, appears in the
display.
Calibrating the Product Sensor
Possible tolerances of the product sensor (the set tem-
perature compared to the actual interior temperature)
can be offset with this function.
Press for 5 seconds. Display = .
Press until appears in the display.
Press .
Display = .
Use buttons or to increase or decrease the cor-
rection value in 0.1°F increments.
Press .
Display = actual (corrected) product sensor
temperature.
Press for 5 seconds. The electronic control system
switches back to normal operation.
Product Sensor
The product sensor, mounted in the
bottom area of the appliance interior,
is an additional sensor for tempera-
ture indication.

Produkspesifikasjoner

Merke: Liebherr
Kategori: Kjøleskap
Modell: LRB05W1HC

Trenger du hjelp?

Hvis du trenger hjelp med Liebherr LRB05W1HC still et spørsmål nedenfor, og andre brukere vil svare deg


Kjøleskap Liebherr Manualer

Kjøleskap Manualer

Nyeste Kjøleskap Manualer