Panasonic TX-32MS360B Bruksanvisning
Les nedenfor ๐ manual pรฅ norsk for Panasonic TX-32MS360B (23 sider) i kategorien Fjernsyn. Denne guiden var nyttig for 35 personer og ble vurdert med 4.5 stjerner i gjennomsnitt av 2 brukere
Side 1/23

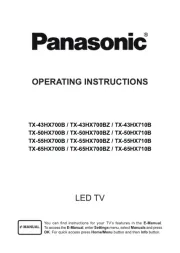
OPERATING INSTRUCTIONS
TX-32MS350B
TX-32MS360B
LED TV
You can find instructions for your TVโs features in the E-Manual.
To access the , enter menu, select and press E-Manual Settings Manuals
OK Home/Menu Info. For quick access press button and then button.
e-MANUAL

English - 1 -
Contents
Safety Information 2 ...................................................
Markings on the Product.......................................... 2
Maintenance 4 ............................................................
Display panel, Cabinet, Pedestal............................. 4
Mains plug 4 ...............................................................
Assembling / Removing the pedestal 4 ......................
When using the wall-hanging bracket...................... 5
Environmental Information....................................... 5
Features 5 ..................................................................
High Dynamic Range (HDR) /
Hybrid Log-Gamma (HLG) 6 ......................................
Accessories Included............................................... 6
Standby Mode Picture 6 .............................................
Standby Notifications 6 ...............................................
TV Control & Operation 7 ...........................................
Using Main TV Menu 7 ...............................................
Inserting the Batteries into the Remote 8 ...................
Power Connection 9 ...................................................
Antenna Connection 9 ................................................
Licence Notification 9 .................................................
Disposal of Old Equipment and Batteries 10 ..............
Declaration of Conformity (DoC) 10 ...........................
UK Declaration of Conformity (DoC) 10 .....................
Sales and Support Information 10 ..............................
Specification .......................................................... 11
Notice 12 ....................................................................
Remote Control 13 .....................................................
Connections........................................................... 14
Switching On/Off 15 ....................................................
First Time Installation............................................. 15
Media Playback via USB Input 16 ..............................
Media Browser....................................................... 17
CEC 17 .......................................................................
Settings Menu Content 18 ..........................................
General TV Operation ........................................... 25
Using the Channel List 25 ..........................................
Configuring Parental Settings 25 ................................
Electronic Programme Guide 25 ................................
Teletext Services (where available) 26 .......................
MHEG Teletext ...................................................... 26
BBC Red Button+ (RB+)........................................ 26
Software Upgrade.................................................. 26
Troubleshooting & Tips .......................................... 27
PC Input Typical Display Modes 27 ............................
AV and HDMI Signal Compatibility 27 ........................
Supported File Formats for USB Mode 28 .................
Video File Formats 28 ................................................
Picture File Formats 28 ..............................................
Audio File Formats 28 ................................................
Subtitle File Formats.............................................. 29
Supported DVI Resolutions 29 ...................................
Connectivity 30 ...........................................................
Wired Connectivity................................................. 30
Wireless Connectivity 30 ............................................
Handling of the customer information 31 ....................
Networked Standby Mode 32 .....................................
Connectivity Troubleshooting ................................ 32
Using Audio Video Sharing Network Service 32 .........
Apps 33 ......................................................................
Freeview Play Platform.......................................... 33
Internet Browser 34 ....................................................
HBBTV System...................................................... 34
Alexa Ready 35 ..........................................................
Google Assistant.................................................... 36
DVB functionality information 37 ................................
Important Instruction 38 ..............................................

English - 2 -
Safety Information
CAUTION
RISK OF ELECTRIC SHOCK
DO NOT OPEN
CAUTION: TO REDUCE THE RISK OF ELECTRIC SHOCK DO
NOT REMOVE COVER (OR BACK).
NO USER-SERVICEABLE PARTS INSIDE. REFER
SERVICING TO QUALIFIED SERVICE PERSONNEL.
Note: Follow the on screen instructions for operating the related
features.
In extreme weather (storms, lightning) and long inactivity
periods (going on holiday) disconnect the TV set from the
mains.
The mains plug is used to disconnect TV set from the mains
and therefore it must remain readily operable. If the TV set is
not disconnected electrically from the mains, the device will
still draw power for all situations even if the TV is in standby
mode or switched off.
IMPORTANT - Please read these instructions
fully before installing or operating
WARNING: This device is intended to be used
by persons (including children) who are
capable / experienced of operating such a device
unsupervised, unless they have been given
supervision or instruction concerning the use of
the device by a person responsible for their safety.
โข Use this TV set at an altitude of less than 5000 meters
above the sea level, in dry locations and in regions
with moderate or tropical climates.
โข The TV set is intended for household and similar
indoor use but may also be used in public places.
โข For ventilation purposes, leave at least 5cm of free
space around the TV.
โข The ventilation should not be impeded by covering
or blocking the ventilation openings with items, such
as newspapers, table-cloths, curtains, etc.
โข The power cord plug should be easily accessible. Do
not place the TV, furniture, etc. on the power cord.
A damaged power cord/plug can cause fire or give
you an electric shock. Handle the power cord by the
plug, do not unplug the TV by pulling the power cord.
Never touch the power cord/plug with wet hands as
this could cause a short circuit or electric shock.
Never make a knot in the power cord or tie it with
other cords. When damaged it must be replaced, this
should only be done by qualified personnel.
โข Do not expose the TV to dripping or splashing of
liquids and do not place objects filled with liquids,
such as vases, cups, etc. on or over the TV (e.g.,
on shelves above the unit).
โข Do not expose the TV to direct sunlight or do not
place open flames such as lit candles on the top of
or near the TV.
โข Do not place any heat sources such as electric
heaters, radiators, etc. near the TV set.
โข Do not place the TV on the floor and inclined
surfaces.
โข To avoid danger of suffocation, keep plastic bags
out of the reach of the babies, children and domestic
animals.
โข Carefully attach the stand to the TV. If the stand is
provided with screws, tighten the screws firmly to
prevent the TV from tilting. Do not over-tighten the
screws and mount the stand rubbers properly.
โข Do not dispose of the batteries in fire or with
hazardous or flammable materials.
WARNING
โข Batteries must not be exposed to excessive heat
such as sunshine, fire or the like.
โข Excessive sound pressure from earphones or
headphones can cause hearing loss.
ABOVE ALL - NEVER let anyone, especially
children, push or hit the screen, push anything
into holes, slots or any other openings in the case.
Caution Serious injury or death risk
Risk of electric shock Dangerous voltage risk
Maintenance
Important maintenance
component
Markings on the Product
The following symbols are used on the product as
a marker for restrictions and precautions and safety
instructions. Each explanation shall be considered
where the product bears related marking only. Note
such information for security reasons.
Class II Equipment: This appliance is
designed in such a way that it does not require
a safety connection to electrical earth.
Hazardous Live Terminal: The marked
terminal(s) is/are hazardous live under normal
operating conditions.
i
Caution, See Operating Instructions: The
marked area(s) contain(s) user replaceable
coin or button cell batteries.
CLASS 1
LASER PRODUCT
Class 1 Laser Product: This
product contains Class 1
laser source that is safe under
reasonably foreseeable
conditions of operation.

English - 3 -
WARNING
Do not ingest the battery, Chemical Burn Hazard
This product or the accessories supplied with the pro -
duct may contain a coin/button cell battery. If the coin/
button cell battery is swallowed, it can cause severe
internal burns in just 2 hours and can lead to death.
Keep new and used batteries away from children.
If the battery compartment does not close securely,
stop using the product and keep it away from children.
If you think batteries might have been swallowed or
placed inside any part of the body, seek immediate
medical attention.
โ โ โ โ โ โ โ โ โ โ โ โ
A television may fall, causing serious personal injury
or death. Many injuries, particularly to children, can be
avoided by taking simple precautions such as:
โข ALWAYS use cabinets or stands or mounting me -
thods recommended by the manufacturer of the
television set.
โข ALWAYS use furniture that can safely support the
television set.
โข ALWAYS ensure the television set is not overhanging
the edge of the supporting furniture.
โข ALWAYS educate children about the dangers of
climbing on furniture to reach the television set or
its controls.
โข ALWAYS route cords and cables connected to your
television so they cannot be tripped over, pulled or
grabbed.
โข NEVER place a television set in an unstable location.
โข NEVER place the television set on tall furniture
(for example, cupboards or bookcases) without
anchoring both the furniture and the television set
to a suitable support.
โข NEVER place the television set on cloth or other
materials that may be located between the television
set and supporting furniture.
โข NEVER place items that might tempt children to
climb, such as toys and remote controls, on the top
of the television or furniture on which the television
is placed.
โข The equipment is only suitable for mounting at
heights โค2 m.
If the existing television set is going to be retained and
relocated, the same considerations as above should
be applied.
โ โ โ โ โ โ โ โ โ โ โ โ
Apparatus connected to the protective earthing of the
building installation through the MAINS connection or
through other apparatus with a connection to protective
earthing โ and to a television distribution system using
coaxial cable, may in some circumstances create a fire
hazard. Connection to a television distribution system
has therefore to be provided through a device providing
electrical isolation below a certain frequency range
(galvanic isolator)
WALL MOUNTING WARNINGS
โข Read the instructions before mounting your TV
on the wall.
โข The wall mount kit is optional. You can obtain from
your local dealer, if not supplied with your TV.
โข Do not install the TV on a ceiling or on an inclined
wall.
โข Use the specified wall mounting screws and other
accessories.
โข Tighten the wall mounting screws firmly to prevent
the TV from fall. Do not over-tighten the screws.
WARNING
โข Using other wall-hanging brackets, or installing
a wall-hanging bracket by yourself have the risk
of personal injury and product damage. In order
to maintain the unitโs performance and safety, be
absolutely sure to ask your dealer or a licensed
contractor to secure the wall-hanging brackets.
Any damage caused by installing without a
qualified installer will void your warranty.
โข Carefully read the instructions accompanying
optional accessories, and be absolutely sure to
take steps to prevent the TV from falling off.
โข Handle the TV carefully during installation since
subjecting it to impact or other forces may cause
product damage.
โข Take care when fixing wall brackets to the wall.
Always ensure that there are no electrical cables
or pipes in the wall before hanging bracket.
โข To prevent fall and injury, remove the TV from
its fixed wall position when it is no longer in use.
Figures and illustrations in this user manual are
provided for reference only and may differ from the
actual product appearance. Product design and
specifications may be changed without notice.

English - 4 -
Assembling / Removing the pedestal
Preparations
Take out the pedestal(s) and the TV from the packing
case and put the TV onto a work table with the screen
panel down on the clean and soft cloth (blanket, etc.)
โข Use a flat and firm table bigger than the TV.
โข Do not hold the screen panel part.
โข Make sure not to scratch or break the TV.
Assembling the pedestal
1. The stand of the TV consists of two pieces. Install
these pieces together.
x3
2. Place the stand(s) on the stand mounting
pattern(s) on the rear side of the TV.
3. Insert the screws provided and tighten
(M4 x 12)
them gently until the stand is properly fitted.
x4
Maintenance
First, remove the mains plug from the mains
socket.
Display panel, Cabinet, Pedestal
Regular care:
Gently wipe the surface of the display panel, cabinet,
or pedestal by using a soft cloth to remove dirt or
fingerprints.
For stubborn dirt:
1. First clean the dust from the surface.
2. Dampen a soft cloth with clean water or diluted
neutral detergent (1 part detergent to 100 parts
water).
3. Wring out the cloth firmly. (Please note, do not
let liquid enter the TV inside as it may lead to
product failure.)
4. Carefully wipe moisten and wipe away the
stubborn dirt.
5. Finally, wipe away all the moisture.
Caution
Do not use a hard cloth or rub the surface too hard,
otherwise this may cause scratches on the surface.
โข Take care not to subject the surfaces to insect
repellent, solvent, thinner or other volatile substances.
This may degrade surface quality or cause peeling
of the paint.
โข The surface of the display panel is specially treated
and may be easily damaged. Take care not to tap
or scratch the surface with your fingernail or other
hard objects.
โข Do not allow the cabinet and pedestal to make
contact with a rubber or PVC substance for a long
time. This may degrade surface quality.
Mains plug
Wipe the mains plug with a dry cloth at regular
intervals.
Moisture and dust may cause fire or electrical shock.

English - 5 -
Environmental Information
This television is designed to be environment friendly.
To reduce energy consumption, you can follow these
steps:
If you set the Energy Saving to , Minimum Medium,
Maximum Auto or the TV will reduce the energy
consumption accordingly. If you like to set the
Backlight Custom to a fixed value set as and adjust
the Backlight (located under the Energy Saving
setting) manually using Left or Right buttons on the
remote. Set as to turn this setting off. Off
Note: Available Energy Saving options may differ depending
on the selected in the menu.Mode Settings>Picture
The Energy Saving settings can be found in the Set-
tings>Picture menu. Note that some picture settings
will be unavailable to be changed.
If pressed Right button or Left button consecutively,
โScreen will be off in 15 seconds.โ message will be
displayed on the screen. Select Proceed and press
OK to turn the screen off immediately. If you donโt
press any button, the screen will be off in 15 seconds.
Press any button on the remote or on the TV to turn
the screen on again.
Note: Screen Off option is not available if the Mode is set
to . Game
When the TV is not in use, please switch off or
disconnect the TV from the mains plug. This will also
reduce energy consumption.
Features
โข Remote controlled colour TV
โข Fully integrated digital terrestrial/cable/satellite TV
(DVB-T-T2/C/S-S2)
โข HDMI inputs to connect other devices with HDMI
sockets
โข USB input
โข OSD menu system
โข Back AV inputs for external devices (such as DVD
Players, PVR, video games, etc.)
โข Stereo sound system
โข Teletext
โข Headphone connection
โข Automatic programming system
โข Manual tuning
โข Automatic power down after up to eight hours
โข Sleep timer
โข Child lock
โข Automatic sound mute when no transmission
โข NTSC playback
โข AVL (Automatic Volume Limiting)
โข PLL (Frequency Search)
Removing the pedestal from the TV
Be sure to remove the pedestal in the following way
when using the wall-hanging bracket or repacking
the TV.
โข Put the TV onto a work table with the screen panel
down on the clean and soft cloth. Leave the stand(s)
protruding over the edge of the surface.
โข Unsrew the screws that fixing the stand(s).
โข Remove the stand(s).
When using the wall-hanging bracket
Please contact your local Panasonic dealer to
purchase the recommended wall-hanging bracket.
Holes for wall-hanging bracket installation;
Rear of the TV
a
b
a (mm) 75
b (mm) 75
View from the side
c
VESA
Bracket
d
(d) Depth of screw (c) min. 9 mm
max. 10 mm
Diameter M4
Note: The screws for fixing the TV onto the wall-hanging
bracket are not supplied with the TV.

English - 6 -
โข PC input
โข Game Mode (Optional)
โข Picture off function
โข Ethernet (LAN) for Internet connectivity and service
โข 802.11 a/b/g/n built in WLAN Support
โข Audio Video Sharing
โข HbbTV
High Dynamic Range (HDR) / Hybrid Log-Gamma
(HLG)
Using this feature the TV can reproduce greater
dynamic range of luminosity by capturing and then
combining several different exposures. HDR/HLG
promises better picture quality thanks to brighter, more
realistic highlights, more realistic colour and other
improvements. It delivers the look that filmmakers
intended to achieve, showing the hidden areas of
dark shadows and sunlight with full clarity, colour and
detail. HDR/HLG contents are supported via native
and market applications, HDMI, USB inputs and over
DVB-S broadcasts.
Accessories Included
โข Remote Control
โข Batteries: 2 x AA
โข Instruction Book
โข Power Cord
โข Detachable stand
โข Stand mounting screws (M4 x 12)
Standby Mode Picture
You can use your TV as a digital picture frame using
the Standby Picture feature. In order to do this
Mode
follow the steps below.
โข Set the Standby Set
Mode Picture option in the -
tings System More On> > menu as . This option is
set as by default. Off
โข Create a separate folder named as standby_picture
in the USB storage device's root directory and copy
the files you want to use into that folder and then
connect the USB storage device to your TV.
โข Press the Standby button on the remote briefly to
switch your TV into standby pictur .
mode e state
Note that once the option is Standby Mode Picture
set as , the function of the button on the On Standby
remote will change. After this you will need to press
and hold the button to switch the TV into standby mode
while the TV is in normal operating mode.
If there are more than 1 picture file available in the
folder all picture files will be displayed as a slide show
in succession. If the necessary folder is not created
or there isn't any picture file in the folder, a warning
message will be displayed on the screen for a few
seconds and then disappear.
In standby pictur he backlight level of the mode e state t
screen will be decreased by 50 % and Smart Center
features will not be usable, if Smart Center is available
for your TV model.
To switch your TV from standby pictur
mode e state
back to normal operating mode press the Standby
button on the remote briefly.
Beside the remote control you can also use the control
unit on the TV to switch into standby pictur
mode e
state and back to normal operating mode. In order to
do that follow the same instructions as described in the
TV Control & Operation section for switching the TV
into the standby mode. Note that you will not be able to
switch the TV into standby mode using the control unit
on the TV while the TV is in standby pictur
mode e state.
Note: The availability of this feature depends on the TV model
and its features.
Refer to the section Supported File Formats for USB Mode
for the supported media file formats.
Standby Notifications
If the TV does not receive any input signal (e.g. from
an aerial or HDMI source) f nutes, it will go or 3 mi
into standby. When you next switch-on, the following
message will be displayed: โTV switched to stand-by
mode automatically because there was no signal
for a long time.โ You can disable this functionality
by setting the ption in the
Timer of No Signal o
Settings>Devices menu accordingly.
The Auto Power Down option(in the Settings System >
>More menu) could have been set to a value between
1 and 8 hours by default. If this setting is not set as Off
and the TV has been left on and not been operated
during the set time, it will switch into standby mode
after the set time has expired. When you next switch-on
the TV, the following message will be displayed. โTV
switched to stand-by mode automatically because
no operation was made for a long time.โ Before the
TV switches into standby mode a dialogue window will
be displayed. If you do not press any button the TV
will switch into the standby mode after a waiting period
of about 5 minutes. You can highlight and press Yes
OK to switch the TV into standby mode immediately.
If you highlight and press , the TV will remain No OK
on. You can also choose to cancel the Auto Power
Down Disablefunction from this dialogue. Highlight
and press , the TV will remain on and the function OK
will be cancelled. You can enable this function again by
changing the setting of the option Auto Power Down
from the menu. Settings>System>More

English - 8 -
2. Search
You can search for Channels, Guide, TV menus,
Applications, Web, YouTube and Videos using this
option. Press and enter a key word using the virtual OK
keyboard. Then highlight OK and press to start OK
the search. Results will be displayed on the screen.
Highlight the desired result using the directional
buttons and press to open.OK
3. TV
3.1. Guide
You can access the electronic programme guide menu
using this option. Refer to Electronic Programme
Guide section for more information.
3.2. Channels
You can access the menu using this option. Channels
Refer to section for more Using the Channel List
information.
3.3. Timers
You can set timers for future events using the options of
this menu. You can also review the previously created
timers under this menu.
To add a new timer select the Add Timer tab using the
Left/Right buttons and press . Set the sub-menu OK
options as desired and when finished press OK. A new
timer will be created.
To edit a previously created timer, highlight that timer,
select the tab and press Edit Selected Timer OK.
Change the sub-menu options as desired and press
OK to save your settings.
To cancel an already set timer, highlight that timer,
select Delete Selected Timer tab and press OK. A
confirmation message will be displayed. Highlight Yes
and press to proceed. The timer will be cancelled.OK
It is not possible to set timers for two or more events
that will broadcasted in different channels at the same
time interval. In this case you will be asked to choose
one of these timers and cancel others. Highlight the
timer you want to cancel and press OK, Options menu
will be displayed. Then highlight and press Set/Cancel
OK to cancel that timer. You will have to save changes
after that. In order to do that press , highlight OK Save
Changes OK and press again.
3.4. More Apps
In order to manage the apps installed on your TV,
you can use this option. Highlight and press OK. You
can add an installed app to menu, launch or Home
remove it. Highlight an app and press to see the OK
available options.
3.5. Market
You can add new apps from the application market
using this option. Highlight and press OK. Available
apps will be displayed. You can also access the
application market from within the menu.More Apps
3.6. Accessibility
You can access the accessibility settings menu directly
using this option.
3.7. Privacy Settings
You can access the privacy settings menu directly
using this option. This option may not be available
depending on the model of your TV and the selected
country during the first time installation process.
4. Settings
You can manage the settings of your TV using the
options of this menu. Refer to Settings Menu Content
section for more information.
You can reset your customisations on the menu Home
to defaults using the option (availability Reset Apps
depends on TV model and its features). Highlight and
press OK. A confirmation message will be displayed.
Highlight Yes and press to proceed. Note that you OK
will not be able to perform this operation again within
the next few minutes.
5. Sources
You can manage your input source preferences using
the options of this menu. To change the current source
highlight one of the options and press . OK
5.1. Source Settings
You can access the source settings menu directly using
๎๎๎๎๎๎๎๎๎๎๎๎๎๎จ๎๏๎๎๎๎๎๎๎๎๎๎๎๎๎๎๎๎๎
๎๎๎๎๎๎๎๏๎๎๎
๎๎๎๎๎๎๎๎๎๎๎๎
๎๎๎๎๎๎๎๎๎๎๏๎๎๎๎
Inserting the Batteries into the Remote
Remove the back cover to reveal the battery compart -
ment. Insert two size batteries. Make sure the (+) AA
and (-) signs match (observe correct polarity). Do not
mix old and new batteries. Replace only with same or
equivalent type. Place the cover back on.
A message will be displayed on the screen when the
batteries are low and must be replaced. Note that when
the batteries are low, the performance of the remote
control may be impaired.
Batteries should not be exposed to excessive heat
such as sunshine, fire or the like.
Produkspesifikasjoner
Merke: | Panasonic |
Kategori: | Fjernsyn |
Modell: | TX-32MS360B |
Trenger du hjelp?
Hvis du trenger hjelp med Panasonic TX-32MS360B still et spรธrsmรฅl nedenfor, og andre brukere vil svare deg
Fjernsyn Panasonic Manualer
6 August 2025
6 August 2025
6 August 2025
6 August 2025
6 August 2025
6 August 2025
6 August 2025
6 August 2025
6 August 2025
6 August 2025
Fjernsyn Manualer
- Fjernsyn Thomson
- Fjernsyn Haier
- Fjernsyn Bauhn
- Fjernsyn Insignia
- Fjernsyn Denver
- Fjernsyn LG
- Fjernsyn Grundig
- Fjernsyn Hisense
- Fjernsyn Sharp
- Fjernsyn Arcelik
- Fjernsyn AOC
- Fjernsyn Saba
- Fjernsyn Philips
- Fjernsyn TCL
- Fjernsyn Reflexion
- Fjernsyn Cecotec
- Fjernsyn Samsung
- Fjernsyn Kogan
- Fjernsyn Sony
- Fjernsyn GoGEN
- Fjernsyn Furrion
- Fjernsyn Pioneer
- Fjernsyn Vox
- Fjernsyn Sencor
- Fjernsyn Cello
- Fjernsyn Medion
- Fjernsyn JVC
- Fjernsyn Technisat
- Fjernsyn RCA
- Fjernsyn Hyundai
- Fjernsyn Chiq
- Fjernsyn Nevir
- Fjernsyn Infiniton
- Fjernsyn Blaupunkt
- Fjernsyn Mitsubishi
- Fjernsyn Alphatronics
- Fjernsyn Megasat
- Fjernsyn Nedis
- Fjernsyn ECG
- Fjernsyn Mitsai
- Fjernsyn Vivax
- Fjernsyn Element
- Fjernsyn Toshiba
- Fjernsyn JTC
- Fjernsyn Vizio
- Fjernsyn Proscan
- Fjernsyn Metz
- Fjernsyn Mystery
- Fjernsyn CGV
- Fjernsyn Doffler
- Fjernsyn Elements
- Fjernsyn FOX Electronics
- Fjernsyn Voxicon
- Fjernsyn Salora
- Fjernsyn Manta
- Fjernsyn Mitchell & Brown
- Fjernsyn Aconatic
- Fjernsyn Continental Edison
- Fjernsyn MBM
- Fjernsyn Schaub Lorenz
- Fjernsyn Strong
- Fjernsyn FFalcon
- Fjernsyn SYLVOX
- Fjernsyn Dyon
- Fjernsyn QBell Technology
- Fjernsyn Peerless-AV
- Fjernsyn Nokia
- Fjernsyn Akai
- Fjernsyn Qilive
- Fjernsyn Xoro
- Fjernsyn Telefunken
- Fjernsyn Engel
- Fjernsyn Jay-tech
- Fjernsyn Hannspree
- Fjernsyn SEIKI
- Fjernsyn TELE System
- Fjernsyn Bang Olufsen
- Fjernsyn Magnavox
- Fjernsyn Luxor
- Fjernsyn RevolutionHD
- Fjernsyn Smart Brand
- Fjernsyn Viewpia
- Fjernsyn Antarion
- Fjernsyn Naxa
- Fjernsyn Linsar
Nyeste Fjernsyn Manualer
7 August 2025
6 August 2025
6 August 2025
6 August 2025
6 August 2025
6 August 2025
6 August 2025
6 August 2025
6 August 2025
6 August 2025