Thermaltake Pacific V-GTX 1080Ti Plus Bruksanvisning
Thermaltake
Maskinvarekjøling
Pacific V-GTX 1080Ti Plus
Les nedenfor 📖 manual på norsk for Thermaltake Pacific V-GTX 1080Ti Plus (2 sider) i kategorien Maskinvarekjøling. Denne guiden var nyttig for 23 personer og ble vurdert med 4.7 stjerner i gjennomsnitt av 12 brukere
Side 1/2
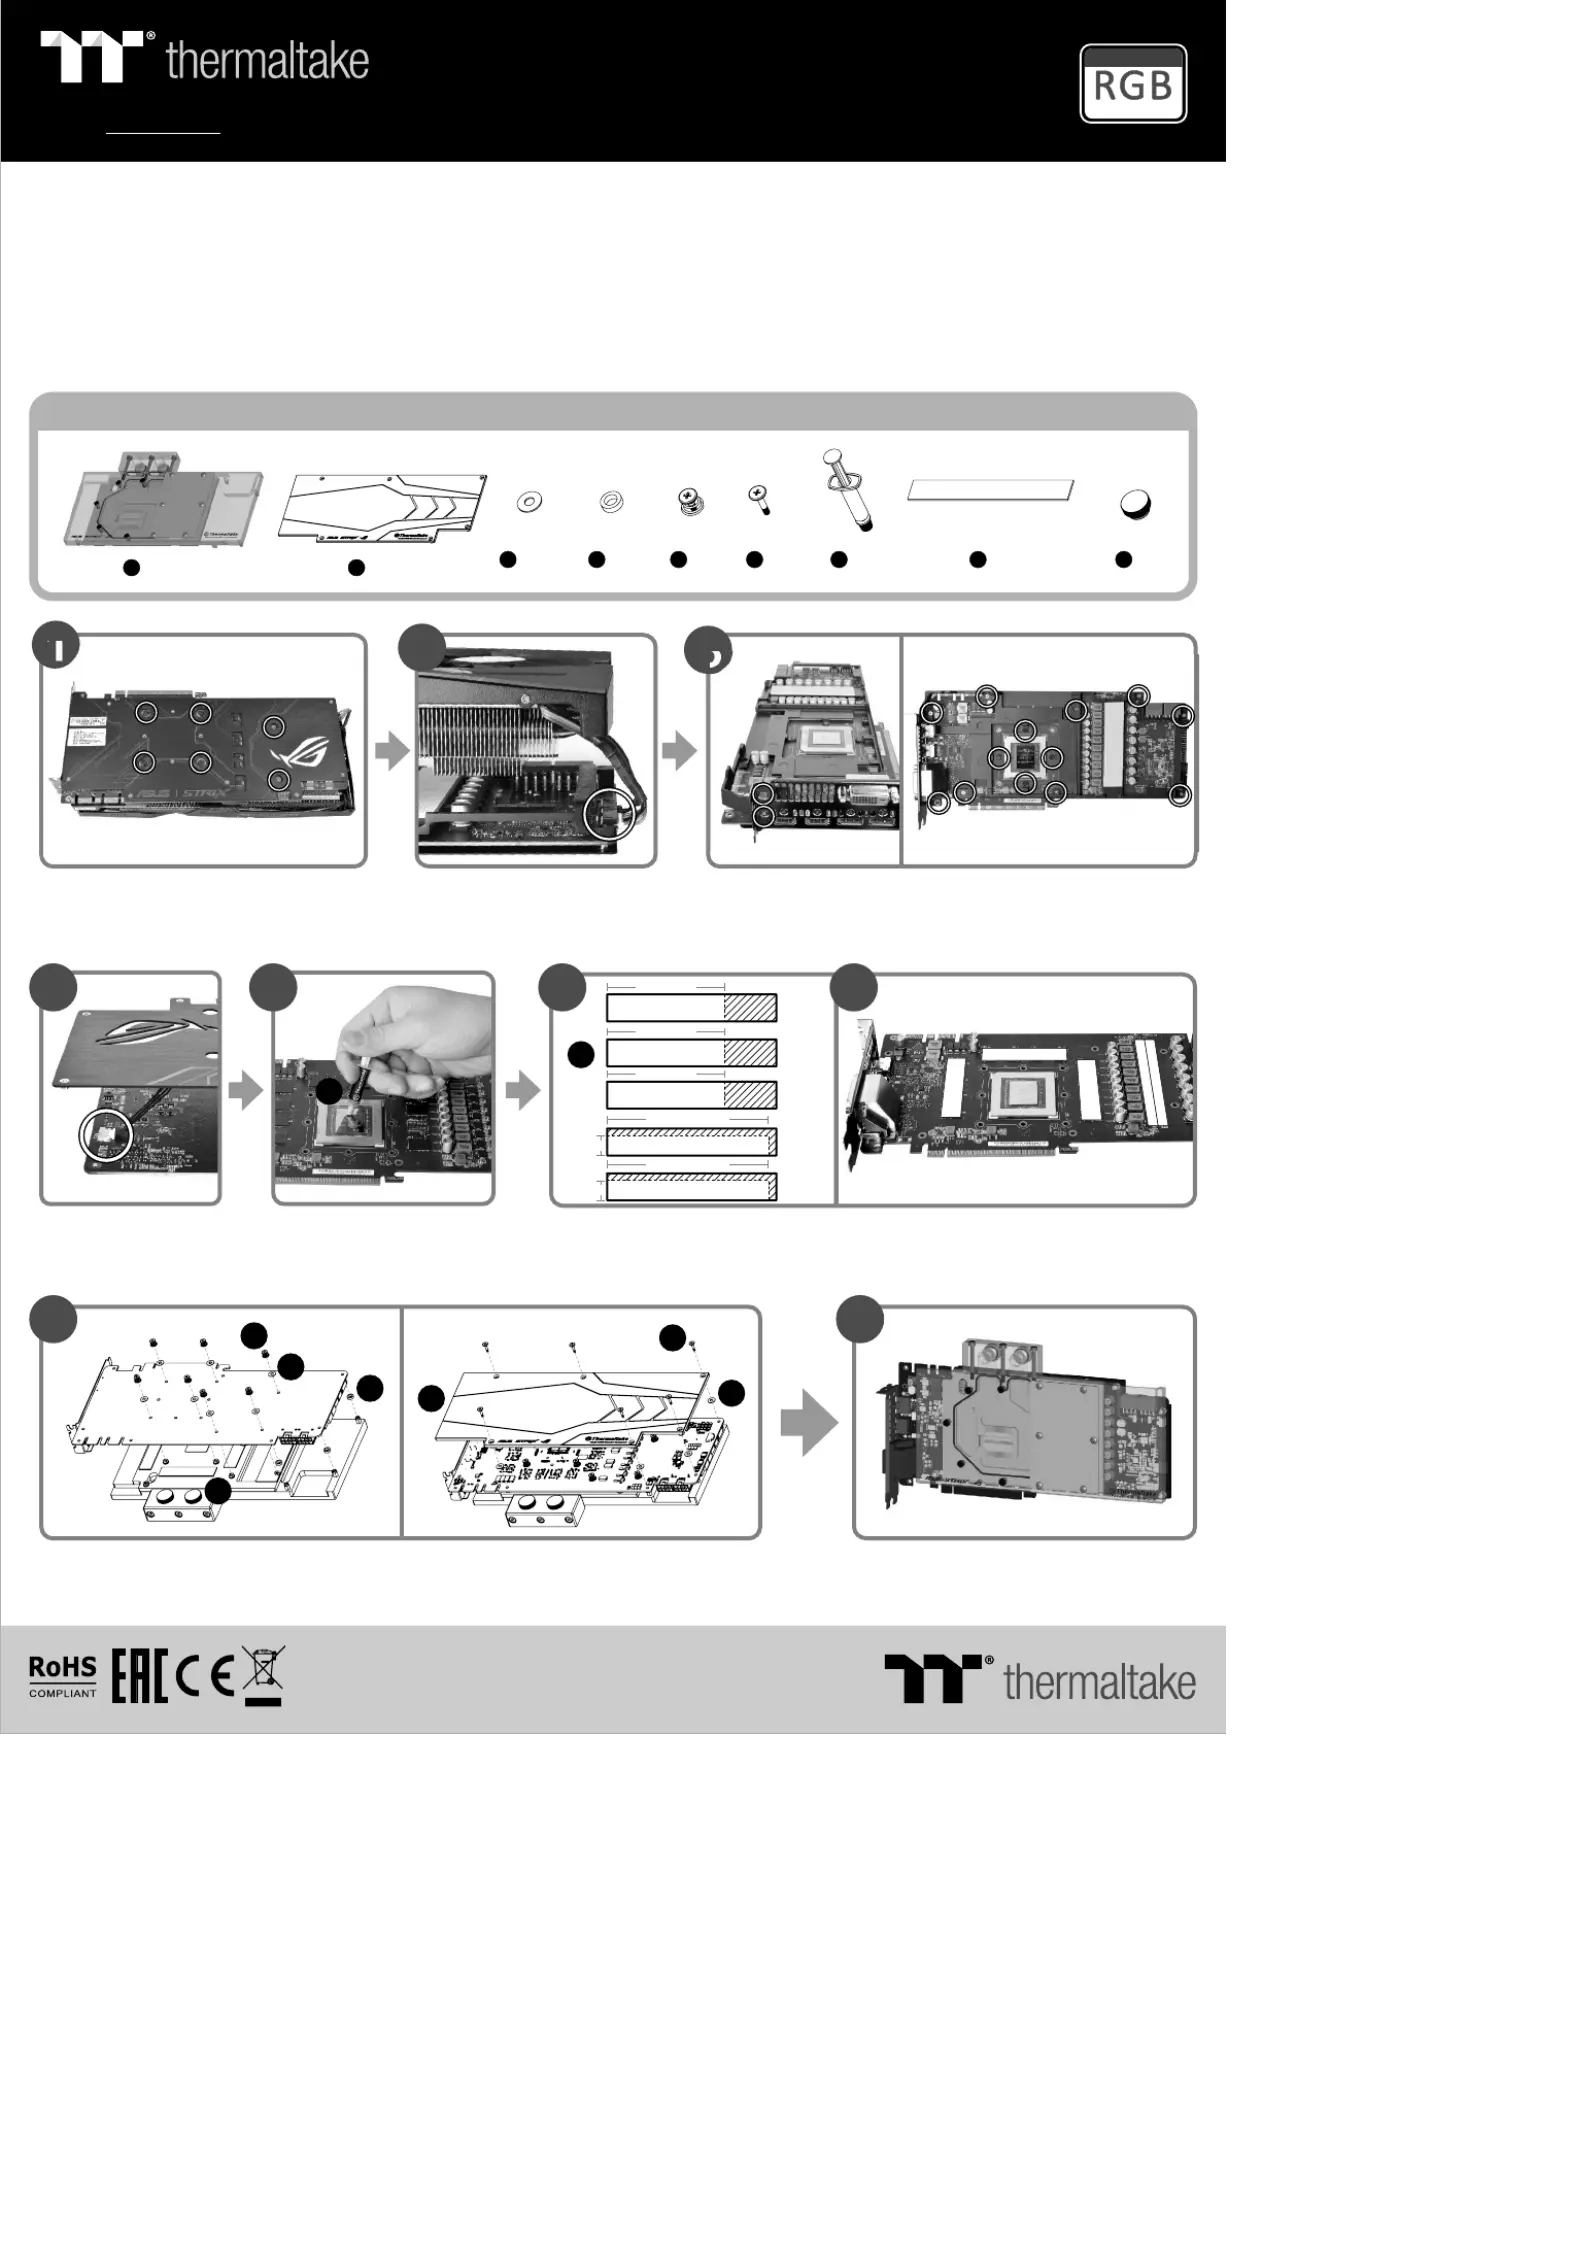
This product is intended for installation only by expert users. Please consult with a qualified technician for installation.
Improper installation may result in damage to your equipment.
Before you start using this product please follow these basic guidelines:
1. Please carefully read through the instruction manual before beginning the installation process.
2. Please remove your graphics card from your motherboard to insure the safest process and in order to prevent any possible damages to
your CPU and motherboard.
3. It is strongly recommended to use market proven pre-mix coolant, such as Thermaltake Coolant 1000.
a
a a b b
A x 1
B x 1
C D E F H I x 13 x 4 x 7 x 6 x 6 x 2G x 1
2
Remove original VGA stock cooler (Remove
the screws circled on the diagram. All heat sink
assembly screws should be removed)
When installing the water block, carefully position the water block with the preinstalled standoffs
on the graphics card.
Remove the power connector
Parts List
8
Apply thermal compound Cut the thermal pads to the dimensions listed and place them on the spots shown on the diagram.
H
64 mm
a
6 7
3
Clean the original thermal compound off the GPU die and remove the
screws to detach the backplate. (Carefully detach the original stock cooler
after removing all acrews securing the cooler to the board)
Finish
9
1
B
F
C
E
D
C
I
4
Remove the
power connector
5
G
64 mm
a
64 mm
a
97mm
b
9mm
97mm
b
9mm
More Language (Deutsch, Español, Français, Italiano, Português,
Русский 简体中文, 正體中文, 日本語, , Türkçe, ภาษาไทย)
Please visit www.thermaltake.com
Support
16.8 Million Colors
Pacific V-GTX 1080Ti Plus
VGA Water Block
© 2017 Thermaltake Technology Co., Ltd. All Rights Reserved.
www.thermaltake.com
Produkspesifikasjoner
| Merke: | Thermaltake |
| Kategori: | Maskinvarekjøling |
| Modell: | Pacific V-GTX 1080Ti Plus |
Trenger du hjelp?
Hvis du trenger hjelp med Thermaltake Pacific V-GTX 1080Ti Plus still et spørsmål nedenfor, og andre brukere vil svare deg
Maskinvarekjøling Thermaltake Manualer

8 April 2025

8 April 2025


8 April 2025

8 April 2025

8 April 2025

8 April 2025

8 April 2025

1 April 2025

1 April 2025
Maskinvarekjøling Manualer
- ALSEYE
- EK Water Blocks
- ENDORFY
- Apc
- Middle Atlantic Products
- StarTech.com
- Cryorig
- Akasa
- Raijintek
- Be Quiet!
- EVOLVEO
- Asus
- DeepCool
- Thermalright
- Tristar
Nyeste Maskinvarekjøling Manualer

10 April 2025

9 April 2025

9 April 2025

9 April 2025

3 April 2025

3 April 2025

2 April 2025

2 April 2025

30 Mars 2025

30 Mars 2025