Alto Elvis 15A MKII Bruksanvisning

Alto Høyttaler Elvis 15A MKII

Les nedenfor 📖 manual på norsk for Alto Elvis 15A MKII (23 sider) i kategorien Høyttaler. Denne guiden var nyttig for 21 personer og ble vurdert med 4.5 stjerner i gjennomsnitt av 2 brukere

Side 1/23
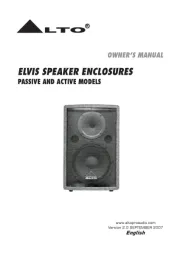
PASSIVE AND ACTIVE MODELS
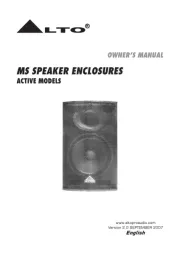
ELVIS SPEAKER ENCLOSURES
OWNER'S MANUAL
www.altoproaudio.com
Version 2.0 SEPTEMBER 2007
LTO
R
R
R
RR
English
CAUTION
RISK OF ELECTRIC SHOCK
DO NOT OPEN
IMPORTANT SAFETY INSTRUCTION
TO REDUCE THE RISK OF ELECTRIC SHOCK
PLEASE DO NOT REMOVE THE COVER OR
THE BACK PANEL OF THIS EQUIPMENT.
THERE ARE NO PARTS NEEDED BY USER
INSIDE THE EQUIPMENT. FOR SERVICE,
PLEASE CONTACT QUALIFIED SERVICE
CENTERS.
WARNING
To reduce the risk of electric shock
and fire, do not expose this equipment
to moisture or rain.
1.
2.
3.
4.
5.
6.
7.
8.
9.
10.
Dispose of this product should
not be placed in municipal waste
and should be separate collection.
11.
12.
Move this Equipment only with a cart,
stand, tripod, or bracket,
specified by the
manufacturer, or
sold with the
Equipment. When
a cart is used, use
caution when
moving the cart /
equipment
combination to
avoid possible
injury from tip-over.
Permanent hearing loss may be caused by
exposure to \ extremely high noise levels.
The US. Government's Occupational Safety
and Health Administration (OSHA) has
specified the permissible exposure to noise
level.
These are shown in the following chart:
HOURS X DAY
EXAMPLE
According to OSHA, an exposure to high SPL in
excess of these limits may result in the loss of
heat. To avoid the potential damage of heat, it is
recommended that Personnel exposed to
equipment capable of generating high SPL use
hearing protection while such equipment is
under operation.
8
6
4
3
2
1,5
1
0,5
0,25 or less
SPL
90
92
95
97
100
102
105
110
115
Small gig
train
Subway train
High level desktop monitors
Classic music concert
Rock concert
This symbol, wherever used, alerts you to the
presence of un-insulated and dangerous voltages
within the product enclosure. These are voltages that
may be sufficient to constitute the risk of electric
shock or death.
This symbol, wherever used, alerts you to
important operating and maintenance instructions.
Please read.
Protective Ground Terminal
AC mains (Alternating Current)
Hazardous Live Terminal
ON: Denotes the product is turned on.
OFF: Denotes the product is turned off.
The apparatus shall be connected to a mains
socket outlet with a protective earthing
connection.
The mains plug or an appliance coupler is used
as the disconnect device, the disconnect device
shall remain readily operable.
CAUTION
Describes precautions that should be observed to
prevent damage to the product.
Read this Manual carefully before operation.
Keep this Manual in a safe place.
Be aware of all warnings reported
with this symbol.
Keep this Equipment away from water and
moisture.
Clean it only with dry cloth. Do not use
solvent or other chemicals.
Do not damp or cover any cooling opening.
Install the equipment only in accordance with
the Manufacturer's instructions.
Power Cords are designed for your safety. Do
not remove Ground connections! If the plug
does not fit your AC outlet, seek advice from
a qualified electrician. Protect the power
cord and plug from any physical stress to
avoid risk of electric shock. Do not place
heavy objects on the power cord. This could
cause electric shock or fire.
Unplug this equipment when unused for long
periods of time or during a storm.
Refer all service to qualified service personnel
only. Do not perform any servicing other than
those instructions contained within the
User's Manual.
To prevent fire and damage to the product,
use only the recommended fuse type as
indicated in this manual. Do not short-circuit
the fuse holder. Before replacing the fuse,
make sure that the product is OFF and
disconnected from the AC outlet.
IN THIS MANUAL:
1. INTRODUCTION..................................................................................1
2. QUICK START - PASSIVE SPEAKER CABINETS.......................................2
-. For Passive Full-range Speakers
Thank you for your purchasing one of our ELVIS speaker enclosures. It is just
one of the many Alto products that a talented, multinational Team of Audio
Engineers and Musicians have developed with their great passion for music.
We design all our transducers and cabinets in Emilia-Romagna of Italy, a
lowland famous for music and fast cars. In fact, Lamborghini, Maserati and
Ferrari are made just a few miles away from our design centers. The same
area has a long tradition in designing and manufacturing some of the world's
best professional transducers. Your ELVIS speaker cabinet is capable of very
high sound pressure level and it has been created to give you a performance
that is better than any loudspeaker in this range. They are flexible in their
passive and active configurations and can be used with single and multiple
subwoofers. The active models even include a microphone preamplifier and a
three-band graphic equalizer.
Enjoy your ELVIS speaker and make sure to read this Manual carefully before
operation!
3. QUICK START - ACTIVE SPEAKER CABINETS.........................................4
-. For Passive Subwoofer & Satellite Speakers
1. INTRODUCTION
4.CONNECTIONS....................................................................................10
-. PASSIVE FULL-RANGE Speaker for ELVIS10/ELVIS12/ELVIS15/ELVIS12M/ELVIS15M
-. PASSIVE SUBWOOFER Speaker for ELVIS12S/ELVIS15S
-. Active FULL-RANGE Speaker for ELVIS10A/ELVIS12/AELVIS15A/ELVIS12MA/ELVIS15MA
-. Active SUBWOOFER Speaker for ELVIS12SA/ELVIS15SA
5. WIRE CONNECTIONS..........................................................................13
6. TECHNICAL SPECIFICATION.................................................................14
1
-. For Active Full-range Speakers
-. For Active Subwoofer & Satellite Speakers
7. WARRANTY........................................................................................20
3
HOOK
UP
3. QUICK START - PASSIVE SPEAKER CABINETS
Passive, Full-range, four speakers. It is similar to the first set-up but four
speakers are connected instead of two.
1).Follow the same steps as described above.
2).Connect the THROUGH socket of the first Elvis cabinet to the INPUT socket
of the second Elvis cabinet.
NOTE: Every time you connect Elvis cabinets this way your parallel them to
the output of the amplifier that will read half of the impedance of one speaker.
MIXER
INPUT THROUGH
INPUT
THROUGH
STEREO AMPLIFIER
D1
500 W 2
(d B)
12
16
18 20 22
24
26
28
30
6
CH1 (dB)
12
16
18 20 22
24
26
28
30
6
CH2
SIG CLIP PRO T SIG CLIP PRO T
4
HOOK
UP
3. QUICK START - PASSIVE SPEAKER CABINETS
Passive two subwoofers and two satellite speakers. With this example, the
stereo amplifier drives both the subwoofers and the satellites. In this case we
do not call them full-range anymore because they receive a signal from the
subwoofer that is already xovered at 125 Hz. In this way, the high energetic
content of the low frequencies is limited to the subwoofer and the satellite's
woofer act like a mid-woofer.
1). Connect one side of speaker cable to the Output CHA/CHB or Binding Post
of your stereo power amplifier and the other side to the Input socket of your
subwoofer, with the second speaker cable connect the Output of the sub
-woofer to the Input of satellite.
2). Complete other connections as illustrated.
3). Turn on your mixer first, then the stereo power amplifier.
4). Turn up the volume controls of your amplifier to about 70%.
5). Use PFL function to get the proper input level for the mixer, and adjust the
Main Mix Level control to manipulate the output level.
6). After use, turn off your stereo power amplifier first, then the mixer.
MIXER
ELVIS SUBWOOFER ELVIS SUBWOOFER
STEREO AMPLIFIER
INPUT INPUT
OUTPUT
INPUT INPUT
OUTPUT
D1
500W 2
(dB)
12
16
18
20
22
24
26
28
30
6
CH1 (dB)
12
16
18
20
22
24
26
28
30
6
CH2
SIGCL I P PROT SIGCL I P PROT
5
HOOK
UP
3. QUICK START - ACTIVE SPEAKER CABINETS
Active, Full-range, two speakers. It is similar to the passive example but you
do not need a power amplifier in between the mixer and the 2 ELVIS speakers
Make all initial connections with all the equipment powered off, and ensure that
all the main volume controls are turned down completely.
1). Connect one side of the signal cable at your mixer into the Main Output Left
/ Right (with 1/4"Jack or XLR) and the other side of the cable in to the Line
Input (COMBO) of your ELVIS active speaker cabinet (with1/4"Jack or XLR).
2). Connect the power cord to mains.
3). Turn ON your mixer first, then the ELVIS cabinets.
4). Turn up the volume control of the ELVIS cabinets.
5). Use PFL function to get the proper input level for the mixer, and adjust the
Main Mix Level control to reach the desired output level.
6). After use, turn off your active speaker cabinets first, then the mixer.
MIXER
LINE IN LINE IN
MAIN OUT L MAIN OUT R

Produkspesifikasjoner

Merke: Alto
Kategori: Høyttaler
Modell: Elvis 15A MKII

Trenger du hjelp?

Hvis du trenger hjelp med Alto Elvis 15A MKII still et spørsmål nedenfor, og andre brukere vil svare deg


Høyttaler Alto Manualer

Høyttaler Manualer

Nyeste Høyttaler Manualer