Axis AX-MG12 Bruksanvisning
Axis
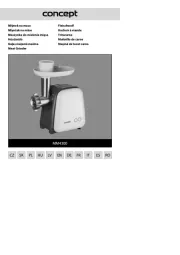
Kjøttkvern
AX-MG12
Les nedenfor 📖 manual på norsk for Axis AX-MG12 (4 sider) i kategorien Kjøttkvern. Denne guiden var nyttig for 14 personer og ble vurdert med 3.8 stjerner i gjennomsnitt av 7.5 brukere
Side 1/4
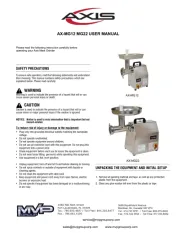
Please read the following instruction carefully before
operating your Axis Meat Grinder
SAFETY PRECAUTIONS
To ensure safe operation, read the following statements and understand
their meaning. This manual contains safety precautions which are
explained below. Please read carefully.
Warning is used to indicate the presence of a hazard that will or can
cause severe personal injury or death.
Caution is used to indicate the presence of a hazard that will or can
cause minor or major personal injury if the caution is ignored.
NOTICE: Notice is used to note information that is important but not
hazard-related.
To reduce risk of injury or damage to the equipment:
• Plug only into grounded electrical outlets matching the nameplate
voltage.
• Do not operate unattended.
• Do not operate equipment around children.
• Do not use an extension cord with this equipment. Do not plug this
equipment into a power strip.
• Check equipment before each use to insure the equipment is clean.
• Do not wear loose fitting garments while operating this equipment.
• Use equipment in a flat, level position.
• Unplug equipment, turn off and let it cool before cleaning or moving.
• Do not spray controls or outside of equipment with liquids or
cleaning agents.
• Do not clean the equipment with steel wool.
• Keep equipment and power cord away from open flames, electric
burners or excessive heat.
• Do not operate if equipment has been damaged or is malfunctioning
in any way.
UNPACKING THE EQUIPMENT AND INITIAL SETUP
1. Remove all packing material and tape, as well as any protective
plastic from the equipment.
2. Clean any glue residue left over from the plastic or tape.
WARNING
CAUTION
AX-MG12 MG22 USER MANUAL
service@mvpgroupcorp.com
sales@mvpgroupcorp.com www.mvpgroupcorp.com
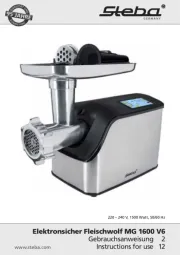
AX-MG12
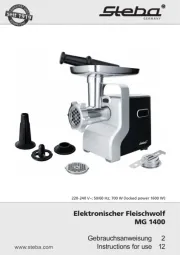
AX-MG22
5659 Royalmount Avenue
Montreal, Qc, Canada H4P 2P9
Tel.: 514.737.9701 / Toll Free: 888.275.4538
Fax.: 514.342.3854 / Toll Free: 877.453.8832
3560 NW 56th Street
Fort Lauderdale, FL 33309
Tel.: 786.600.4687 / Toll Free: 844.218.8477
Fax.: 786.661.4100
Produkspesifikasjoner
| Merke: | Axis |
| Kategori: | Kjøttkvern |
| Modell: | AX-MG12 |
Trenger du hjelp?
Hvis du trenger hjelp med Axis AX-MG12 still et spørsmål nedenfor, og andre brukere vil svare deg
Kjøttkvern Axis Manualer
15 September 2025
Kjøttkvern Manualer
- Ardes
- Backyard Pro
- United Office
- Royal Catering
- Gorenje
- Aurora
- Biltema
- Globe
- Beem
- Hobart
- Gourmetmaxx
- RGV
- Scarlett
- Ade
- MPM
Nyeste Kjøttkvern Manualer

13 Oktober 2025
13 Oktober 2025
13 Oktober 2025
2 Oktober 2025
1 Oktober 2025

30 September 2025
30 September 2025
28 September 2025
28 September 2025
28 September 2025