Black Decker HS1050 Bruksanvisning
Black Decker
Ikke kategorisert
HS1050
Les nedenfor 📖 manual på norsk for Black Decker HS1050 (13 sider) i kategorien Ikke kategorisert. Denne guiden var nyttig for 10 personer og ble vurdert med 4.6 stjerner i gjennomsnitt av 5.5 brukere
Side 1/13

1
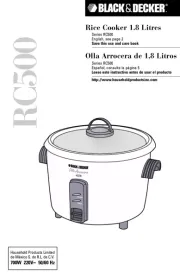
7-QT. FOOD STEAMER
OLLA DE VAPOR
DE 7 CUARTOS (6,6 L)
CUISEUR-VAPEUR DE 7 QUARTS (6,6 L)
MODEL/MODELO/ MODÈLE
❍ HS1050
Customer Care Line:
USA 1-800-231-9786
Accessories/Parts (USA)
1-800-738-0245
For online customer service
and to register your product, go to
www.prodprotect.com/applica
Service line à la clientèle :
Canada 1-800-231-9786
Accessoires/Pièces (Canada)
1-800-738-0245
Pour accéder au service à la clientèle en
ligne ou pour inscrire votre produit en
ligne, rendez-vous à
www.prodprotect.com/applica
Servicio para el cliente:
México 01-800 714-2503
Accesorios/Partes (EE.UU)
1-800-738-0245
Para servicio al cliente y para
registrar su garantía, visite
www.prodprotect.com/applica
Produkspesifikasjoner
| Merke: | Black Decker |
| Kategori: | Ikke kategorisert |
| Modell: | HS1050 |
Trenger du hjelp?
Hvis du trenger hjelp med Black Decker HS1050 still et spørsmål nedenfor, og andre brukere vil svare deg
Ikke kategorisert Black Decker Manualer
7 September 2025
6 September 2025
5 September 2025
5 September 2025
4 September 2025
4 September 2025
4 September 2025
4 September 2025
4 September 2025
4 September 2025
Ikke kategorisert Manualer
- BMW
- Bluesound
- Therm-a-Rest
- LevelOne
- Graphite
- GALAXY
- EMOS
- Lincoln Electric
- Uniross
- HeadRush
- Scosche
- Omega
- Blomberg
- Murr Elektronik
- Leba
Nyeste Ikke kategorisert Manualer

23 Oktober 2025

23 Oktober 2025

23 Oktober 2025

23 Oktober 2025

23 Oktober 2025

23 Oktober 2025

23 Oktober 2025

23 Oktober 2025

23 Oktober 2025

23 Oktober 2025