Crestron DM-TX-4KZ-100-C-1G-W-T Bruksanvisning
Crestron
Ikke kategorisert
DM-TX-4KZ-100-C-1G-W-T
Les nedenfor 📖 manual på norsk for Crestron DM-TX-4KZ-100-C-1G-W-T (5 sider) i kategorien Ikke kategorisert. Denne guiden var nyttig for 12 personer og ble vurdert med 4.4 stjerner i gjennomsnitt av 6.5 brukere
Side 1/5
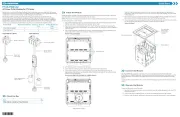
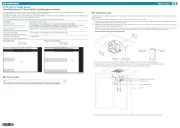
The Crestron® DM-TX-4KZ-100-C-1G is a DigitalMedia 8G+® wall plate
transmitter that supports 4K60 4:4:4 and HDR (High Dynamic Range)
video. The transmitter provides a cost-effective solution for a single AV
source as part of a complete Crestron DigitalMedia™ system.
In
In
In
InIn t
t
t
tthe
he
he
hehe Box
Box
Box
BoxBox
1 DM-TX-4KZ-100-C-1G DigitalMedia 8G+® Wall Plate
Transmitter
A
A
A
AAd
d
d
ddd
d
d
ddit
it
it
itition
ion
ion
ioniona
a
a
aal
l
l
ll It
It
It
ItIte
e
e
eem
m
m
mms
s
s
ss
1 Bracket, Surface Mount (2016054)
1 Connector, 2-Pin (2003574)
1 Connector, 3-Pin (2003575)
2 Screw, 6-32 x 3/4 in., Truss Head, Combo (2009211)
2 Screw, 6-32 x 1/4 in., Pan Head, SEMS (2007218)
Ins
Ins
Ins
InsInst
t
t
tta
a
a
aall
ll
ll
llll t
t
t
tthe
he
he
hehe Trans
Trans
Trans
TransTransm
m
m
mmitt
itt
itt
ittitter
er
er
erer
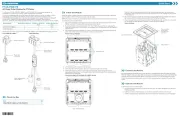
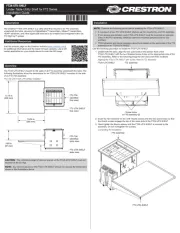
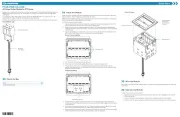
Mount the transmitter into an electrical box, onto a flat surface, or onto a
rack rail. Connect the rear of the transmitter before mounting it into an
electrical box. If the transmitter is to be mounted onto a flat surface or
rack rail, connect the rear of the transmitter after the device is mounted.
Co
Co
Co
CoConne
nne
nne
nnennec
c
c
cct
t
t
tti
i
i
iing
ng
ng
ngng t
t
t
tthe
he
he
hehe Rear
Rear
Rear
RearRear of
of
of
ofof t
t
t
tthe
he
he
hehe T
T
T
TTra
ra
ra
rarans
ns
ns
nsnsm
m
m
mmitt
itt
itt
ittitte
e
e
eer
r
r
rr
N
N
N
NNO
O
O
OOTE:
TE:
TE:
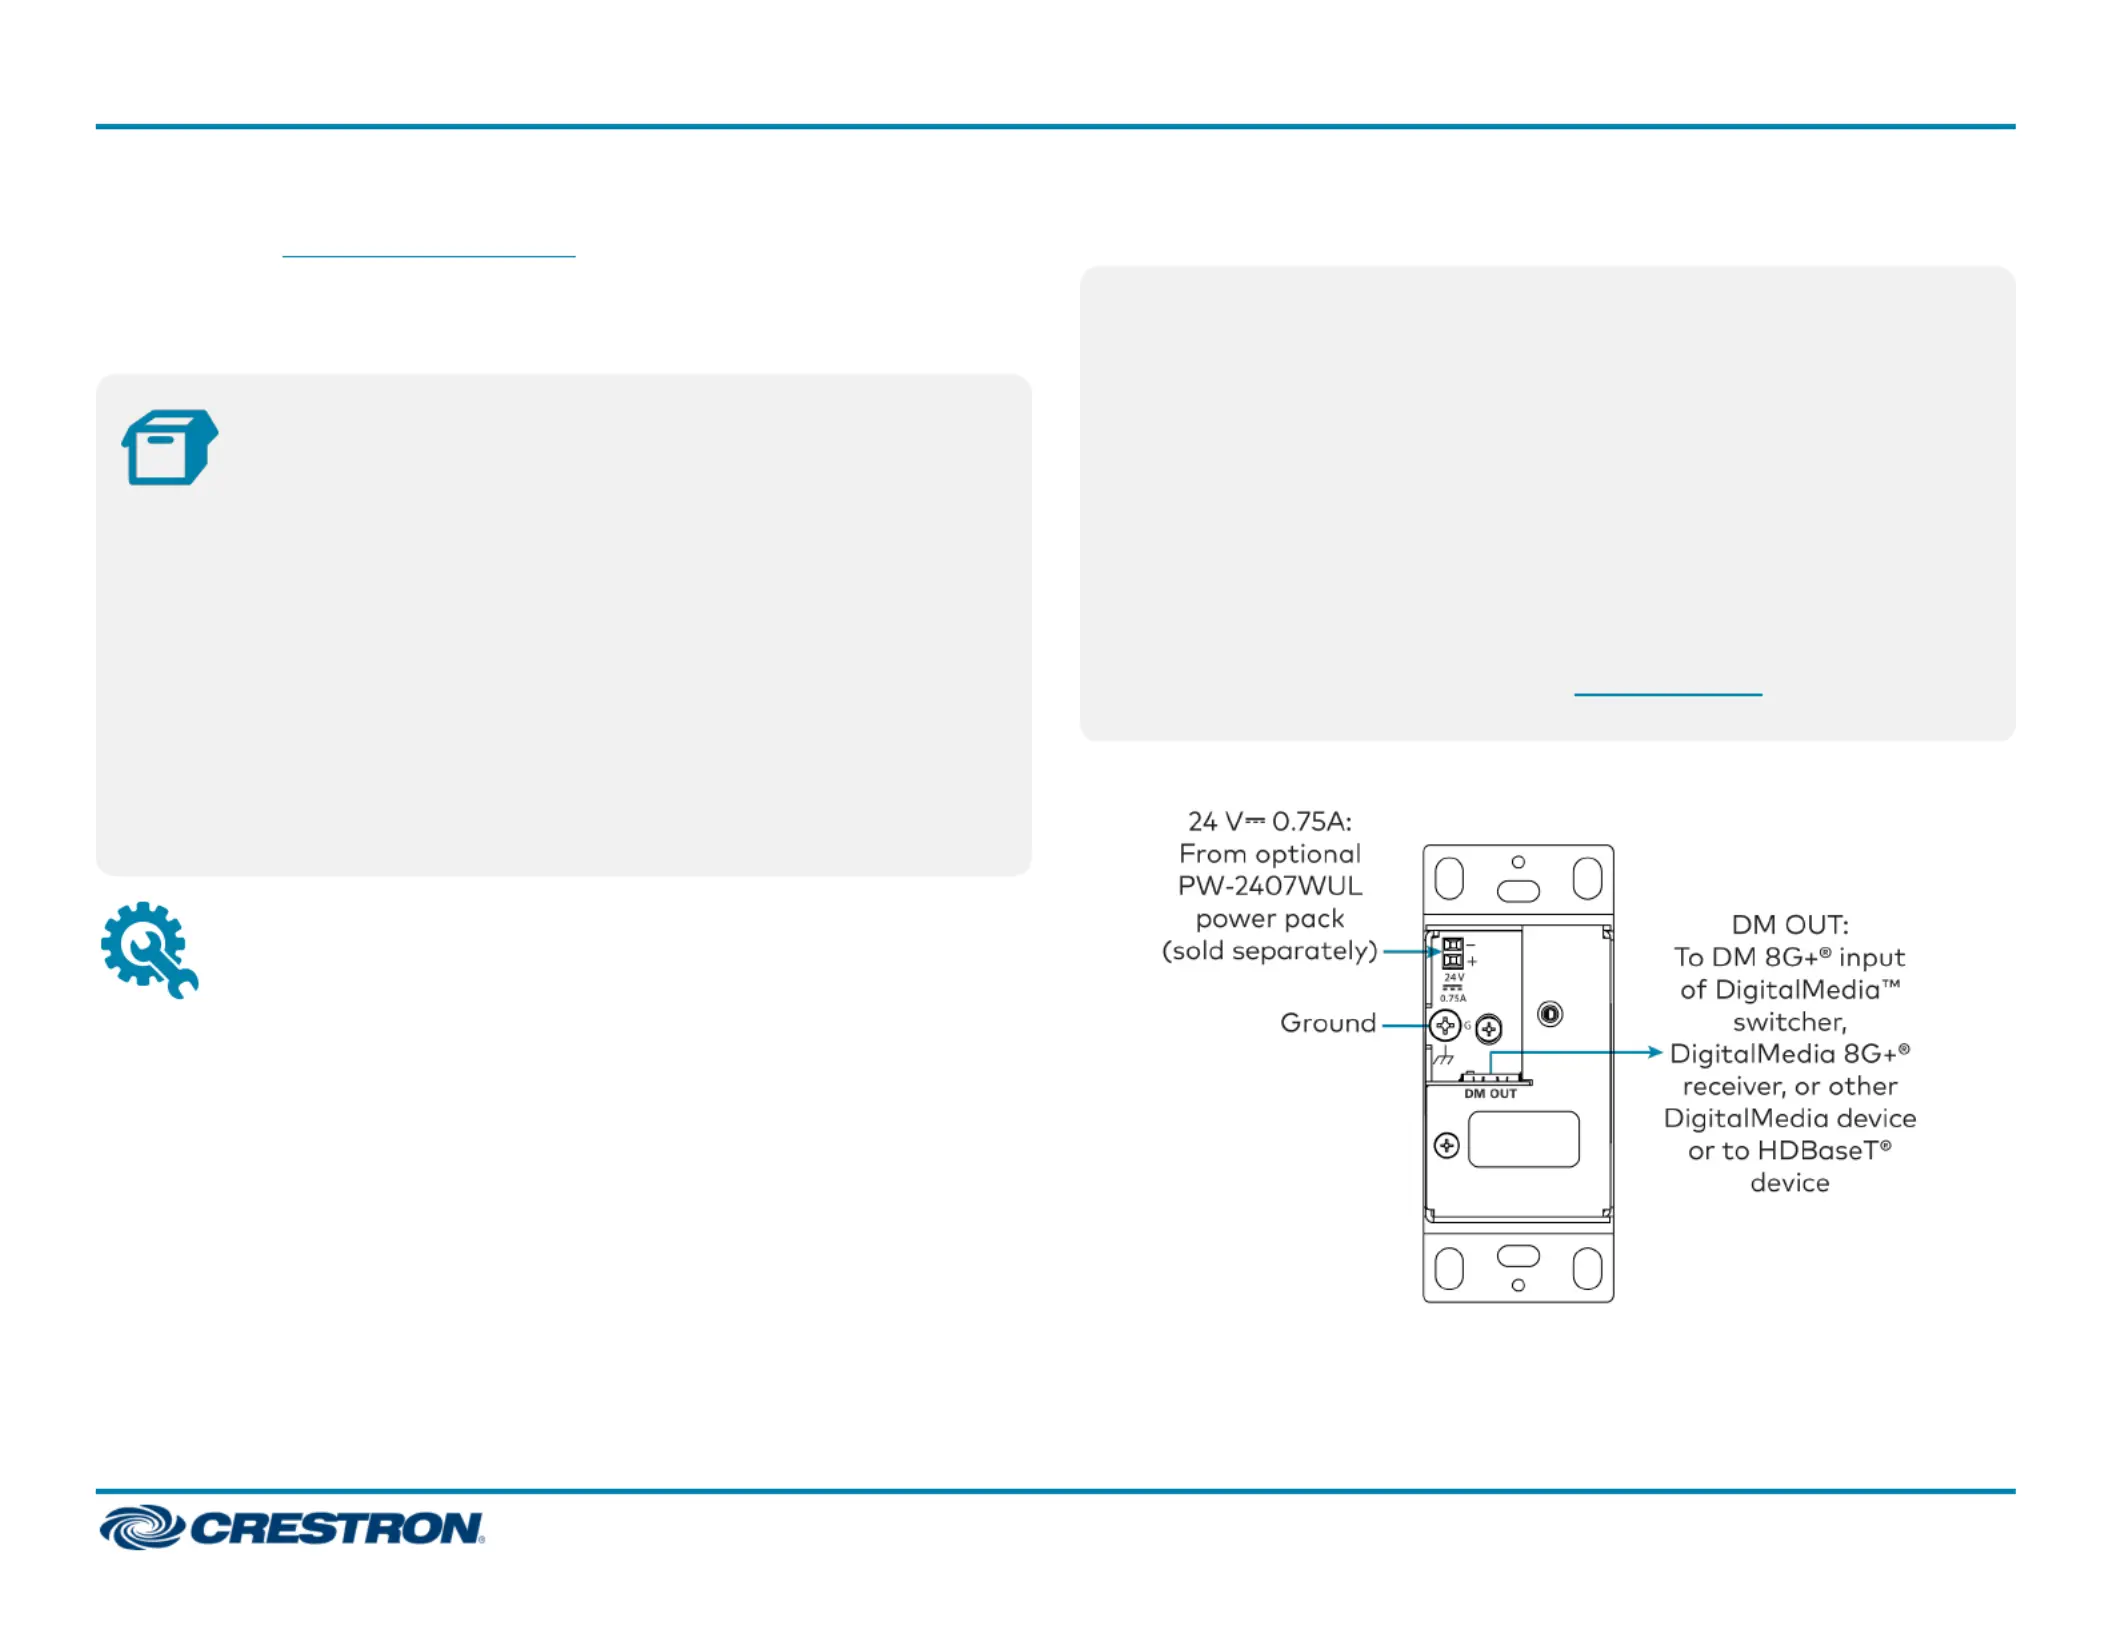
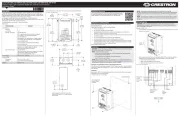
TE:TE: The DM OUT port is a PoDM (Power over DM) powered device
(PD) port and is also compatible with HDBaseT® PoE:
lIn order for the DM OUT port to receive PoDM, the port must be
connected to a DigitalMedia switcher or other DigitalMedia
equipment that has a PoDM power sourcing equipment (PSE) port.
lIn order for the DM OUT port to receive HDBaseT PoE, the port
must be connected to equipment that has an HDBaseT PoE PSE
port.
Wiring that connects to a PoDM or HDBaseT PoE port is designed for
intrabuilding use only.
PoDM, HDBaseT PoE, or the optional PW-2407WUL power pack
(soldseparately) can be used to power the transmitter.
Co
Co
Co
CoConn
nn
nn
nnnnectio
ectio
ectio
ectioections
ns
ns
nsns t
t
t
tto
o
o
oo Re
Re
Re
ReRea
a
a
aar
r
r
rr of
of
of
ofof Tra
Tra
Tra
TraTransm
nsm
nsm
nsmnsmitt
itt
itt
ittitte
e
e
eer
r
r
rr
1
1
1
11
DM-
DM-
DM-
DM-DM-TX
TX
TX
TXTX-4
-4
-4
-4-4K
K
K
KKZ
Z
Z
ZZ-1
-1
-1
-1-10
0
0
000-
0-
0-
0-0-C
C
C
CC-1
-1
-1
-1-1G
G
G
GG
QuickStart
Di
Di
Di
DiDigi
gi
gi
gigit
t
t
tta
a
a
aalMe
lMe
lMe
lMelMed
d
d
ddia
ia
ia
iaia 8G+®
8G+®
8G+®
8G+®8G+® 4K6
4K6
4K6
4K64K60
0
0
00 4:
4:
4:
4:4:4:4
4:4
4:4
4:44:4 H
H
H
HHDR
DR
DR
DRDR W
W
W
WWal
al
al
alall
l
l
ll Pla
Pla
Pla
PlaPlat
t
t
tte
e
e
ee Tra
Tra
Tra
TraTran
n
n
nnsmi
smi
smi
smismit
t
t
ttte
te
te
teter
r
r
rr
Produkspesifikasjoner
| Merke: | Crestron |
| Kategori: | Ikke kategorisert |
| Modell: | DM-TX-4KZ-100-C-1G-W-T |
Trenger du hjelp?
Hvis du trenger hjelp med Crestron DM-TX-4KZ-100-C-1G-W-T still et spørsmål nedenfor, og andre brukere vil svare deg
Ikke kategorisert Crestron Manualer
28 September 2025
27 September 2025
13 September 2025
11 September 2025
11 September 2025

11 September 2025
10 September 2025
10 September 2025
10 September 2025
10 September 2025
Ikke kategorisert Manualer
- Profoto
- Focal
- Insignia
- InfiRay
- Nilfisk
- Bigben
- Statron
- AVM
- Hendi
- Compex
- Vent-A-Hood
- Bolin Technology
- Bavaria
- Joy-it
- Morphor
Nyeste Ikke kategorisert Manualer

23 Oktober 2025

23 Oktober 2025

23 Oktober 2025

23 Oktober 2025

23 Oktober 2025

23 Oktober 2025

23 Oktober 2025

23 Oktober 2025

23 Oktober 2025

23 Oktober 2025