Kern OBS 115 Bruksanvisning
Les nedenfor 📖 manual på norsk for Kern OBS 115 (22 sider) i kategorien Mikroskop. Denne guiden var nyttig for 16 personer og ble vurdert med 4.5 stjerner i gjennomsnitt av 8.5 brukere
Side 1/22

OBS-1- -e-1 BA 912
KERN & Sohn GmbH
Ziegelei 1
D-72336 Balingen
E-Mail: info@kern-sohn.com
Tel: +49-[0]7433- 9933-0
Fax: +49-[0]7433-9933-149
Internet: www.kern-sohn.com
User instructions
Transmitted light microscopeschool
KERN S-1 OB
OBS 101, OBS 102, OBS 103, OBS 104,
OBS 105, OBS 106
OBS 111, OBS 112, OBS 113, OBS 114,
OBS 115, OBS 116
Version 1.2
01/ 9 201
Produkspesifikasjoner
| Merke: | Kern |
| Kategori: | Mikroskop |
| Modell: | OBS 115 |
Trenger du hjelp?
Hvis du trenger hjelp med Kern OBS 115 still et spørsmål nedenfor, og andre brukere vil svare deg
Mikroskop Kern Manualer
4 August 2025

9 April 2025

1 April 2025

1 April 2025

1 April 2025

1 April 2025

1 April 2025

1 April 2025

1 April 2025

30 Mars 2025
Mikroskop Manualer
- National Geographic
- MAGUS
- Celestron
- Bresser
- Maginon
- Velleman
- Hama
- National Optical
- Eschenbach
- Levenhuk
- Dino-Lite
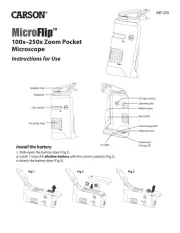
- Carson
- Learning Resources
- Swift
- PCE Instruments
Nyeste Mikroskop Manualer
Learning Resources Talking Electron Microscope Bruksanvisning
19 Oktober 2025
15 Oktober 2025
13 Oktober 2025

26 September 2025
25 September 2025
25 September 2025
24 September 2025
24 September 2025

24 September 2025
24 September 2025