Optoma 3D-RF System Bruksanvisning
Optoma
prosjektor tilbehør
3D-RF System
Les nedenfor 📖 manual på norsk for Optoma 3D-RF System (24 sider) i kategorien prosjektor tilbehør. Denne guiden var nyttig for 2 personer og ble vurdert med 4.5 stjerner i gjennomsnitt av 2 brukere
Side 1/24

Copyright 2011 Bit Cauldron Corporation Page 1 of 24
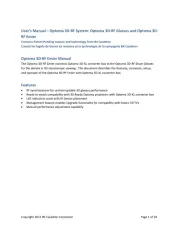
User’s Manual – Optoma 3D-RF System: Optoma 3D-RF Glasses and Optoma 3D-
RF Emitter
Contains Patent Pending software and technology from Bit Cauldron
Contient les logitiels de brevet en instance et la technologie de la compagnie Bit Cauldron
Optoma 3D-RF Emitter Manual
The Optoma 3D-RF Emitter connects Optoma 3D-XL converter box to the Optoma 3D-RF Shutter Glasses
for the ultimate in 3D stereoscopic viewing. This document describes the features, connection, setup,
and operation of the Optoma 3D-RF Emitter with Optoma 3D-XL converter box.
Features
RF synchronization for uninterruptable 3D glasses performance
Ready to watch compatibility with 3D Ready Optoma projectors with Optoma 3D-XL converter box
LED indicators assist with IR Sensor placement
Management Software enables Upgrade functionality for compatibility with future 3D TVs
Manual performance adjustment capability

Copyright 2011 Bit Cauldron Corporation Page 2 of 24
Connections
Optoma 3D-XL converter box with 3D Emitter Port
1: Connect the Optoma 3D-RF emitter to the Optoma 3D-XL converter box using the IR Emitter Port as
shown below.
Basic Features
RF Communication of Synchronization Signal
RF communications enables the Optoma 3D-RF System to provide an awesome and uninterruptable 3D
viewing experience. Line of sight obstructions, emitter placement and viewer seating arrangements
have no impact on the performance of the emitter to glasses synchronization. Optimal seating distance
and viewing angle is determined by the capabilities of the 3D Ready Projector coupled to the Optoma
3D-XL converter box and 3D-RF System.

Copyright 2011 Bit Cauldron Corporation Page 3 of 24
LED Indicators
The Optoma 3D-RF Emitter uses 5 multicolored LEDs
to indicate modes of operation or other information.
The LEDs are located on the top of the emitter close
to the joystick and display red, green, or orange.
Joystick
The Optoma 3D-RF Emitter uses a joystick to allow
the user to enable various modes and change
settings. The joystick has two axes and a center
button function. Function of the axes and buttons
are dependent on the operating mode as described
in following sections.
Modes of Operation
The Optoma 3D-RF Emitter has 5 modes of operation.
Normal
Sync Signal Status (Strength)
Manual Tuning of Glasses Performance
Pairing the Optoma 3D-RF Emitter with Optoma 3D-RF Glasses
Set Polarity
Accessing Modes
During normal operation, the joystick is used to
access different modes of operation. Press and
hold the joystick to cycle through the available
modes. Release the joystick to select a mode. In
any mode, the normal mode of operation
resumes after 60 seconds of inactivity with the
exception of Set Polarity mode. Set Polarity mode
will time out in 10 seconds.
Produkspesifikasjoner
Merke: | Optoma |
Kategori: | prosjektor tilbehør |
Modell: | 3D-RF System |
Trenger du hjelp?
Hvis du trenger hjelp med Optoma 3D-RF System still et spørsmål nedenfor, og andre brukere vil svare deg
prosjektor tilbehør Optoma Manualer
16 August 2025
16 August 2025
16 August 2025
16 August 2025
16 August 2025
prosjektor tilbehør Manualer
- prosjektor tilbehør Viewsonic
- prosjektor tilbehør Chipolino
- prosjektor tilbehør BenQ
- prosjektor tilbehør Barco
Nyeste prosjektor tilbehør Manualer
15 August 2025
15 August 2025
13 August 2025
13 August 2025
12 August 2025
5 August 2025
5 August 2025
5 August 2025
5 August 2025
5 August 2025