ORNO OR-MT-ME-1809 Bruksanvisning
ORNO
Sikkerhetskamera
OR-MT-ME-1809
Les nedenfor 📖 manual på norsk for ORNO OR-MT-ME-1809 (6 sider) i kategorien Sikkerhetskamera. Denne guiden var nyttig for 13 personer og ble vurdert med 4.9 stjerner i gjennomsnitt av 7 brukere
Side 1/6

OR- - -1809MT ME
(PL) Kamera - Wi Fi bezprzewodowa zewnętrzna
(EN) Wireless outdoor - camera Wi Fi
(DE) Drahtlose Wi- -Fi Kamera für den Außenbereich
ORNO-LOGISTIC Sp. z o.o.
ul. Rolników 437
44-141 Gliwice, POLAND
tel. (+48) 32 43 43 110
(PL) YTKOWANIA! WSKAZÓWKI DOTYCZĄCE BEZPIECZNEGO UŻ
Przed rozpoczęciem korzystania z urządzenia, należy zapoznać się z niniejszą instrukcją obsługi oraz zachować ją na przyszłość. Dokonanie samodzielnych napraw i modykacji skutkuje
utratą gwarancji. Producent nie odp iada za uszkodzenia mogące wyniknąć z nieprawidłoweg ntaż i urządzenia. ow o mo u czy eksploatacj
Z uwagi na owadzania innych fakt, że dane techniczne podlegają ciągłym modyfikacjom, Producent zastrzega sobie prawo do dokonywania zmian dotyczących charakterystyki wyrobu oraz wpr
rozwiązań konstrukcyjnych niepogarszających parametrów i walorów użytkowych produktu. Dodatkowe informacje na temat produktów marki ORNO dostępne są na: www.orno.pl. Orno-
Logistic Sp. z o.o. nie ponosi od nstrukcji. Firma Orno- stic Sp. z o.o. zastrzega sobie prawo do wprowadzania powiedzialności za skutki wynikające z nieprzestrzegania zaleceń niniejszej i Logi
zmian w instrukcji - aktualna wersja do pobrania ze strony support.orno.pl. Wszelkie praw ia oraz prawa autorskie niniejszej instrukcji s . a do tłumaczenia/interpretowan ą zastrzeżone
1. Nie zanurzaj urządzenia w wodzie i innych płynach.
2. Produkt przeznaczony do użytku wewnętrznego i zewnętrznego.
3. a, gdy uszkodzona jest obudowa. Nie obsługuj urządzeni
. 4 Nie dokonuj samodzielnych napraw.
5. Nie używaj urządzenia niezgodnie z jego przeznaczeniem.
(EN) DIRECTIONS FOR SAFTY USE!
Before using the device, read this Service Manual and keep it for future us e. Any repair or modication carried out by yourselves results in loss of guarantee. The manufacturer is not
responsible for any damage that can result from improper device installation or operation.
In view of the fact that the technical data are subject to continuous modications, the manufacturer reserves a right to make changes to the product characteristics and to introduce dierent
constructional solutions without deterioration of the product parameters or functional quality.
Additional information about ORNO products are available at www.orno.pl. Orno-Logistic Sp. z o.o. holds no responsibility for the results of non-compliance with the provisions of the present
Manual. Orno Logistic Sp. z o.o. reserves the right to make changes to the Manual - the latest version of the Manual can be downloaded from support.orno.pl. Any translation/interpretation
rights and copyright in relation to this Manual are reserved.
1. Do not immerse the device in water or another uid.
2. The product is intended for indoor and outdoor use.
3 Do not operate the device when its housing is damaged. .
4 Do not open the device and do not repair it by yourselves. .
5. not use the device contrary to its dedication.Do
(DE) ANWEISUNGEN ZUR SICHEREN VERWENDUNG!
Vor der Inbetriebnahme des Geräts die Bedienungsanleitung sorgfältig lesen und für die zukünftige Inanspruchnahme bewahren. Selbständige Reparat en und Modifikationen führen zum ur
Verlust der Garantie. Der Hersteller haftet nicht für die Schäden, die aus falscher Montage oder falschem Gebrauch des Geräts folgen können. In Anbetracht der Tatsache, dass die
technischen Daten ständig geändert werden, ehält sich der Hersteller das Recht auf Änderun b gen in Bezug auf Charakteristi ungen, k des Produktes und Einführung anderer Konstruktionslös
die die Parameter und Gebrauchsfunktionen nicht beeinträchtigen, vor.
Zusätzliche Informationen zum Thema der Pro ic Sp. z o.o. haftet nicht für die Folgen der Nichteinhdukte der Marke ORNO nden Sie auf der Internetseite: www.orno.pl. Orno-Logist altung der
Empfehlungen, die in dieser Bedienungsanleitung zu nden sind. Die Firma Orno-Logistic d ng vor die aktuelle Sp. z o.o. behält sich as Recht auf Änderungen in der Bedienungsanleitu –
Version kann man auf der Internetseite support.orno.pl herunterladen.
Alle Rechte auf Übersetzung/Interpretation sowie Urheberrechte an dieser Bedienungsanleitung sind vorbehalten.
1. Tauchen Sie das Gerät nicht ins Wasser oder in andere Flüssigkeiten.
2. Das Produkt ist für die Verwendung in Innenräumen und im Außenbereich bestimmt.
3. Nutz ist. en Sie das Gerät nicht, wenn sein Gehäuse beschädigt
4. Nehmen Sie keine selbständigen Reparaturen vor.
5. Verwenden Sie die Einrichtung nur .ordnungsgemäß
Każde gospodarstwo jest użytkownikiem sprzętu elektrycznego i elektronicznego, a co za tym idzie potencjalnym wytwórcą niebezpiecznego dla ludzi i środowis z tytułu obecności w sprzęcie ka odpadu,
niebezpiecznych substancji, mieszanin oraz części składowych. Z drugiej strony zużyty sprzęt to cenny materiał, z którego możemy odzyskać surowce takie jak miedź, cyna, szkło, żalazo i inne. Symbol
przekreślonego kosza na śmieci umieszczany na sprzęcie, opakowaniu lub dokumentach do niego dołącz nieczność selektywnego zbierania zużytego sprzętu elektrycznego i onych wskazuje na ko
elektronicznego. Wyrobów tak oznaczonych, pod karą grzywny, nie można wyrzucać do zwykłych śmieci razem z innymi odpadami. Oznakowanie oznacza jednocześnie, że sprzęt został wprowadzony do o brotu
po dniu 13 sierpnia 2005r. Obowiązkiem użytkownika jest przekazanie zużytego sprzętu do wyznaczonego punktu zbiórki w celu właściwego jego nia. Zużyty sprzęt może zostać również oddany do przetworze
sprzedawcy, w przypadku zakupu nowego wyrobu w ilości nie większej niż nowy kupowany sprzęt tego samego rodzaju. Informacje o dostępnym systemie zbierania zużytego sprzętu elektrycznego można
znaleźć w punkcie informacyjnym sklepu oraz w urzędzie miasta/gminy. Odpowiednie postępowanie ze zużytym sprzętem za pobiega negatywnym konsekwencjom dla środowiska naturalnego i ludzkiego zdrowia!
Each household is a user of electrical and electronic equipment, and hence a potential producer of hazardous waste for humans and the environment, due to the presence of hazardous substances, mixtures and
components in the equipment. On the other hand, used equipment is valuable material from which we can recover raw materials such as copper, tin, glass, iron and others. The weee sign placed on the
equipment, packaging or documents attached to it indicates the need for selective collection of waste electrical and electronic equipment. Products so marked, under penalty of ne, cannot be thrown into ordinary
garbage along with other waste. The marking means at the same time that the equipment was placed on the market after August 13, 2005. It is the responsibility of the user to hand the used equipment to a
designated collection point for proper processing. Used equipment can also be handed over to the seller, if one buys a new product in an amount not greater than the new purchased equipment of the same type.
Information on the available collection system of waste electrical equipment can be found in the information desk of the store and in the municipal oce or district oce. Proper handling of used equipment
prevents negative consequences for the environment and human health!
Jeder Haushalt ist ein Nutzer von elektrischen nschen und Umwelt geund elektronischen Geräten und dadurch auch ein potenzieller Produzent von für Me fährlichen Abfällen aufgrund der sich drin befindenden
gefährlichen Stoe, Mischungen und Bestandteile. Andererseits sind die gebrauchten Geräte auch ein wertvoller Sto, aus denen wir Rohstoe wie: Kupfer, Zinn, Glas, Eisen und andere wieder verwerten können.
Das Zeichen einer durchgestrichenen Mülltonne auf dem Gerät, der Verpackung oder in den Dokumenten, die dem Gerät beigelegt sind, weist dass die elektronischen und elektrischen Altgeräte darauf hin,
getrennt gesammelt werden müs ichneten Produkte dürfen nicht im normalen Hausmüll mitsamt anderen Abfällen entsorgt werden, unter Androhung einer Geldbuße. sen. Die so gekennze Das Zeichen bedeutet
auch, da st verpichtet, das es richtig wieder verwertet ss das Gerät nach dem 13. August 2005 in den Verkehr gebracht wurde. Der Nutzer i Altgerät an die angewiesene Rücknahmestelle zu übermitteln, damit
wird. Beim Kauf von neuen Geräten kann man die Altgeräte in gleicher Menge und Art beim Verkäufer zurückgeben. Die Informationen über das System der Sammlung der elektrischen Altgeräte kann man sich
bei einem Auskunftspunkt des Ladens sowie bei der Stadt-/Gemeindeverwaltung einholen. Der richtige Umgang mit den Altgeräten verhindert negative Konsequenzen für die Umwelt und die Gesundheit!
01 20/ 22
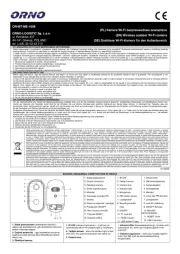
BUDOWA URZĄDZENIA/ CONSTRUCTION OF DEVICE
1. Dioda podczerwieni
2. Czujnik zmierzchu
Obiektyw kamery 3.
4. Dioda sygnalizacyjna
5. Mikrofon
6. Soczewka czujnika PIR
k 7. Głośni
8. Otwór na wspornik mocujący
9. Przełącznik ON/OFF
10. Slot na karty microSD
11. Przycisk RESET
12. Gniazdo USB-C
1. IR LED
2. Twilight sensor
3. Camera lens
4. Indicator lig ht
5. Microphone
6. PIR motion sensor
7. Loudspeaker
8. Mounting bracket
Hole
9. ON/OFF
10. TF card slot
11. RESET button
12. USB socket C-type
1. Infrarot-LED
2. Dämmerungssensor
3. Kameraobjektiv
4 Anzeigediode.
5. Mikrofon
6 Linse des PIR-Sensors.
7. Lautsprecher
8. Loch für Halterung
9. ON/OFF-Schalter
10. MicroSD-
Kartensteckplatz
11. RESET-Taste
12. USB-C-Buchse
1. Diody podczerwieni (doświetlenie kamery) –
włączy się automaty , gdy oświe cznie tlenie otoczenia
będzie niewystarczające,
2. Czujnik zmierzchu – oświetle gdy nie otoczenia
spadnie poniżej wartości 2lux doświetlenie kamery
włączy się,
3. Obiektyw kamery,
1. IR LED (camera illumination) it will turn on –
automatically when the ambient light is insucient
2. Twilight sensor - when the ambient light is less
than 2lux, the camera illumination will switch on,
3. Camera lens,
1. (Kamerabeleuchtung) - schalten sich Infrarot-LEDs
automatisch ein, wenn das Umgebungslicht nicht
ausreicht,
2. - wenn das Umgebungslicht Dämmerungssensor
unter 2lux fällt, wird die Kamerabeleuchtung
eingeschaltet,
Produkspesifikasjoner
| Merke: | ORNO |
| Kategori: | Sikkerhetskamera |
| Modell: | OR-MT-ME-1809 |
Trenger du hjelp?
Hvis du trenger hjelp med ORNO OR-MT-ME-1809 still et spørsmål nedenfor, og andre brukere vil svare deg
Sikkerhetskamera ORNO Manualer

12 August 2025
Sikkerhetskamera Manualer
- Hikvision
- Technaxx
- IDIS
- Sony
- GeoVision
- Lorex
- TP Link
- Yale
- First Alert
- Edimax
- BirdDog
- Feelworld
- Vivotek
- Arecont Vision
- Canon
Nyeste Sikkerhetskamera Manualer

20 Oktober 2025

20 Oktober 2025

20 Oktober 2025

19 Oktober 2025

18 Oktober 2025

18 Oktober 2025

17 Oktober 2025

17 Oktober 2025

17 Oktober 2025

17 Oktober 2025