Rangemaster PAR3115 Bruksanvisning
Rangemaster
kjøkkenvask
PAR3115
Les nedenfor 📖 manual på norsk for Rangemaster PAR3115 (4 sider) i kategorien kjøkkenvask. Denne guiden var nyttig for 18 personer og ble vurdert med 4.6 stjerner i gjennomsnitt av 9.5 brukere
Side 1/4

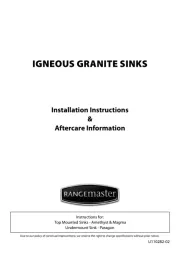
Instructions for:
Top Mounted Sinks - Amethyst & Magma
Undermount Sink - Paragon
IGNEOUS GRANITE SINKS
Installation Instructions
&
Aftercare Information
U110282-02
Due to our policy of continual improvement, we reserve the right to change specications without prior notice.
Produkspesifikasjoner
| Merke: | Rangemaster |
| Kategori: | kjøkkenvask |
| Modell: | PAR3115 |
| Vekt: | 11300 g |
| Bredde: | 550 mm |
| Dybde: | 430 mm |
| Pakkevekt: | 15000 g |
| Kran inkludert: | Nei |
| Pakkedybde: | 530 mm |
| Pakkehøyde: | 305 mm |
| Pakkebredde: | 720 mm |
| Dybde installasjonskammer: | 400 mm |
| Bredde installasjonskammer: | 520 mm |
| Servant type: | Plan montert vask |
| Vaskekum form: | Rektangulær |
| Antall vaskekar: | 2 boller |
| Første bolle form: | Rektangulær |
| Dimensjoner på bolle nr. 1 (BxL): | 310 x 370 mm |
| Dybde på bolle nr. 1: | 200 mm |
| Dimensjoner på bolle nr. 2 (BxL): | 152 x 370 mm |
| Dybde på bolle nr. 2: | 130 mm |
| Kran hull: | Nei |
| Drenerings bord: | Nei |
| Vaskekum materiale: | Magmatisk bergart |
Trenger du hjelp?
Hvis du trenger hjelp med Rangemaster PAR3115 still et spørsmål nedenfor, og andre brukere vil svare deg
kjøkkenvask Rangemaster Manualer
5 August 2025
kjøkkenvask Manualer
- Krowne
- Artusi
- Thor
- Advance Tabco
- IMC/Teddy
- Physa
- Concept
- Gustavsberg
- Crown Verity
- Sani-Lav
- Leisure
- Teka
- T&S
- Blanco
- Kernau
Nyeste kjøkkenvask Manualer
4 Oktober 2025

29 September 2025

29 September 2025

29 September 2025

29 September 2025

29 September 2025

29 September 2025

29 September 2025

29 September 2025
29 September 2025