RetroSound R-693N Bruksanvisning
RetroSound
Høyttaler
R-693N
Les nedenfor 📖 manual på norsk for RetroSound R-693N (8 sider) i kategorien Høyttaler. Denne guiden var nyttig for 7 personer og ble vurdert med 3.9 stjerner i gjennomsnitt av 4 brukere
Side 1/8
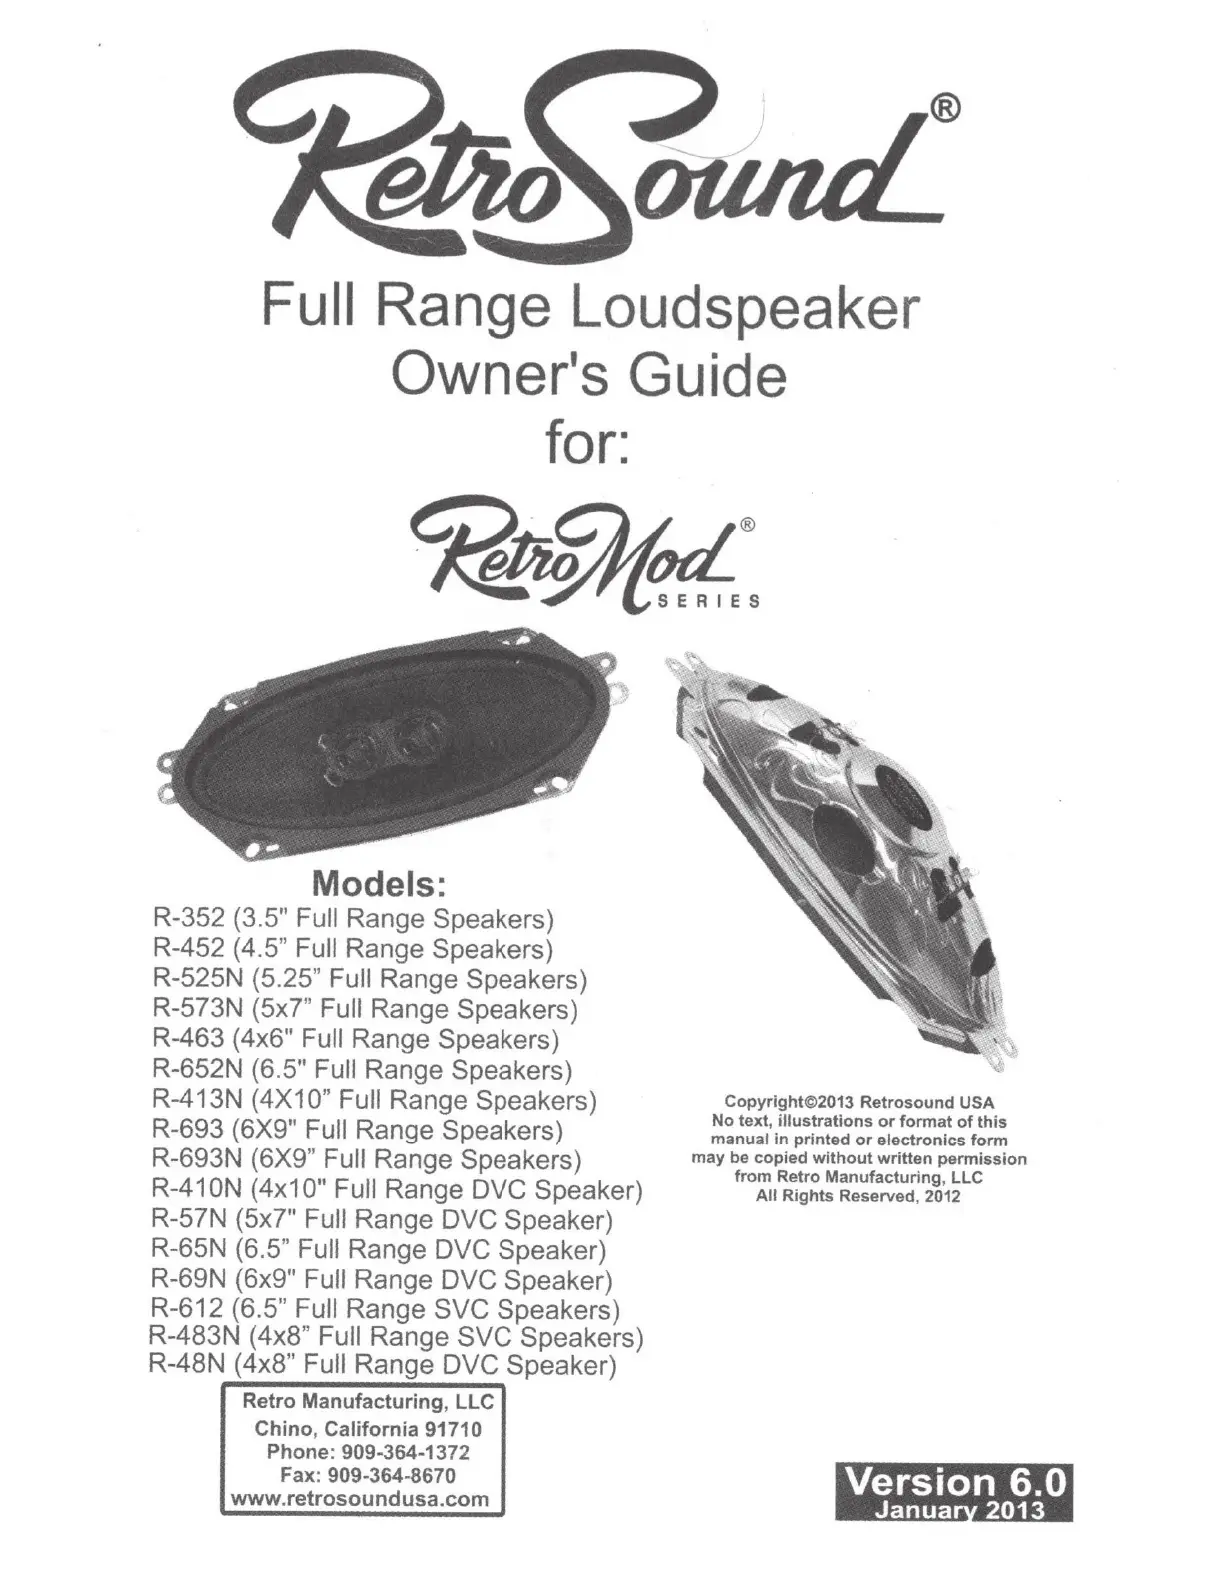
Full
Range Loudspeaker
Owner's
Guide
for:
~
..
;t;:J~
®
·
~,£~ERIES
Models:
R-352 (3.5"
Full
Range Speakers)
R-452 (4.5" Full
Range Speakers)
R-525N (5.25" Full
Range Speakers)
R-573N (5x7"
Full
Range Speakers)
R-463 (4x6"
Full
Range Speakers)
R-652N (6.5" Full
Range Speakers)
R-413N
(4X10" Full
Range Speakers)
R-693 (6X9"
Full
Range Speakers)
R-693N
(6X9" Full
Range Speakers)
R-410N (4x10" Full
Range
DVC
Speaker)
R-57N (5x7"
Full
Range DVC Speaker)
R-65N
(6.5" Full
Range
DVC
Speaker)
R-69N (6x9"
Full
Range DVC Speaker)
R-612 (6.5" Full
Range
SVC
Speakers)
R-483N
(4x8" Full
Range
SVC
Speakers)
R-48N
(4x8" Full Range
DVC
Speaker)
Retro Manufacturing, LLC
Chino,
California 91710
Phone: 909-364-1372
Fax:
909-364-8670
www.retrosoundusa.com
Copyright
C>
2013
Retrosound
USA
No text,
illustrations
or
format
of
this
manual
in
printed
or
electronics form
may be
copied
without
written
permission
from
Retro Manufacturing, LLC
All
Rights Reserved,
2012
Produkspesifikasjoner
| Merke: | RetroSound |
| Kategori: | Høyttaler |
| Modell: | R-693N |
Trenger du hjelp?
Hvis du trenger hjelp med RetroSound R-693N still et spørsmål nedenfor, og andre brukere vil svare deg
Høyttaler RetroSound Manualer

17 Oktober 2025
16 Oktober 2025

16 Oktober 2025

16 Oktober 2025

16 Oktober 2025

16 Oktober 2025
Høyttaler Manualer
- SereneLife
- Glemm
- Rockville
- Andover
- Boston Acoustics
- Mirage
- Altec Lansing
- AOC
- Standard Horizon
- DataVideo
- Vonyx
- OWI
- Defender
- QSC
- Steelseries
Nyeste Høyttaler Manualer

23 Oktober 2025
21 Oktober 2025
21 Oktober 2025
20 Oktober 2025
20 Oktober 2025
20 Oktober 2025
20 Oktober 2025
20 Oktober 2025
20 Oktober 2025
20 Oktober 2025