Salus ST621TX Bruksanvisning
Les nedenfor 📖 manual på norsk for Salus ST621TX (36 sider) i kategorien Termostat. Denne guiden var nyttig for 24 personer og ble vurdert med 4.5 stjerner i gjennomsnitt av 2 brukere
Side 1/36

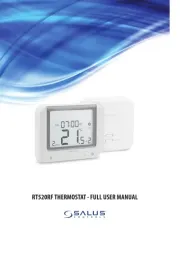
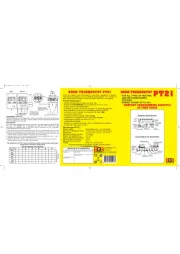
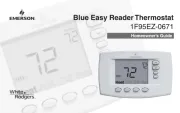
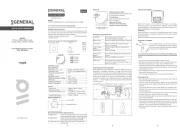
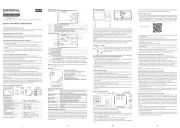
The ST621TX can be used with any of these receivers
868MHz
RXBC605
RXST625
RXRT505
RXVBC605
RXWBC605
ST621TX
Digital Room
Thermostat

ST621TX INSTRUCTION MANUAL2
PRODUCT COMPLIANCE
This product complies with the essential requirements of the following EC Directives:
• Electro-Magnetic Compatibility directive 2004/108/EC
• Low Voltage Directive 2006/95/EEC
• EC Marking directive 93/68/EEC
SAFETY INFORMATION
These instructions are applicable to the SALUS Controls model stated on the front cover of
this manual only, and must not be used with any other make or model. These instructions
are intended to apply in the United Kingdom only, and should be followed along with any
other statutory obligations. When tting batteries don’t mix old and new batteries together.
Do not use rechargeable batteries. Please leave these instructions with the end user where
they should be kept in a safe place for future reference.

3ST621TX INSTRUCTION MANUAL
INTRODUCTION
A programmable thermostat is a transmitter that
combines the functions of both a room thermostat and
heating controller into a single unit. The programmable
thermostat is used to switch the heating system by
means of time and temperature change. This unit is
not like a standard programmer. It works by controlling
the temperature according to a series of programmed
settings that take effect at different times of the day. The
ST621TX from SALUS Controls is a stylish and accurate
5/2 or 7 day programmable electronic thermostat with
a large, easy to read Liquid Crystal Display (LCD). The
thermostat provides the user interface and temperature
sensing / control. The thermostat and RF receiver are
linked together by a Radio Frequency (RF) signal. The
use of the revolutionary Touch Ring technology makes for simple usage, and is coupled with
a unique, smart design. The LCD display will show the current room temperature and the
‘one touch’ operation makes the ST621TX easy to operate.
FEATURES
• Touch Ring Technology
• Large LCD with White Backlight
• Stylish Casing
• Intelligent Communication Technology
• Battery Powered with Replacement Indicator
• Frost Protection
• Burner on Symbol
• Radio Controlled Clock (RCC)
• Manual Time / Date Setting Option
• Holiday Function
• Service Function
• Six Time / Temperature Settings / day
• Secure RF Transmission
(one million unique RF address codes)

ST621TX INSTRUCTION MANUAL4
1. INSTALLATION
ST621TX Programmable Room Thermostat
Getting Started…….
Installing the ST621TX Batteries
To open the case of the ST620, undo the securing screw
on the bottom.
Now pull the screw down until it stops, then carefully separate
the two halves of the case by gently pulling out an upwards
direction. You will now see the battery compartments on the
rear of the front fascia as shown.
Ensure that the batteries are inserted correctly and check the
polarity.

5ST621TX INSTRUCTION MANUAL
Powering up the ST621TX for the rst time
As soon as the batteries have been inserted, the ST621TX will power up for the rst
time and behave in the following way:
All the segments on the display along with the display backlight will be turned
on as shown.
After two seconds, the software version number will be briey on the screen.
The ST621TX will now prompt you to choose a language. If you require ENGLISH
press OK. If you require a different Language use the touch ring to scroll through
the language options then press OK.
The ST621TX at this point will be in AUTO and at factory default settings.
Changing default settings will be explained on page 15. You will also notice that
the time at the top of the LCD is ashing. This will continue to ash until the unit
picks up the RCC (Radio Controlled Clock) signal and displays the correct time.
More information on the RCC can be found on page 24.
Now put the ST621TX front fascia in a safe place so you can mount the ST620
back plate. The back plate is easily xed to the wall and uses industry standard
mounting positions. We recommend that you continue with the back plate
mounting before starting to program the ST621TX.

ST621TX INSTRUCTION MANUAL6
Note: If you do not wish to mount the ST621TX on the wall, use the stand
provided and assemble the ST621TX front and back housing. Remember to
tighten the screw at the bottom.
Wall Mounting Guidelines
The ST621TX should be mounted in a location where the thermostat is accessible,
reasonably lit and free from extremes of temperature and draughts. Do not
mount the thermostat on an outside wall, above a radiator or in a location where
it may be subjected to direct sunlight.
The ST621TX should be mounted in a location where it will not come into contact with moisture or
condensation as this can affect the Touch Ring operation.
To ensure trouble free reception for both the Radio Controlled Clock (RCC) and the Radio Frequency (RF)
signal. Always ensure that the programmable thermostat is mounted away from any possible sources of
interference (such as radios, TV sets, computers, etc.), and is not mounted on or in close proximity to large
metal objects. Installing the ST621TX in enclosed areas such as cellars and basements is not recommended.
NOTE: The ideal position to locate the ST621TX is about 1.5m above oor level.
RF Transmission
The receiving range between ST621TX and the RF Boiler Control is around 100 metres in open air, however
many factors can affect the RF transmission and shorten the operating distance, e.g. shielding by thick walls,
foil back plasterboard, metal objects such as ling cabinets, general RF interference, and so on.
The operating range is generally around 30 metres, which is large enough for most household applications.
Mounting the Back plate
Use the screws and anchors supplied to mount the ST621TX back plate
in your chosen position. Now attach the ST621TX front fascia to the back
plate. Remember to tighten the securing screw
SURFACE MOUNT STAND SUPPLIED

7ST621TX INSTRUCTION MANUAL
Indicator Description Function
Clock Display Displays the day and time
Temperature indicator Displays set or measured temperature
Alphanumeric Display Displays menu and other status messages
Programme Number Displays the number of the
indicator active (selected) programme
Output indicator Indicates output is turned on.
Holiday indicator Indicates Holiday operation mode is selected
Battery Status Indicates battery is low
RF Signal indicator Indicates the unit is transmitting
a wireless signal
RCC indicator Indicates the status of the Radio Controlled Clock
Service indicator Indicates Service function is active
Frost Mode indicator Indicates frost setting is turned on
Touch Lock indicator Indicates touch lock is activated

ST621TX INSTRUCTION MANUAL8
There are few user controls for the ST621TX, making
the programmable thermostat very easy to operate.
The controls are a Touch Ring (which surrounds the
user display), two touch sensitive buttons, a reset
button and a slide operated switch mounted on the
side of the thermostat.
USER CONTROL FUNCTION SUMMARY:
Key / Operation Functions
Touch Ring (move clockwise) Increases the selected setting and scrolls
down the menu selection
Touch Ring (move anti- clockwise) Decreases the selected setting and
scrolls up the menu selection
OK Key Enters Menu or conrms a menu selection
Arrow (Back) Key Single touch – sets the unit back one step.
Hold for two seconds sets the unit back to NORMAL mode
Reset Button Resets the programmable thermostat to default (original factory)
settings except Service setting (when Service is on)
Slide Switch Activates and deactivates the key lock function
(prevents accidental changes)

PAIRING THE THERMOSTAT AND THE RECEIVER
It is important to correctly pair both the receiver and thermostat to ensure that the RF
address codes are matched and that reliable communication is established between the
units. Please follow the instructions below to ensure that the units are congured correctly.
On the receiver:
Press and hold the sync button on the receiver to put the receiver into pairing mode*.
9ST621TX INSTRUCTION MANUAL
RXBC605RXRT505
LOCATION OF SYNC BUTTONS ON THE RECEIVERS
RXST625RXVBC605 RXWBC605
For full instructions on
the receiver pairing refer
to the RXBC605 manual.
For full instructions on
the receiver pairing
refer to the RXRT505
manual. See page 7.
*Please note this
receiver does not
have a sync button.
Switching it on
automatically puts it
into pairing mode.
For full instructions on the
receiver pairing refer to the
RXST625 manual. See page 9.
For full instructions on the
receiver pairing refer to the
RXBC605 manual. See page 16.
For full instructions on the
receiver pairing refer to
the RXWBC605 manual.
See page 23.
Sync
Button Sync
Button Sync Button
Sync Button
Press reset
button rst
Produkspesifikasjoner
Merke: | Salus |
Kategori: | Termostat |
Modell: | ST621TX |
Trenger du hjelp?
Hvis du trenger hjelp med Salus ST621TX still et spørsmål nedenfor, og andre brukere vil svare deg
Termostat Salus Manualer
4 August 2025
4 August 2025
4 August 2025
4 August 2025
27 Oktober 2024
27 Oktober 2024
27 Oktober 2024
27 Oktober 2024
27 Oktober 2024
27 Oktober 2024
Termostat Manualer
- Termostat ORNO
- Termostat Bosch
- Termostat Boneco
- Termostat Siemens
- Termostat EBERLE
- Termostat Schwaiger
- Termostat AEG
- Termostat TP Link
- Termostat Oreg
- Termostat Netatmo
- Termostat Busch-Jaeger
- Termostat Brennenstuhl
- Termostat Danfoss
- Termostat Somfy
- Termostat Panasonic
- Termostat Schneider
- Termostat EMOS
- Termostat Heatit
- Termostat Dimplex
- Termostat Velleman
- Termostat GE
- Termostat Nexa
- Termostat Nobo
- Termostat Tru Components
- Termostat Bearware
- Termostat Elgato
- Termostat Daikin
- Termostat Avidsen
- Termostat Mitsubishi
- Termostat STI
- Termostat Hunter
- Termostat Basetech
- Termostat TFA
- Termostat Tesla
- Termostat Renkforce
- Termostat REMKO
- Termostat ATAG
- Termostat Drayton
- Termostat Jung
- Termostat Ambiano
- Termostat Crestron
- Termostat Xavax
- Termostat Techno Line
- Termostat Remeha
- Termostat Heatmiser
- Termostat Hive
- Termostat Wolf
- Termostat GENERAL Life
- Termostat Silvercrest
- Termostat AVM
- Termostat HomePilot
- Termostat Elektrobock
- Termostat Corberó
- Termostat Perel
- Termostat Delta Dore
- Termostat Rademacher
- Termostat Homematic IP
- Termostat Vimar
- Termostat Emerson
- Termostat Intellinet
- Termostat Ferguson
- Termostat Chacon
- Termostat Fenix
- Termostat Honeywell
- Termostat Junkers
- Termostat Eliwell
- Termostat Grasslin
- Termostat Jumo
- Termostat Enda
- Termostat Orbis
- Termostat Fantini Cosmi
- Termostat Vemer
- Termostat Qubino
- Termostat Theben
- Termostat EQ3
- Termostat Etherma
- Termostat Saunier Duval
- Termostat Gewiss
- Termostat Viessmann
- Termostat Bticino
- Termostat Conrad
- Termostat Econo-Heat
- Termostat Elro
- Termostat Gira
- Termostat Tado
- Termostat Brink
- Termostat Emmeti
- Termostat Itho
- Termostat Bryant
- Termostat Aube
- Termostat Baxi
- Termostat Seitron
- Termostat Amfra
- Termostat Vaillant
- Termostat Carel
- Termostat Buderus
- Termostat Optima
- Termostat Frico
- Termostat UPM
- Termostat Computherm
- Termostat Veria
- Termostat Innogy
- Termostat Nefit
- Termostat ICY
- Termostat Levica
- Termostat Itho-Daalderop
- Termostat Carrier
- Termostat Radson
- Termostat ChiliTec
- Termostat King
- Termostat ACV
- Termostat Landis Gyr
- Termostat Nest
- Termostat Oventrop
- Termostat IMIT
- Termostat Horstmann
- Termostat ELKO
- Termostat Alecto
- Termostat Google
- Termostat Emko
- Termostat Wachendorff
- Termostat MundoControl
- Termostat Otio
- Termostat Rose LM
- Termostat Tylö
- Termostat Sinustec
- Termostat TrickleStar
- Termostat Finder
- Termostat Sygonix
- Termostat Warmup
- Termostat Plugwise
- Termostat Lowes
- Termostat Go Green
- Termostat Drayton Erie
- Termostat Intertechno
- Termostat EQ-3
- Termostat Johnson Control
- Termostat RWE
- Termostat Webasto
- Termostat Tellur
- Termostat OJ ELECTRONICS
- Termostat Zehnder
- Termostat Plieger
- Termostat HomeMatic
- Termostat Eneco
- Termostat VDH
- Termostat Maico
- Termostat Yokis
- Termostat Eurotronic
- Termostat HQ
- Termostat Ouellet
- Termostat THERMAFLEX
- Termostat Truma
- Termostat Wallair
- Termostat AWB
- Termostat PECO
- Termostat Worcester-Bosch
- Termostat 2Heat
- Termostat EasyTemp
- Termostat Hugo Muller
- Termostat Watts
- Termostat Westfalia
- Termostat Oregon Scientific
- Termostat H-Tronic
- Termostat Z-Wave
- Termostat Easy Timer
- Termostat Fibaro
- Termostat SPC
- Termostat Muller
- Termostat Bulex
- Termostat Helios (Amfra)
- Termostat IR-V
- Termostat Eqiva
- Termostat Hager
- Termostat Energenie
- Termostat Thermy
- Termostat Ferroli
- Termostat Niko
- Termostat Stiebel Eltron
- Termostat De Dietrich
- Termostat POER
- Termostat Technoline
- Termostat Magnum
- Termostat Cotech
- Termostat Hornbach
- Termostat ATTACK
- Termostat AcuRite
- Termostat Braeburn
- Termostat Konyks
- Termostat Devi
- Termostat Sorel
- Termostat Wodtke
- Termostat Hoffman
Nyeste Termostat Manualer
12 August 2025
12 August 2025
11 August 2025
11 August 2025
10 August 2025
5 August 2025
5 August 2025
4 August 2025
3 August 2025
9 April 2025