Thank you for purchasing the Sharper Image 3-In-1 Heated Neck
Therapy with Remote. Please take a moment to read this guide and
store it for future reference.
3-IN-1 HEATED NECK THERAPY WITH REMOTE
• Ergonomic design vibratory massage button
• 3D intelligent fitting technology
• Easy to adjust neck electrodes
• Five modes: Thermal moxibustion, low-frequency electric
impulse, magnetic effect, ring traction and vibratory massage
• Two automatically combined electric impulse modes and four
manual electric impulse modes
• Several built-in magnets to promote microcirculation
• Includes a remote control
• LCD menus and backlight display for easy and clear operation
1. Operating the power supply with the adapter: Insert the output
and input plugs of the adapter (switching power supply) into the
port at the lower part of the massager and the AC power socket.
2. Operating the power supply with the built-in rechargeable battery:
The built-in rechargeable battery enables you to use the device
without cords. Simply charge the device using the included
adapter to use wire-free.
HOW TO OPERATE THE 3-IN-1 HEATED NECK
1. Shift the toggle switch to the “ON” position and then apply the
massager close to your neck. If there is some sweat on your neck,
wipe it off before using the device.
2. Hold the remote control and press the button “ ” to turn it on.
After you hear the buzzer beep once, the power supply indicator
will be on and the default program is enabled. The massager will
work under Impulse Mode 1, Intensity 01 and Level H of thermal
moxibustion, with a default time period of 15 minutes.
Optional: Use the remote control to adjust the massage mode and
intensity to your liking. When using the remote, you must aim it at the
massager’s receiving window. After the massager receives the infrared
ray signal successfully it will beep once for prompting.
3. There are six modes of intensity under the impulse mode “ ” for
selection. Mode 0 refers to stopping massage. The “+” button is to
increase the intensity by one level each time you press the button.
Press the “-” button to decrease the intensity. There are 16 levels
for adjustment. The default level is Level 1 when booting.
4. The button “ ” is for selecting thermal moxibustion mode. And
the “0” refers to stopping thermal moxibustion mode. Note: “L”
means low temperature and “H” high temperature. It defaults to
5. The button “ ” is for selecting vibration mode, with six sub-
modes of 1~6. “0” refers to stopping the vibration. Press the “+”
button once to increase the intensity by one level each time you
press the button. There are three levels for adjustment.
6. After the massage is completed, shift the toggle switch to “OFF”
to power the massager off. Stick the electrode slices on the
storage board for storage in a dry, well-ventilated place for next
7. When the battery runs low, please charge it with the power
adapter provided with the massager. Otherwise, the massager will
automatically turn off after the indicator flickers.
8. When the remote control backlight flickers or becomes
insensitive, it is recommended to replace the button battery (Use
3V, CR2032 batteries only). The normal battery life is more than
Attention: When you use the remote control to operate the massager,
the IR receiving window on the massager and the IR sending window
on the remote control cannot be shielded. Aim the remote control at
the receiving window as much as possible to get the best sensitivity.
USE OF SILICON ELECTRODE SLICES
• Insert one end of the 2-core connector wires into the electrode
port and connect the other end to the electrode slices, then use
the massager as specified above. If they are used together with
the conductive plates there will be a difference in intensity due to
the parts they are applied to.
• The electrode slices should be clean on their surfaces without
any dust, oily or sticky substances. If their surfaces become dirty,
flush with clean water and then air dry them for repeated use.
• The electrode slices can be used about 80 times (20 minutes
each time). If their viscosity still cannot be recovered after
several times of cleaning, consider purchasing new ones.
• Only the electrode slices provided with the massager should be
used. Each electrode slice is 2.2” wide, 3.1” high and 0.09” thick
• Please dispose of electrode slices according to your local
environmental regulations rather than discarding them at will.
Note: It is recommended to use the massager one to two times a day,
10 to 20 minutes per massage, and 15-30 minutes in electric impulse
• When the buzzer beeps continuously during a massage, the built-
in lithium battery is low and needs charging with the adapter.
Shift the toggle switch to “Charge” position. The power indicator
will turn green and flicker. When it is fully charged, the power
indicator will stay green. Charge time is 3 to 4 hours.
• The battery can be used for about one week (30 minutes a day)
• Under normal use, the rechargeable battery supports 500
charges. When it is not in use for a long time, please charge it
once a month to prevent reducing its service life.
- 2 - - 3 - - 4- - 5- - 6-
Note: Never use this massager with other electronic medical
devices such as pacemakers, artificial heart-lung machines,
electrocardiographs, etc. If device is used near a short-wave
microwave or microwave therapeutic equipment (within 3.3 ft.), it can
possibly result in damage.
• This massager should not be used by pregnant women or those
with sensitive skin, heart disease, abnormal blood pressure,
malignant tumors, cerebral vascular disease, acute disease, etc.
If in doubt, consult a doctor
• Do not use in the bath or while sleeping
• This device should never be used by children
• Do not use if you have sensitive skin (especially heat sensitivity)
• Don’t move this massager during use. When changing from one
massage area to the next, power it down first and then place it
on the desired area. Otherwise, serious irritation to the area can
• Don’t disassemble this device and avoid placing it into water.
• Do not clean the massager with water
• Use a wet soft cloth or towel to wipe the massager.
• Store it in a dry and well-ventilated place.
• Don’t store it in a place with direct sunlight, high temperature or
• While using the massager, shift the toggle switch to “ON” first
and then aim the IR sending window on the remote control at the
IR receiving window on the massager. If the rechargeable battery
built in the massage runs low, charge it with a power adapter.
If the remote control cannot work normally, please replace the
button battery (CR2032) inside it.
• While charging, use a power adapter and then shift the toggle
Product name: 3-In-1 Heated Neck Therapy with Remote
Power supply: 100-240VAC, 50/60Hz 0.2A converts into DC6V 800mA
or internal power supply 3.7V DC 1450mAh CR2032 button battery for
Impulse frequency: 1-1000Hz
Impulse waveform: Square wave
Thermotherapy temperature: + 100.4°F+ 118.4° F
(ambient temperature: 77°F)
Size of packing box: 9.7 x 9.1 x 3 Inches
WARRANTY / CUSTOMER SERVICE
Sharper Image branded items purchased from SharperImage.
com include a 1-year limited replacement warranty. If you have any
questions not covered in this guide, please call our Customer Service
department at 1 (877) 210-3449. Customer Service agents are
available Monday through Friday, 9:00 a.m. to 6:00 p.m. ET.
The SHARPER IMAGE® name and logo are registered trademarks.
©Sharper Image. All Rights Reserved.
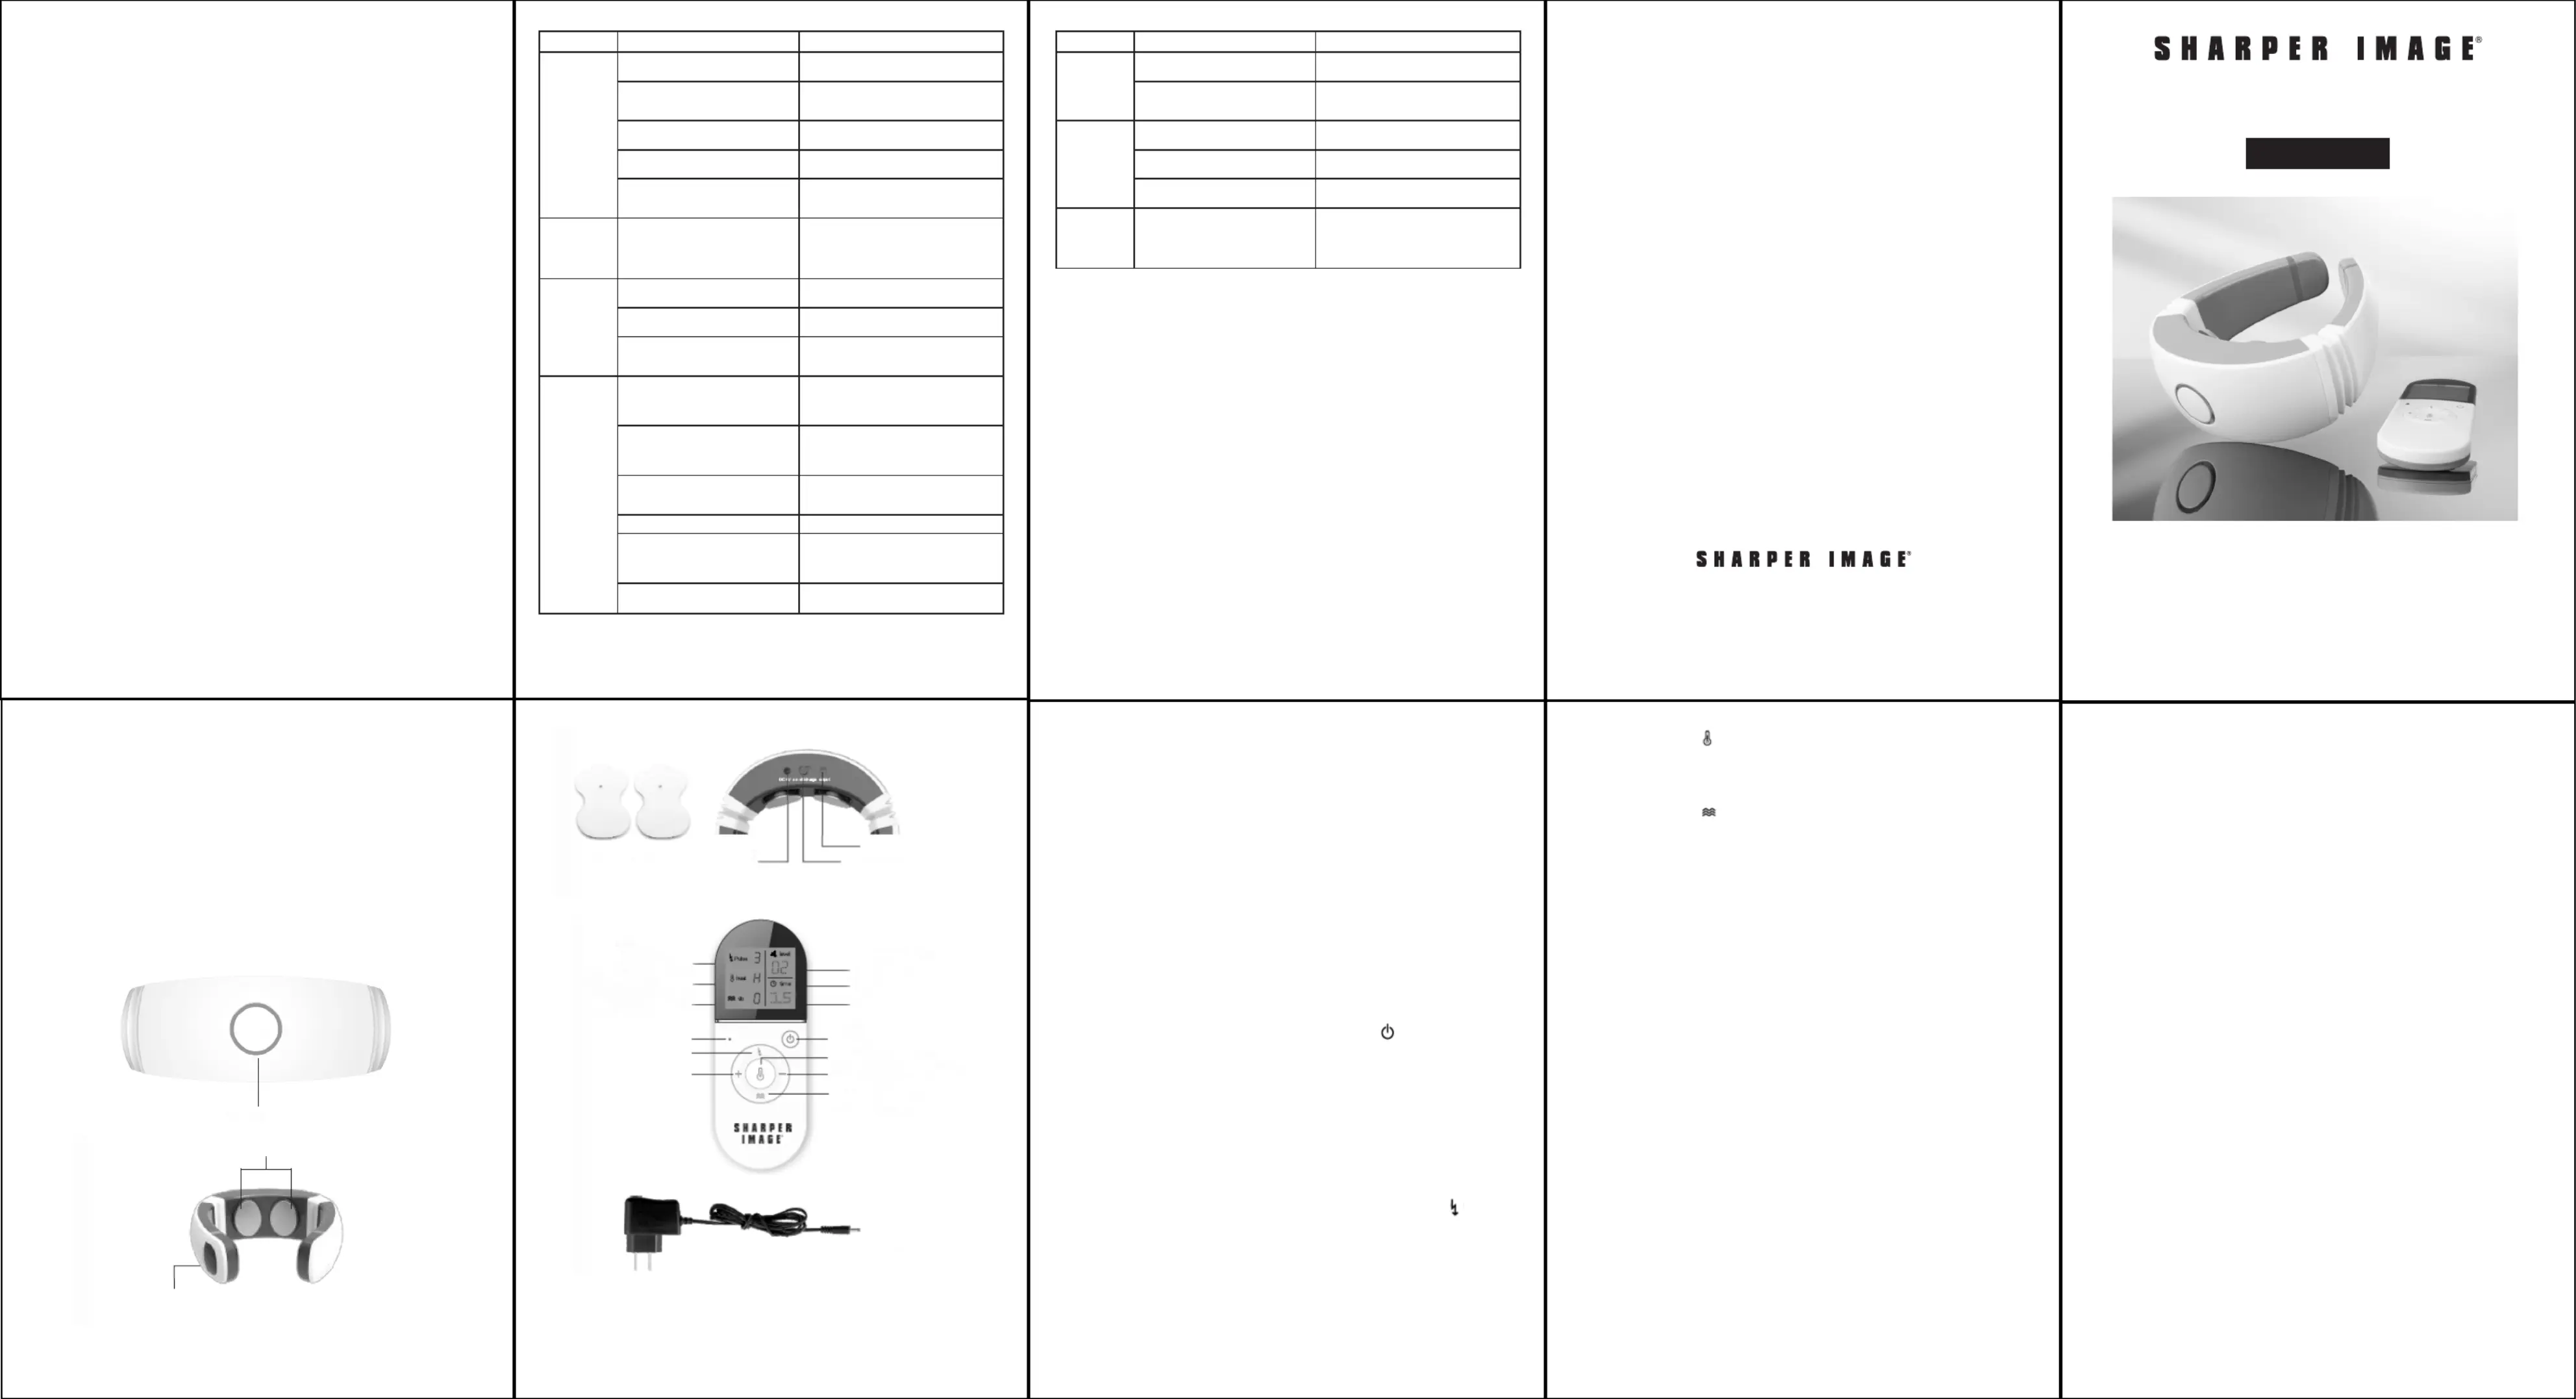
THERMAL MOXIBUSTION BUTTON
INTENSITY DECREASE BUTTON
INFRARED RAY SENDING WINDOW
ELECTRIC IMPULSE MASSAGE BUTTON
INTENSITY INCREASE BUTTON
INFRARED RAY RECEIVING WINDOW
PROBLEM POSSIBLE CAUSE SOLUTION
Check if its toggle switch is
Please shift its toggle switch to “ON”.
Check if the IR sending window on the
remote control aims at the IR receiving
Please aim at the receiving window first and
Check if the remote control display is on. If the display is not on replace the CR2032
button battery in the remote control.
Check if the built-in rechargeable battery
If the battery is low charge it.
Check if the charging is normal. Connect the power adapter properly. If it is
properly connected, the charging indicator will
See if the power adapter is properly
Insert the plug of the power adapter properly.
Check to see if the toggle switch of the
massager is shifted to “Charge” position.
Confirm its toggle switch is shifted to “Charge”
Check to see if the electrodes contact
The electrode slices must contact close to your
Check if there are some hairs, clothes,
accessories, etc. at the contact area of
electrode slices and your skin.
Remove or separate such objects.
Check to see if the massage intensity is
The intensity is defaulted to Level 1 when
booting and needs adjusting; or some users are
not sensitive to the intensity in Level 1 to 2 and
could increase the intensity properly.
Check to see if the electrode slices contact
Wet your neck skin with a wet towel first and
then contact the electrode slices close to the
skin, and then adjust properly the intensity and
The massage lasts too long. Use the massager for 10 to 20 minutes with
every use. Do not exceed using the device twice
Adjust the massage intensity. Properly reduce the intensity.
Check to see if your skin is allergic to
If your skin has a history of allergic reactions
reduce the massage time; if serious, please stop
using the massager and seek for desensitization
The cold weather causes your skin to
Wet your skin and the surface of electrode slices
PROBLEM POSSIBLE CAUSE SOLUTION
Use the massager after staying up late. Please use it the next day as the electrolyte
reduces after staying up late.
Check to see if there are some hairs
or accessories at the contact area of
electrodes and your skin.
Please remove or separate the accessories
Make sure your skin contact
is close to electrode slices.
Contact electrodes close to your skin and then
Check if there is some dirt or oil
stain on electrode slices.
Check if the rechargeable
If it’s running low, please use an external power
supply to provide the power.
Pay attention to any tingling while in use
and monitor products used.
Stop using the massager and the red mark will
generally disappear in 3 to 5 days.


