TurboChef Single Batch Bruksanvisning
Les nedenfor 📖 manual på norsk for TurboChef Single Batch (2 sider) i kategorien ovn. Denne guiden var nyttig for 22 personer og ble vurdert med 4.9 stjerner i gjennomsnitt av 11.5 brukere
Side 1/2
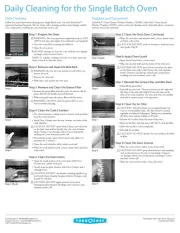
Daily Cleaning for the Single Batch Oven
Follow the steps below when cleaning your Single Batch oven. Use only TurboChef ®-
approved cleaning chemicals. e use of any other cleaning products may damage critical
oven components, resulting in a non-warranty service call.
TurboChef ® Oven Cleaner (Product Number: 103180), TurboChef ® Oven Guard
(Product Number: 103181), nylon scrub pad, cleaning towel, disposable gloves, protective
eyewear, dust mask (optional)
Step 5: Clean the Oven Door, Continued
• Wipe the oven door and window with a clean, damp towel
and then a dry towel.
CAUTION: DO NOT scrub or attempt to clean the oven
door gasket (Fig B).
Step 6: Apply Oven Guard
• Spray Oven Guard onto a clean towel.
• Wipe the interior walls and the inside of the oven door.
CAUTION: DO NOT spray Oven Guard into the holes
on the back oven wall or directly into the cook chamber
lamps. Doing so can damage critical oven components,
resulting in a non-warranty service call.
Step 7: Reinstall the Grease Filter and Wire Rack
• Reinstall the grease lter.
• Reinstall the wire rack. ere are notches on the right and
left sides of the wire rack which t over the pins on the
sides of the cook chamber. e wire rack must be installed
correctly to ensure proper oven operation.
Step 8: Clean the Air Filter
CAUTION: TurboChef does not recognize blocked air
vents as a warrantable claim. e lter must be cleaned
regularly or replaced if damaged. During oven operation,
the lter must remain in place at all times.
• Remove the air lter from the back of the oven.
• Rinse the air lter with hot water. DO NOT scrub the lter.
• Allow the air lter to dry completely.
• Reinstall the air lter.
CAUTION: DO NOT Operate the oven without the lter
in place.
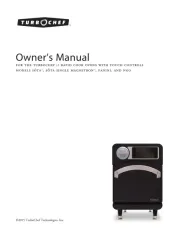
Step 9: Clean the Oven Exterior
• Wipe the oven exterior with a clean, damp towel.
CAUTION: DO NOT spray chemicals into any openings,
such as the louvers on the side or rear panels. Doing so
can damage critical oven components, resulting in a non-
warranty service call.
• Wipe the oven exterior with a clean, dry towel.
Part Number: DOC-1602 / Rev A / May 2017
Country Code: NA/EU
Customer Service: 800.90TURBO (within U.S.)
Customer Service: +1 214-379-6000 (outside U.S.)
©2017 TurboChef Technologies, Inc.
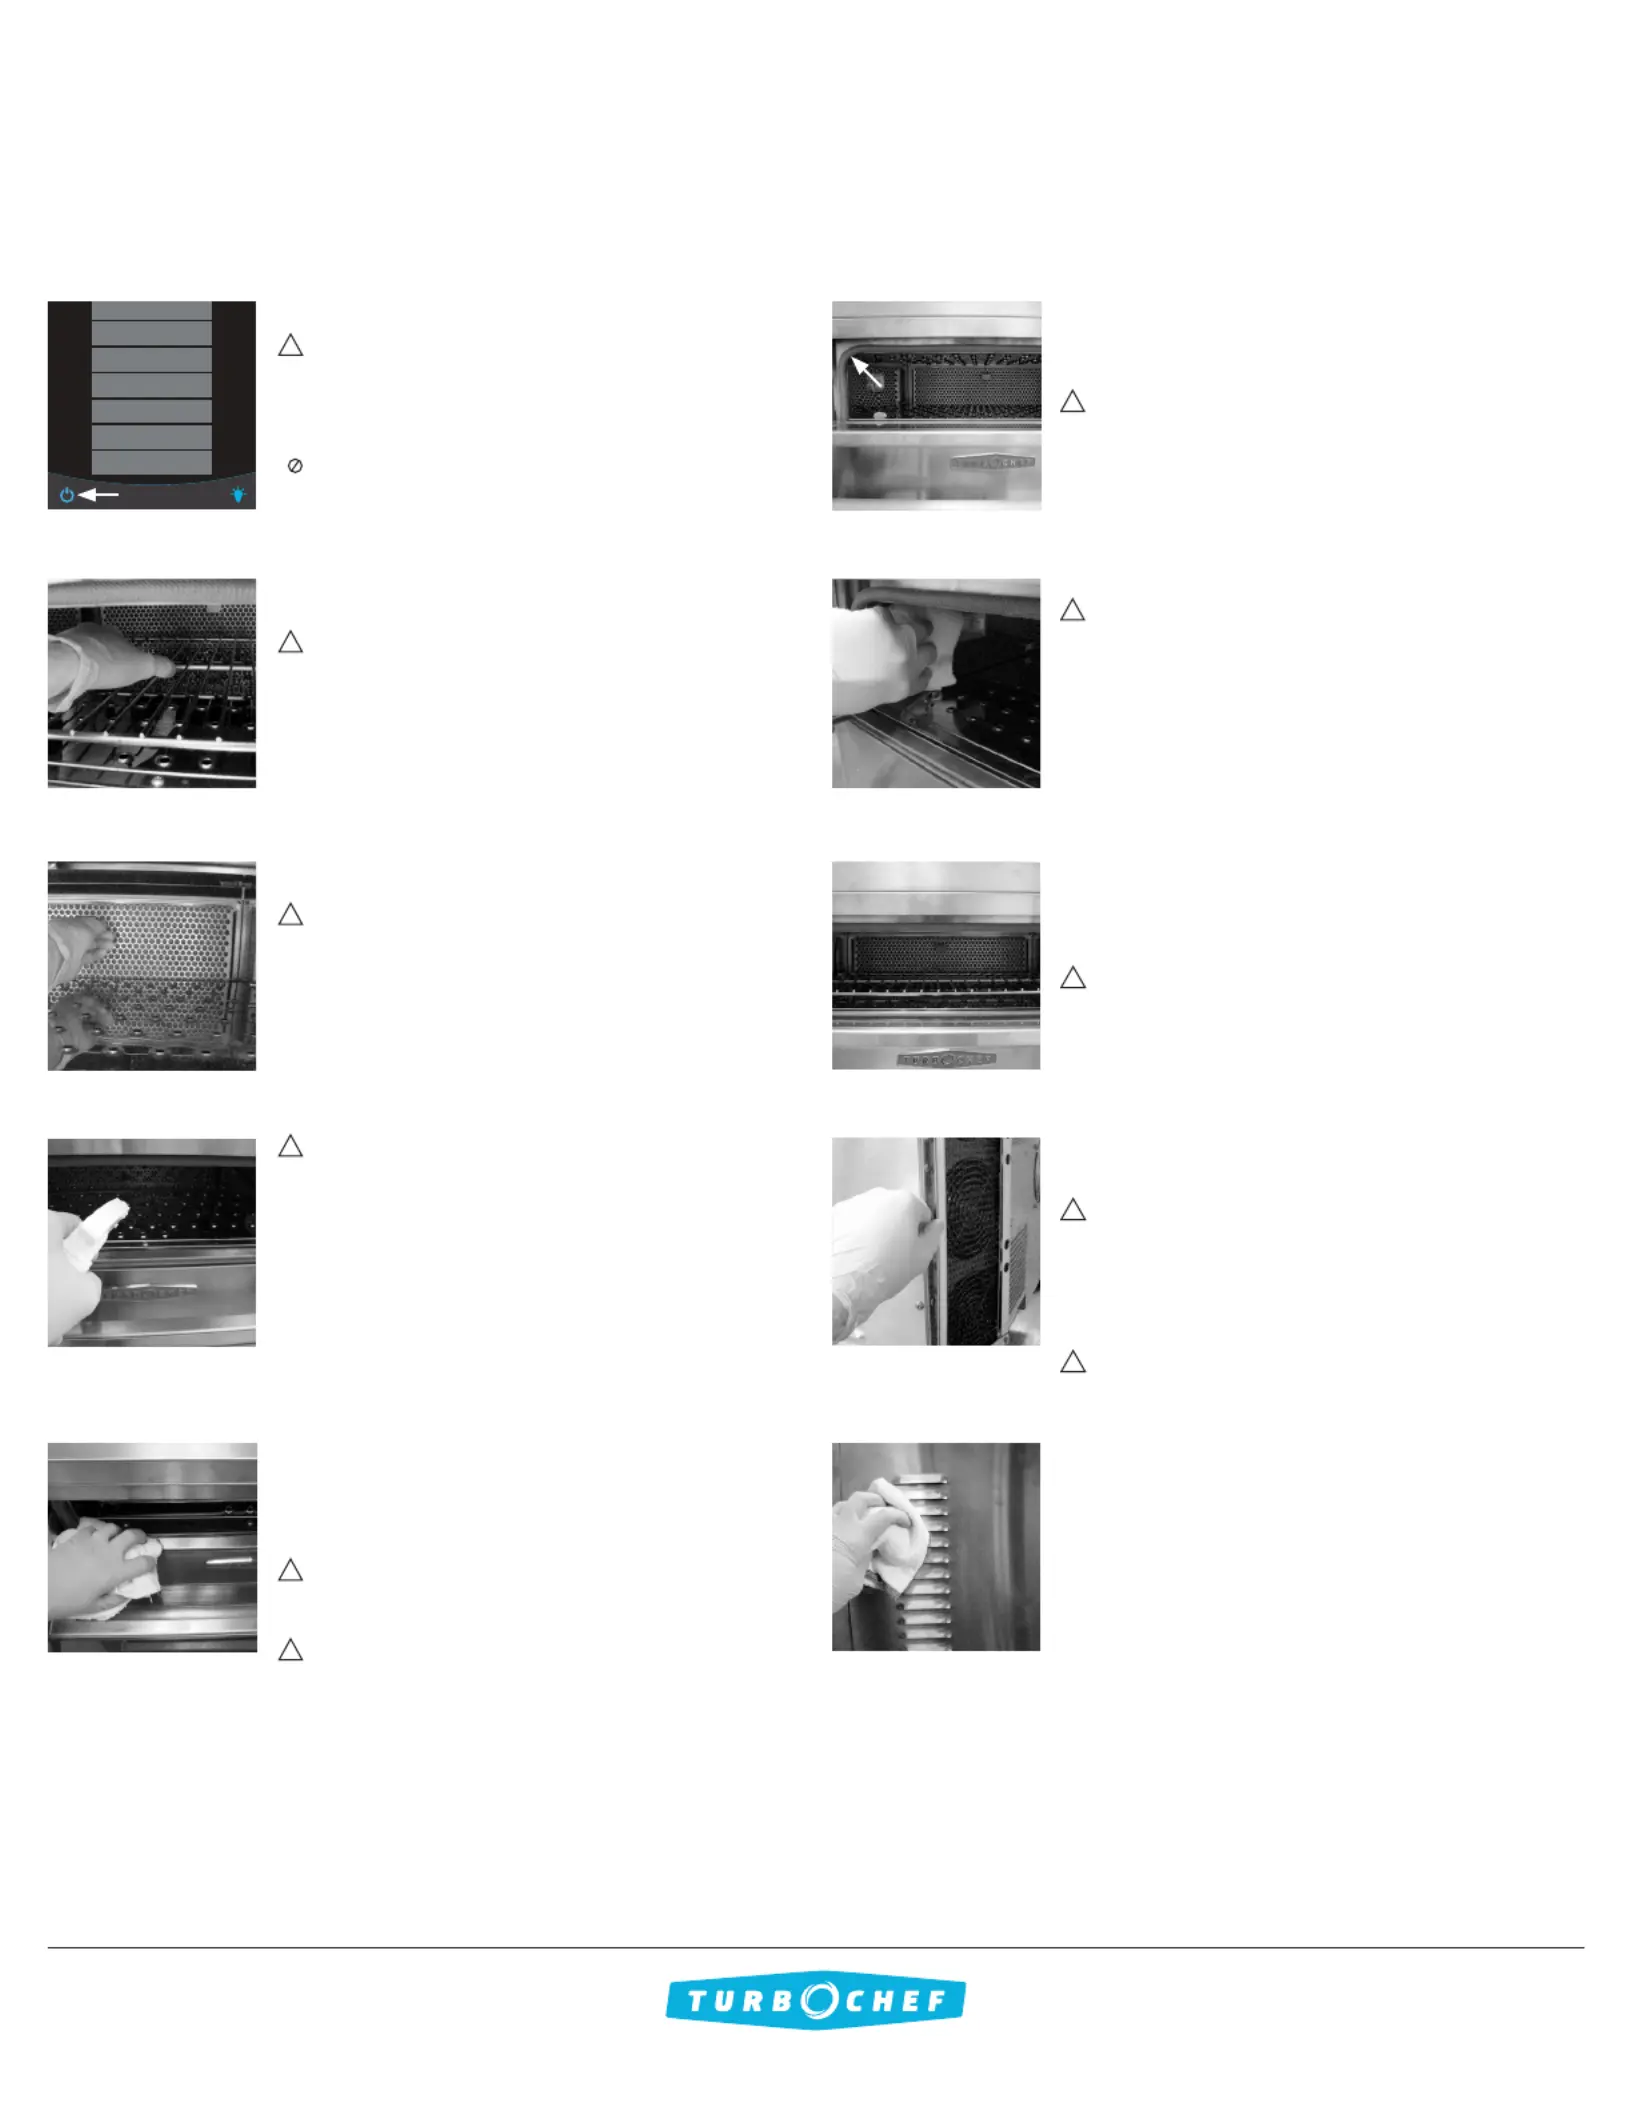
Step 1: Prepare the Oven
WARNING: e oven operates at temperatures up to 550°F
(285°C) and may cause injury if not allowed to cool properly.
• Turn the oven off by touching the Off icon.
• Open the oven doors.
DO NOT attempt to clean the oven until the oven display
no longer reads .
NOTE: To expedite cooking, leave the oven door open and
insert a tray of ice into the cavity.
Step 2: Remove and Clean the Wire Rack
WARNING: Be sure the oven interior is cool before you
remove the rack.
• Remove the wire rack.
• Wash rinse, and sanitize the wire rack.
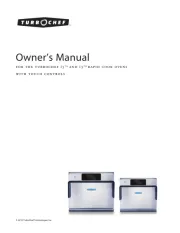
Step 3: Remove and Clean the Grease Filter
• Remove the grease lter from the oven. To remove, lift the
grease lter by the handle and pull forward.
• Wash and gently rinse the grease lter with hot water.
WARNING: DO NOT scrub the grease lter or use a
water jet when cleaning.
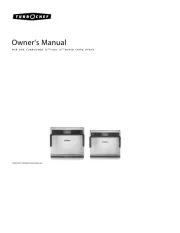
Step 4: Clean the Cook Chamber
• Use a food vacuum or damp towel to remove food particles
from the cook chamber.
• Spray Oven Cleaner onto the top, bottom, and sides of the
cook chamber.
CAUTION: DO NOT spray Oven Cleaner into the holes
on the back oven wall or directly into the cook chamber
lamps. Doing so can damage critical oven components,
resulting in a non-warranty service call.
• For stubborn stains, spray Oven Cleaner and allow it to
penetrate for 5 minutes.
• Clean the cook chamber with a nylon scrub pad.
• Wipe the cook chamber with a clean, damp towel and then
a dry towel.
Step 5: Clean the Oven Doors
• Clean the metal portion of the oven door with Oven
Cleaner and a nylon scrub pad.
• Gently clean the glass window with Oven Cleaner and a
cleaning towel.
CAUTION: DO NOT use abrasive cleaning supplies (e.g.
steel wool) when cleaning the glass window. Doing so may
scratch the window.
CAUTION: DO NOT apply excessive force when
cleaning the glass window. Breakage may result in a non-
warranty service call.
!
!
!
!
!
!
!
!
!
!
tm
!
Step 1
Step 2
Step 4
Step3
Daily Cleaning Supplies and Equipment
Step 5 (Fig A)
Step 5 (Fig B)
Gasket
Step 6
Step 7
Step 8
Step 9
Group 4
Group 5
Group 6
Group 7
Group 8
Group 10
Group 9
O Icon
Produkspesifikasjoner
| Merke: | TurboChef |
| Kategori: | ovn |
| Modell: | Single Batch |
Trenger du hjelp?
Hvis du trenger hjelp med TurboChef Single Batch still et spørsmål nedenfor, og andre brukere vil svare deg
ovn TurboChef Manualer
13 August 2025
13 August 2025
13 August 2025

13 August 2025

13 August 2025

12 August 2025
12 August 2025
12 August 2025
12 August 2025
12 August 2025
ovn Manualer
- Barazza
- Hisense
- Vestfrost
- Cata
- Roesle
- Traeger
- Avanti
- Innoliving
- Flavel
- Gram
- Kenmore
- Jenn-Air
- Nedis
- Vox
- Frigidaire
Nyeste ovn Manualer
23 Oktober 2025

21 Oktober 2025

20 Oktober 2025

19 Oktober 2025

18 Oktober 2025

18 Oktober 2025

18 Oktober 2025

17 Oktober 2025
17 Oktober 2025
16 Oktober 2025