Valera Premium 1200 Compact Bruksanvisning
Les nedenfor 📖 manual på norsk for Valera Premium 1200 Compact (74 sider) i kategorien Hårføner. Denne guiden var nyttig for 2 personer og ble vurdert med 4.5 stjerner i gjennomsnitt av 2 brukere
Side 1/74

Stamp and signature of delear
Stempel und Unterschrift des Händlers
Cachet et signature du commerçant
Timbro e firma del rivenditore
Sello y firma del proveedor
Stempel en handtekening van de handelaar
Carimbo e firma do revendedor
Selgerens stempel og underskrift
Återförsäljarens stämpel och namnteckninge
Myyjän leima ja allekirjoitus
Forhandlerens stempel og underskrift
Eladó pecsétje és aláírása
razítko a podpis prodejce
Tampila i semnãtura vãnzãtorului
Pieczec i podpis sprzedawcyù
Satıcının mühür ve imzası
Guarantee card
Garantiekarte
Carte de garantie
Certificato di garanzia
Tarjeta de garantià
Garantiekarte
Certificado de garantia
Garantibevis
Garantibevis
Takuutodistus
Garantibevis
Certificat de garanţie
Záruční list
Záručný list
Garancialevél
Karta Gwarancyijna
Garanti sertificası
UK
RU
ZH
AR
00060633-06/14
INSTRUCTIONS FOR USE AND INSTALLATION
BEDIENUNGSANLEITUNG UND MONTAGEANWEISUNG
INSTRUCTIONS D’UTILISATION ET DE MONTAGE
ISTRUZIONI PER L’USO E PER IL MONTAGGIO
INSTRUCCIONES DE USO Y MONTAJE
GEBRUIKAANWIJZINGEN EN INSTALLATIEAANWIJZINGEN
INSTRUÇÕES DE USO E INSTALAÇÃO
BRUKSANVISNING OG INSTALLASJONSINSTRUKSJONER
INSTRUKTIONER FÖR INSTALLATION OCH ANVÄNDNING
KÄYTTÖ- JA ASENNUSOHJEET
BETJENINGS- OG INSTALLATIONSVEJLEDNING
HASZNÁLATI ÉS TELEPÍTÉSI ÚTMUTATÓ
NÁVOD K POUŽITÍ A INSTALACI
NÁVOD NA OBSLUHU A INŠTALÁCIU
INSTRUCT
,
IUNI DE FOLOSIRE SI INSTRUCT
,
IUNI DE INSTALARE
INSTRUKCJA OBSŁUGI I INSTALACJI
Οδηγίες χρήσης και εγκατάστασης
KULLANIM VE MONTAJ TALIMATLARI
ІНСТРУКЦІЯ ПО ЕКСПЛУАТАЦІЇ ТА МОНТАЖУ
ИНСТРУКЦИИ ПО ЭКСПЛУАТАЦИИ И УСТАНОВКЕ
安装及使用说明
Type: 533.. 542.. 554.. 561..
Wall holder
Wandhalter
Support mural
Supporto a muro
Soporte de pared
Muursteupt
Suporte de parede
Veggholder
Vägghållare
Seinäteline
Vægbeslag
Fali tartó
Nástěnný držák
Držiak na stenu
Suport de perete
Uchwyt naścienny
Βάσης τοίχου
Duvara monte
Настінний утримувач
Настенный держатель
壁挂底座
Hairdryer
Haartrockner
Sèche-cheveux
Asciugacapelli
Secador
Haardroger
Secador de cabelo
Hårtørker
Hårtork
Hiustenkuivaaja
Hårtørrer
Hajszárító
Vysoušeč vlasů
Sušič vlasov
Uscător de păr
Suszarka do włosów
Σεσουάρ
Saç kurutma makinasi
Фен
Фен
吹风机
Type: 036 038A 038B
ΕΎϤϴϠόΗϝΎϤόΘγϻϭ ΐϴϛήΘϟ
ΔϴτΎΣ ΔϣΎϋΩ
Made by Ligo Electric SA - 6853 Ligornetto / Mendrisio - Switzerland
Valera is a registered trademark of Ligo Electric S.A. - Switzerland
EN
Hairdryer -
Wall holder
Translation from original instructions 6
DE
Haartrockner -
Wandhalter
Übersetzung der Originalanweisungen 9
FR
Sèche-cheveux -
Support mural
Traductions à partir des instructions d'origine 12
IT
Asciugacapelli -
Supporto a muro
Istruzioni originali 15
ES
Secador -
Soporte de pared
Traducción de las instrucciones originales 18
NL
Haardroger -
Muursteun
Vertaling van de originele instructies 21
PT
Secador de cabelo - Suporte de parede
Tradução das instruções originais
24
NO
Hårtørker - Veggholder
Oversettelse av original bruksanvisning
27
SV
Hårtork - Vägghållare
Översättningar från originalinstruktioner
30
FI
Hiustenkuivaaja - Seinäteline
Alkuperäisen käyttöohjeen käännös
33
DA
Hårtørrer - Vægbeslag
Oversættelser fra oprindelige anvisninger
36
HU
Hajszárító - Fali tartó
Az eredeti utasítások fordítása
39
CS
Vysoušeč vlasů - Nástěnný držák
Překlad originálních pokynů
42
SK
Sušič vlasov - Držiak na stenu
Preklad z originálneho návodu
45
RO
Uscător de păr -
Suport de perete
Traducerea instrucţiunilor originale 48
PL
Suszarka do włosów - Uchwyt naścienny
Tłumaczenie oryginalnej instrukcji
51
EL
-
μεταφράσεις από τις αρχικές οδηγίες 54
HE
57
TR
Saç kurutma makinasi - Duvara monte
Orijinal talimatların çevirisi 60
UK
Фен -
Переклад з оригінальних інструкцій 63
RU
Фен -
Настенный держатель
Перевод с оригинальных инструкций 66
ZH
吹风机 -
壁挂底座
翻译自原文说明
69
SA
-
72
ΔϴϠλϷ ΕΎϤϴϠόΘϟ Ϧϣ ΔϤΟήΗ
ΔϴτΎΣ ΔϣΎϋ
Ω
ήόθϟ ϒϔΠϣ
ʤʰʷʺʤʥ ʹʥʮʩʹ ʺʥʠʸʥʤ
ʸʲʩʹ ʹʡʩʩʮ
ʤʩʩ
ʬ
ʺ ʯʷʺʮ
ʸʲʩʹ ʹʡʩʩʮ - ʤʩʩʬʺ ʯʷʺʮ
00060633 cop_giu2014:Layout 1 25/06/2014 8.53 Pagina 1

English
Mod. Nr.
Date of purchase
Kaufdatum
Date d’achat
Data d’acquisto
Fecha de adquisición
Datum aankoop
Data de compra
Innkjøpsdato
Inköpsdatum
Ostopäivämäärä
Købsdato
Eladás dátuma
Datum prodeje
Data cumpãrãrii
Dátum nákupu
Data zakupu
Satın alma tarihi
Ligo Electric SA - 6853 Ligornetto / Mendrisio - Switzerland
158 mm
(Mod. 533..)
148 mm
(Mod. 554..)
245 mm
(Mod. 533.., 542..)
225 mm
(Mod. 554..)
183 mm
(Mod. 533.., 542..)
160 mm
(Mod. 554..)
Name and full address of purchaser
Name und vollständige Anschrift des Käufers
Nom et adresse completè de l’acheteur
Nome e indirizzo completo dell’acquirente
Nombre y dirección completa del comprador
Naam en adres van de consument
Nome e endereço do cliente
Kjøperens fullstendige navn og adresse
Köparens namn och fullständig adress
Ostajan nimi ja täydellinen osoite
Køberens fulde navn og adresse
Vevo˝ neve éstelies cime
Jméno a adresa záhaznika
Meno a celá adresa kupujúceho/zákazníka
Numele i adresa completa˘ a compãrãtorului
Nazwisko oraz pelny adres kupujacego
Alıcının tam ismi ve adresi
• If the hair
vicinity to
ASSEMBLY AND OPERATING INSTRUCTIONS
Read these instructions thoroughly. Available also on www.valera.com
CAUTION
• For additional protection, the installation of a residual current device (RCD)
having a rated residual operating current not exceeding 30mA is advisable
in the electrical circuit supplying the bathroom. Ask your installer for
advice.
• Make sure the electrical system is fitted with a device which guarantees
omnipolar disconnection from the electricity mains under category III
overvoltage conditions.
• Make sure the unit is perfectly dry before using it.
• WARNING: Do not use this appliance near bathtubs, showers,
basins or other vessels containing water.
• This appliance can be used by children from 8 years of age and over,
and by persons with limited physical, sensory or mental abilities or who
lack the relevant experience and knowledge, if they are suitably
supervised or have been educated to use the appliance safely and made
aware of the associated risks.
• Do not allow children to play with the appliance.
• Children must not perform cleaning and maintenance procedures unless
supervised.
• Do not use your unit if it is not working properly. Do not try to repair this
electrical unit yourself, rather contact an authorized technician. If the supply
cord is damaged, it must be replaced by the manufacturer, its service agent
or a similarly qualified person in order to avoid a hazard.
• Plug the hairdryer into an alternating current outlet only, and make sure
that the voltage of your electricity supply is the same as that indicated
on the rating plate of the appliance.
• Do not immerse in water or other liquids.
• Never put the appliance in a place where it could fall into water or in other
liquids.
• Do not try to salvage an electrical appliance which has fallen into water.
• Turn the unit off when you put it down.
• Unplug the appliance when not in use, but never do it by pulling the cord.
• Remember to check regularly that the air inlet and outlet grills are clean.
• Allow your appliance to cool before storing away and do not wrap the
supply cord around the hairdryer in storage.
6
00060633 cop_giu2014:Layout 1 25/06/2014 8.53 Pagina 2

7
INSTALLATION INSTRUCTIONS
Wall holder for hairdryer
Type 036 - 038A - 038B
Type 036
Front housing model.
Type 038A
Vertical housing model.
Type 038B
As the 038A but with no switch.
Installation of wall holder
This wall holder must only be installed by a qualified
electrician in conformity to applicable safety standards.
The wall holder may be installed in one of two ways:
A = connection to wall mains wiring
B = connection to surface mains wiring
Attention: before installing the wall holder always switch
off the general switch of your mains electricity.
For each pole a switch with a minimum break distance
between contacts of 3 mm must be fitted up-line of the
appliance.
Each time the appliance is opened, the switch must be used
to disconnect the appliance.
The connection wiring must be at least type H05VV-F
2x1,0 mm
2
.
Method A
IMPORTANT: Refer to the figures for the model you have
purchased.
1.Unscrew the screw (1) (fig. 1) and remove the cover from
the wall unit.
2.Break the plastic membrane (3) at the back of the wall unit
(fig. 3A).
3.Route the main power cable from the wall (4) through the
hole left by the plastic membrane (3) (fig. 3A).
4.Fix the back of the wall unit to the wall using the fixing
screws and wall plugs provided (fig. 2).
5.Remove the terminal strip (5). The input power cable (4)
and the output power cable (9) of hairdryer with max input
current of 10A,if not already connected, must be
connected to the terminal strip(5).
In mod. 036 the Neutral output cable(9) must be connected
to terminal strip(5) and the Line output cable (9) to terminal
strip (11).
6.Reposition the terminal strip. Tighten the cable clamp
(6 and 10) with its own screws. (fig. 3A). IMPORTANT:
This appliance is double insulated and has no ground
(earth) connection.
7.Fit the cover back on the wall unit with (1) (fig. 1).
8.Switch the power on at the mains switch. The hair dryer is
now ready to use.
Method B
IMPORTANT: Refer to the figures for the model you have
purchased.
1.Unscrew the screw (1) (fig. 1) and remove the cover from
the wall unit.
2.Break the plastic membrane (7) (fig. 3B).
3.Fix the back of the wall unit to the wall using the fixing
screws and wall plugs provided (fig. 2).
4.Route the input power cable (8) and the output power (9)
into the holes (fig. 3B).
5.Remove the terminal strip (5). The input power cable (8)
and the output power cable (9) of hairdryer with max input
current of 10A,if not already connected, must be
connected to the terminal strip(5).
In mod. 036 the Neutral output cable(9) must be connected
to terminal strip (5) and the Line output cable (9) to
terminal strip (11).
Reposition the terminal strip. Tighten the cable clamp (6 and
10) with its own screws. (fig. 3B). IMPORTANT: This
appliance is double insulated and has no ground (earth)
connection.
6.Fit the cover back on the wall unit with (1) (fig. 1).
7.Switch the power on at the mains switch. The hair dryer is
now ready to use.
INSTRUCTIONS FOR USE
Hairdryer with wall holder
Control Switches
Control switch on wall holder
(only for models equipped with a switch) rif. 2 fig. 1:
0-1 = Off/On
Hairdryer
Type 533.03 - 533.05 - 533.03/I - 533.05/I
542.05 - 542.06 - 542.14 - 561.22
Pushbutton:
ON=On/Off
(pressure must be maintained to operate the hairdryer)
Slide Switch
Cool=(low power)
1=(medium power)
2=(maximum power)
Hairdryer
Type 554.02 - 554.05 - 554.08 - 554.11
554.13
Pushbutton:
ON=On/Off (pressure must be maintained to operate the
hairdryer)
Slide Switch
1=(low power)
2=(maximum power)
Hardryer
Type 533.04 - 533.06 - 533.14 - 533.15
554.01 - 554.04 - 554.07 - 554.10
Pushbutton=On/Off
(pressure must be maintained to operate the hairdryer)
00060633 int_giu2014:Layout 1 26/06/2014 13.12 Pagina 7
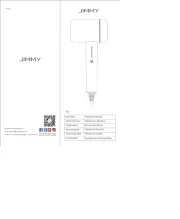
Produkspesifikasjoner
Merke: | Valera |
Kategori: | Hårføner |
Modell: | Premium 1200 Compact |
Ionisk funksjon: | Nei |
Produktfarge: | Hvit |
Kan monteres på vegg: | Ja |
Strøm: | 1200 W |
Antall hastighetsnivåer: | 1 |
Varmeinnstillinger: | 1 |
Opphengbar: | Hengeløkke |
Hengbar: | Ja |
Trenger du hjelp?
Hvis du trenger hjelp med Valera Premium 1200 Compact still et spørsmål nedenfor, og andre brukere vil svare deg
Hårføner Valera Manualer
19 August 2025
19 August 2025
19 August 2025
19 August 2025
19 August 2025
19 August 2025
19 August 2025
19 August 2025
29 Mars 2025
14 Mars 2025
Hårføner Manualer
- Hårføner Denver
- Hårføner Severin
- Hårføner Philips
- Hårføner Cecotec
- Hårføner Imarflex
- Hårføner Bomann
- Hårføner Solis
- Hårføner Create
- Hårføner G3 Ferrari
- Hårføner Conair
- Hårføner ETA
- Hårføner BaByliss
- Hårføner Panasonic
- Hårføner Vox
- Hårføner Westinghouse
- Hårføner Sencor
- Hårføner Khind
- Hårføner Taurus
- Hårføner Hyundai
- Hårføner Ufesa
- Hårføner Revamp
- Hårføner Scarlett
- Hårføner Rowenta
- Hårføner Braun
- Hårføner Tristar
- Hårføner Eldom
- Hårføner ECG
- Hårføner Shark
- Hårføner Innoliving
- Hårføner Mesko
- Hårføner Fagor
- Hårføner Tefal
- Hårføner Silvercrest
- Hårføner Trisa
- Hårføner Girmi
- Hårføner Physa
- Hårføner DPM
- Hårføner Sogo
- Hårføner Diforo
- Hårføner Comelec
- Hårføner Unold
- Hårføner Zelmer
- Hårføner Remington
- Hårføner Visage
- Hårføner Calor
- Hårføner Alpina
- Hårføner Aurora
- Hårføner Proficare
- Hårføner LAFE
- Hårføner WAD
- Hårføner Fripac
- Hårføner T3
- Hårføner Carmen
- Hårføner Team
- Hårføner Moser
Nyeste Hårføner Manualer
18 August 2025
18 August 2025
18 August 2025
18 August 2025
18 August 2025
18 August 2025
18 August 2025
16 August 2025
15 August 2025
15 August 2025