Vimar 46KIT.036C Bruksanvisning

Vimar Sikkerhetskamera 46KIT.036C

Les nedenfor 📖 manual på norsk for Vimar 46KIT.036C (29 sider) i kategorien Sikkerhetskamera. Denne guiden var nyttig for 2 personer og ble vurdert med 4.5 stjerner i gjennomsnitt av 2 brukere

Side 1/29
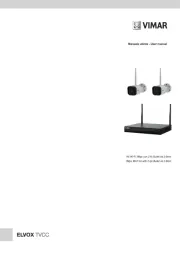
Manuale utente - User manual
Kit Wi-Fi 3Mpx con 2 tlc Bullet ob.3.6mm
3Mpx Wi-Fi kit with 2 ipc Bullet ob.3.6mm
46KIT.036C - 46242.036C
2
IT
EN
IndexIndice
1 - Caratteristiche ................................................................................. 3
2 - Installazione .................................................................................... 3
2.1 - Telecamera Wi-Fi ....................................................................... 4
2.2 - Suggerimenti per il posizionamento del registratore NVR ......... 5
2.3 - Collegare l'NVR al monitor ......................................................... 6
2.4 - Connessioni ............................................................................... 7
3 - Reset Login Password ................................................................... 8
4 - Preview ............................................................................................ 9
4.1 - Visione Live ................................................................................ 9
4.2 - Eventi di allarme del rilevamento AI ........................................... 10
4.3 - Barra di stato della telecamera selezionata ............................... 10
4.4 - Barra di navigazione della telecamera ..................................... 11
4.5 - Barra di stato NVR ...................................................................... 11
4.6 - Barra di navigazione visione Live .............................................. 11
5 - Funzione Playback .......................................................................... 12
5.1 - Playback .................................................................................... 12
5.2 - Riproduzione delle registrazioni di rilevamento AI ..................... 13
6 - Configurazione ................................................................................ 14
6.1-Impostazionigeneraliecongurazionedell'ora ......................... 14
6.2 - Impostazioni Network ................................................................. 14
6.3 - Impostazioni di archiviazione HDD ............................................ 15
6.4 - Aggiunta telecamera .................................................................. 16
6.5 - Impostazioni telecamera ............................................................ 17
6.6 - Impostazione utente ................................................................... 18
6.7-Impostazionipredenite ............................................................. 18
6.8 - Impostazione di sistema .......................................................... 18
7 - Telecamere aggiuntive 46242.036C ............................................... 19
7.1 - Alimentare la telecamera ........................................................... 19
7.2 - Aggiungere una telecamera ....................................................... 19
8 - Funzione DST (ora legale) .............................................................. 21
9 - Utilizzo con App "VIEW Product" .................................................. 22
9.1 - Installare l’App sullo smartphone ............................................... 22
9.2 - Primo accesso ........................................................................... 22
9.3 - Aggiungi un NVR ....................................................................... 22
1 - Characteristics ................................................................................ 3
2 - Installation ....................................................................................... 3
2.1 - Wi-Fi camera .............................................................................. 4
2.2 - Suggestions for positioning the NVR recorder ........................... 5
2.3 - Connect NVR to screen ............................................................. 6
2.4 - Connections ............................................................................... 7
3 - Reset Login Password ................................................................... 8
4 - Preview Function ............................................................................ 9
4.1 - Live View .................................................................................... 9
4.2 - Alarm records of AI detection ...................................................... 10
4.3 - Status bar of selected camera .................................................... 10
4.4 - Navigation bar of selected camera ............................................ 11
4.5 - Status bar of NVR ....................................................................... 11
4.6 - Navigation bar of live view ......................................................... 11
5 - Playback Function ........................................................................... 12
5.1 - Playback .................................................................................... 12
5.2 - Playbacks of AI detection ............................................................ 13
6 - Setting Function .............................................................................. 14
6.1 - General setting &Time setting .................................................... 14
6.2 - Network setting .......................................................................... 14
6.3 - HDD Storage setting .................................................................. 15
6.4 - Camera adding .......................................................................... 16
6.5 - Camera setting .......................................................................... 17
6.6 - User setting ................................................................................ 18
6.7 - Default setting ............................................................................ 18
6.8 - System setting ........................................................................... 18
7 - Additional cameras 46242.036C ..................................................... 19
7.1 - Power up the camera ................................................................. 19
7.2 - Adding a camera ........................................................................ 19
8 - DST(Daylight Saving Time) Function ............................................ 21
9 - Use with "VIEW Product" App ....................................................... 22
9.1 - Install the App on the smartphone ............................................. 22
9.2 - First access ................................................................................ 22
9.3 - Add a NVR ................................................................................ 22
46KIT.036C - 46242.036C
3
IT
EN
NVR
LED di stato:
- Lucerossassa:NVRsistaavviando/anomaliarete
- Lucerossalampeggiante:inattessacongurazioneinApp
- Luceblussaaccesa:NVRfunzionacorrettamente
LED HDD
Luce blu lampeggiante: dati in lettura o scrittura
Audio: per ascoltare il suono su altoparlanti o auricolari
VGA: per collegare monitor VGA
HDMI: percollegaremonitoradaltadenizione
WAN: porta Ethernet. Collegamento al cavo di rete
USB: collegamento a mouse o chiavetta USB
Power: DC12V/2A
1 - Characteristics
LED di stato
Status LED
LED HDD
HDD LED
Audio VGA HDMI WAN USB Power
1 - Caratteristiche
NVR
Telecamera Camera
LED di stato:
- Luce rossa lampeggiante: in attesa connessione di rete
- Luceblussaaccesa:latelecamerafunzionacorrettamente
- Lucerossassa:anomaliaconnessionedirete
Microfono:
Per catturare l'audio ambientale
Reset:
Tenere premuto per 5 secondi per ripristinare la telecamera.
Leimpostazionitornerannoaivaloripredenitidifabbrica.
NOTA: SD card non supportata.
Status light:
- Solidredlighton:NVRisstartingup/networkanomaly
- Blinkingredlight:waitforAPPconguration
- Solid blue light on: NVR is working correctly
HDD light
Blinking blue light: Data is being read or written
Audio: Connect to speakers or earphones to hear sound
VGA: VGA video output port
HDMI:Highdenitionvideooutputport
WAN: Ethernet port. Connect to the network cable
USB: Connect to mouse, USB storage device
Power:DC12V/2A
Status light:
- Blinking red light: wait for network connection (fast)
- Solid blue light on: camera is working correctly
- Solid red light on: network is malfunctional
Microphone:
Capture sound for your video
Reset:
Pressandholdfor5secondstoresetthecamera(ifyouhavemodiedsettings,
they will return to factory defaults).
NOTE: sd card not supported.
Dati tecnici
Wi-Fi 2.4GHzWIFI(IEEE802.11b/g/n)
Range di frequenza 2412-2472 MHz
Potenza RF trasmessa < 100 mW (20dBm)
Technical data
Wireless 2.4GHzWIFI(IEEE802.11b/g/n)
Frequency range 2412-2472 MHz
Transmitted RF power < 100 mW (20dBm)
Microfono
Microphone
LED di stato
Status light
LED IR
IR LED
Reset
Reset
Speaker
Speaker

Produkspesifikasjoner

Merke: Vimar
Kategori: Sikkerhetskamera
Modell: 46KIT.036C

Trenger du hjelp?

Hvis du trenger hjelp med Vimar 46KIT.036C still et spørsmål nedenfor, og andre brukere vil svare deg


Sikkerhetskamera Vimar Manualer
Sikkerhetskamera Manualer

Nyeste Sikkerhetskamera Manualer