Wilbur Curtis ILGD-10 Bruksanvisning
Wilbur Curtis
kaffemaskin
ILGD-10
Les nedenfor 📖 manual på norsk for Wilbur Curtis ILGD-10 (5 sider) i kategorien kaffemaskin. Denne guiden var nyttig for 13 personer og ble vurdert med 3.7 stjerner i gjennomsnitt av 7 brukere
Side 1/5
F ind out more
on the web.
WILBURCURTIS.COM
1
F ind out more
on the web.
WILBURCURTIS.COM
WILBUR CURTIS COMPANY
Montebello, CA 90640
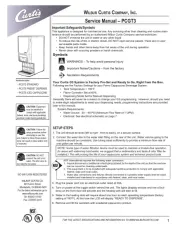
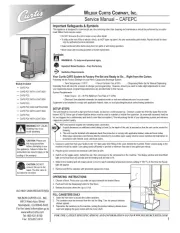
Models Included
ILGD
TL-ILGD
CAUTION: Please use
this setup procedure
before attempting to use
this grinder. Failure to follow the
instructions can result in injury or the
voiding of the warranty.
WARNING TO AVOID
SCALDING, Do not
remove brewcone whil
brew light is ashing.
ISO 9001 REGISTERED
C
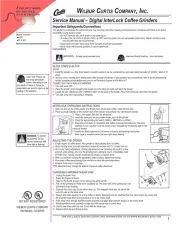
Service Manual – Digital InterLock Coffee Grinders
For the Latest speciFications and inFormation go to www.wiLburcurtis.com
This appliance is designed for commercial use. Any servicing other than cleaning and maintenance should be performed by an autho-
rized Wilbur Curtis service center.
•DoNOTimmersetheunitinwateroranyotherliquid
•Toreducetheriskofreorelectricshock,doNOTopentoppanel.Nouserserviceablepartsinside.Repairshouldbedone
only by authorized service personnel.
•Keephandsandotheritemsawayfromhotpartsofunitduringoperation.
•Nevercleanwithscouringpowdersorharshimplements.
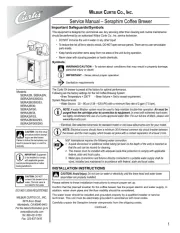
Important Safeguards/Conventions
Conventions
WARNINGS–Tohelpavoidpersonalinjury ImportantNotes/Cautions–fromthefactory
QUICKSTART&SETUP
SETUP
1. Installthegrinderonarm,levelbaseinalocationwhereitcanbeconnectedtoagroundedelectricaloutletof120VAC,ratedat15
amps.
2. Testtheunitbyrunningsomewholebeancoffeethroughthegrinder.Ifanyproblemsareencountered,refertothetroubleshooting
sectioncompleteatwww.wilburcurtis.comorcallTechnicalSupportat800-995-0417.
CONNECTINGTHEINTERLOCKGRINDER
1. TurnbothunitsOFF.
2. PlacethegrindercloseenoughtothebrewersoittheInterLockcablewillreachthebrewer.
3. Locatethejack,labeledCLASS2WIRINGONLY,onthebackofthebrewer.PlugintheInterLockcabelfromthegrinder.
4. TurnbothunitsON.Interlockingiscomplete.
INTERLOCKOPERATINGINSTRUCTIONS
1. Openthedoorontopofthegrinderandllwithfreshwholebeancoffee.Closethetopdoor.
2. PlaceanemptySatelliteonthewarmerdeckofthebrewerandpreheatitbyswitchingonwarmer.
3.Placeanewpaperlterintothebrewcone.
4. Insertthebrewconeintothebasketholderarmsonthegrinder.
5. Presstheappropriategrindswitch(SMALL,MEDIUMorLARGE).
6. Allowthegrindmotortocompletelystopbeforeremovingthebrewcone.Thebrew
selectionisnow“Locked”inatthebrewerandisindicatedbytheashinglightonthe
InterLockbrewer.
7.Transferthelledbrewconetothebrewerandpresstheashingbrewbutton.
Brewcycleiscompletewhenthebrewlightstopsashing.
ADJUSTINGTHEGRINDS
1. Emptyhopperofcoffeebeans.Rungrindertocleargrindingburrsofcoffee.
2. Openhousingcovertolocateadjustmentscrew(8)andlocknut(7).Loosenlocknut.
3. Runmotorduringadjustment.Turningadjustmentscrewclockwisewillresultinaner
grind(if,whileturning,youhearthegrindingburrsstartingtotouch,immediately,back
off1/8thturn).Turningcounterclockwisewillproduceacoarsergrind.
4. Withascrewdriverholdingtheadjustmentscrewinplace,tightenthelocknut.
5. Runsomecoffeebeansthroughthemachinetocheckthegrindadjustment.
6. Replacefrontcoveronmachine.
*Thisadjustmentmaychangetheamountofgroundcoffeedispensed.
CHANGINGABROKENSHEARDISK
1. Unplugthepowercord.
2. Emptythehopperofbeans.
3. Takeoutthethumbscrews(10)toremovethegrindcap(6).
4. Pulloutthegrindingburr/feedwormassembly(2).Theinnerhalfofthegrindingburrset
willremaininthehousing.
5. Separatetheshearcap(5)andsheardrive(3).Thesnappedsheardisk(4)shouldfall
out of it’s slot on the shear drive.
6. Inspectandcleanhousing(1)ofanycoffeeordebris.Especiallylookforanythingthatmayhavebrokenthesheardisk.
7. Re-insertthefeedwormandgrindingburrontothemotorshaft.
8. Pushsheardrivethroughburr/feedwormassemblyandalignlargeslotwithtongueonthemotorshaft.
9. Rotateburr/feedwormassemblytoalignslotwithnarrowslotonsheardrive.
10.Insertanewsheardiskintoslot.Coverwiththeshearcap.
11. Replacegrindcapandthumbscrews.
W C C , i .ilbur urtis ompany nC
Produkspesifikasjoner
| Merke: | Wilbur Curtis |
| Kategori: | kaffemaskin |
| Modell: | ILGD-10 |
Trenger du hjelp?
Hvis du trenger hjelp med Wilbur Curtis ILGD-10 still et spørsmål nedenfor, og andre brukere vil svare deg
kaffemaskin Wilbur Curtis Manualer

25 August 2025
24 August 2025
24 August 2025

23 August 2025

23 August 2025
23 August 2025
23 August 2025
23 August 2025
23 August 2025
23 August 2025
kaffemaskin Manualer
- Fetco
- Electrolux
- Scarlett
- CaterChef
- Cuisinart
- Heinner
- Butler
- N8WERK
- Gorenje
- Jura
- Victoria Arduino
- Moulinex
- Trisa
- Fakir
- G3 Ferrari
Nyeste kaffemaskin Manualer
19 Oktober 2025

19 Oktober 2025

17 Oktober 2025
16 Oktober 2025
15 Oktober 2025
13 Oktober 2025

13 Oktober 2025

13 Oktober 2025

13 Oktober 2025

13 Oktober 2025