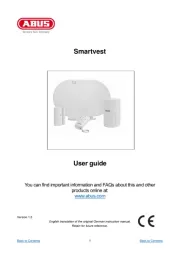
Abus FUFT50002B Bruksanvisning
Abus
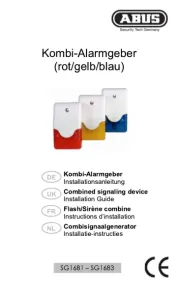
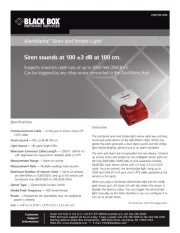
Alarmsystem
FUFT50002B
Les nedenfor 📖 manual på norsk for Abus FUFT50002B (2 sider) i kategorien Alarmsystem. Denne guiden var nyttig for 13 personer og ble vurdert med 5.0 stjerner i gjennomsnitt av 7 brukere
Side 1/2

Abb./
schéma 1
für
Schrauben
Ø
ohne
Bohrer Ø
mit
Bohrer Ø
4,0 mm
3,0 mm
4,5 mm
3,0 mm
5,5 mm
4,2 mm
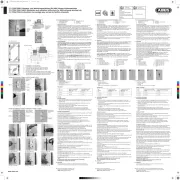
FTS96/PV96 | Montage- und Bedienungsanleitung für ABUS Fenster-Universalschloss
FTS96/PV96 | ABUS Installation and operation instructions for ABUS universal window lock
FTS96/PV96 | Instructions de montage pour serrure de fenêtre universelle
1 x
1
IV. Montagewerkzeug
• Kreuzschlitzschraubendreher
Schlitzschraubendreher•
• Bohrmaschine
•
Bohrtabelle
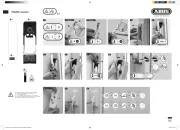
V. Montage
Wichtige Hinweise:
1. Vr.
Stellen Sie sicher, dass sich das Fenster/
schließen lässt.
2. Messen Sie auch nach, ob die in Abb.
Fenster/Ihrer Fenstertür vorhanden sind.
3. Die Bohrlochtiefen bz
4. Austreten des Bohrers bz
T
Montage des Schlosskastens:
r
r . Türblatt anhalten,
E F und G
4 +
E
4,2 x 1 r
F G 4+
Montage des Schließkastens:
d
Falzhöhe: ab 14 mm
1
Q
A, 11, 1
r 1 r
. 1
DurCWW
W
C
. 14 +1
C
r
entfernen.
1
B . 1
Falzhöhe: 0 bis 13 mm
r
entfernen.
D1 bis D3
r r
5,5 x 60 mm festschrauben.
Funktion prüfen:
laufen.
Bei Montage von FTS96: beide Abdeckhauben ( 5) aufdrücken.4+
Bei Montage von FTS96E: siehe Rückseite!
VI. Bedienung
FTS96 lässt sich ohne Schlüssel dur
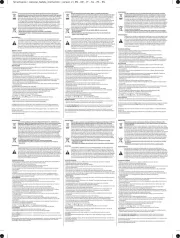
These instructions are organised in the following sections:
I. General instructions IV. Tools
V. Installation instructions
I. General instructions
requirements of DIN 1104
TARDANT DIN tested”
1104 1 recommends that an additional
r
T
II. Application
and is suitable
for all common windows/French doors opening to the inside with turn or
turn-and-tilt hard-ware 1
composite mortar or
fixing bolts
ABUS fixing bolt BA frames, the
ABUS fastening set
III. Pack contents
x
Ce manuel comporte les chapit es suivants:r
V
V
I. Conseils d’ord e généralr
normes DIN 1 104 1
« N
intrusions 1104 1, il est
accessoires ABUS.
II. Application
convient
r 1
r
le dor
mant.
ancre de fixation ou mortier
de fixation ABUS BA
de fixations ABUS IM100
III. Liste de colisage
x
1 x
2
1 x
3
1 x
4
1 x
5
1 x
6
1 x
7
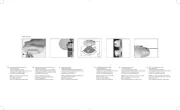
Abb schéma./ ./ 11
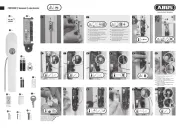
Montage des Schlosskastens / Fitting the lock case / Montage du boîtier
Abb schéma ./ ./ 6
A B
C
Anschraubleiste
D 1-3
Abb schéma./ ./ 12
Abb schéma./ ./ 17
for
Ø
without
drill bit Ø
with
drill bit Ø
4.0 mm
3.0 mm
4.5 mm
3.0 mm
5.5 mm
4.2 mm
IV. Installation tools
•
•
Drill•
• Sa
Drilling table
V. Installation instructions
Installation:
r.
If necessar
rfectl .
. 1.
conditions.
4. A
Fitting the lock case:
r,
E F and G
E
4.2 x 1FG
4 +
Fitting the striking plate:
T
d/
Rebate height: from 14 mm
1
.
Q .
A , 11, 1
r 1
. 1
C
C. 14 +1
C.
. 1
Rebate height: 0 to 13 mm
D1 to D3
r
5.5 x 60 mm.
Check function:
When installing the FTS96: P ess on both covers (r 4+ 5).
When installing the FTS96E: See r e!everse sid
VI. Operation
.
vis
de Ø
sans armature métallique
foret Ø
avec armature métallique
foret Ø
4,0 mm
3,0 mm
4,5 mm
3,0 mm
5,5 mm
4,2 mm
IV. Outillage de montage
• Tournevis cruciforme
T•
rceuse•
• rcir les vis, tournevis
Tableau de perçage
V. Instructions de montage
Indications importantes:
1. A
rfaitement.
indiquées en schéma 1.
conditions locales.
r
vitres.
Montage du boîtier:
T E F et G
7
E
vis de 4,2 x 1
Fixations de vis F G 4 +
Montage de la gâche:
r
Recouvrement: 1
e 1
Q
TA, 11, 1
1
a 1
C
laire.C
14 + 1
C.
a 1
Recouvrement: 0–13 mm
TD1 D3
Contrôlez le bon fonctionnement:
Montage sur la FTS96: pr 4 +esser sur les deux couverles ( 5).
Montage sur la FTS96E: voir au verso!
VI. Utilisation
8
2 x
9
2 x
10
3 x
11
2 x
12
FAS
FAS
FTS
FTS
FAS
FTS
FTS
F
G
E
G
Abb schéma ./ ./ 5
Montage des Schließkastens / Fitting the striking plate / Montage de la gâche
Abb schéma./ ./ 10
Abb schéma./ ./ 18
Abb schéma ./ ./ 2
0 – 29 mm
= Tür oder Fenster / Door or W
e/ W
/
Abb schéma./ ./ 4
Abb schéma./ ./ 7
Abb schéma./ ./ 15
Abb schéma./ ./ 16
Abb schéma./ ./ 13
Abb schéma./ ./ 14
3 mm
2 mm
1
Abb schéma./ ./ 3
2
Abb schéma./ ./ 9
Abb schéma./ ./ 8
Fenster
W
Battant de
rahmen
Frame
51
max. 29
120
5113
Diese Anleitung ist wie folgt untergliedert:
V
V
I. Allgemeine Hinweise
DIN 1104 r
“
1104o 1 Meter
V
V
W
V
dur
II. Einsatzmöglichkeit
und eignet
sich für alle gängigen nach innen önende Fenster/Fenstertüren mit D eh- oderr
Dreh-Kipp-Beschlägen. 1W
Holz oder Alu er
mittel Verbundmörtel oder Befestigungsanker
ABUS-Befestigungsanker BA oder alternativ bei
ABUS-Befestigungsset
Handel erhältlich.
Die in Abb. 2
erhältlich.
III. Packungsinhalt
x
T
©
ABUS |
©
ABUS |
Nous nous réser
.
©
ABUS |
Q
N
3
G
1
2
3
G
N
Q
www.abus.com
*
Toe assin
inuten
Toe assin
inuten
Hout:
Zie instructie
Kunsts f met staal versterking:to
Zie instructie
Kunsts f zonder staal verst king:to er
Met BA aner of 10 IM 0 chemisch aner
M aal:et
Zie instructie
Alti d met BA an er
C
M
Y
CM
MY
CY
CMY
K
FTS96+FTS96E_DGBF_390296_MA_AJ.pdf 1 28.08.19 08:11
Produkspesifikasjoner
| Merke: | Abus |
| Kategori: | Alarmsystem |
| Modell: | FUFT50002B |
Trenger du hjelp?
Hvis du trenger hjelp med Abus FUFT50002B still et spørsmål nedenfor, og andre brukere vil svare deg
Alarmsystem Abus Manualer
18 August 2025
18 August 2025
18 August 2025
18 August 2025
18 August 2025
18 August 2025
18 August 2025
18 August 2025

5 Januar 2025

5 Januar 2025
Alarmsystem Manualer
- Black Box
- Vimar
- X-Sense
- Indexa
- Biltema
- IKEA
- Somfy
- Redmond
- Bearware
- Hikvision
- Netatmo
- Smartwares
- Kemo
- RCF
- Pentatech
Nyeste Alarmsystem Manualer

18 Oktober 2025

17 Oktober 2025

5 Oktober 2025
1 Oktober 2025
15 September 2025
15 September 2025
15 September 2025
10 September 2025
9 September 2025
5 September 2025