Atdec TH-1030-VFM Bruksanvisning
Atdec
Flatpanelstøtte
TH-1030-VFM
Les nedenfor 📖 manual på norsk for Atdec TH-1030-VFM (2 sider) i kategorien Flatpanelstøtte. Denne guiden var nyttig for 8 personer og ble vurdert med 4.3 stjerner i gjennomsnitt av 4.5 brukere
Side 1/2
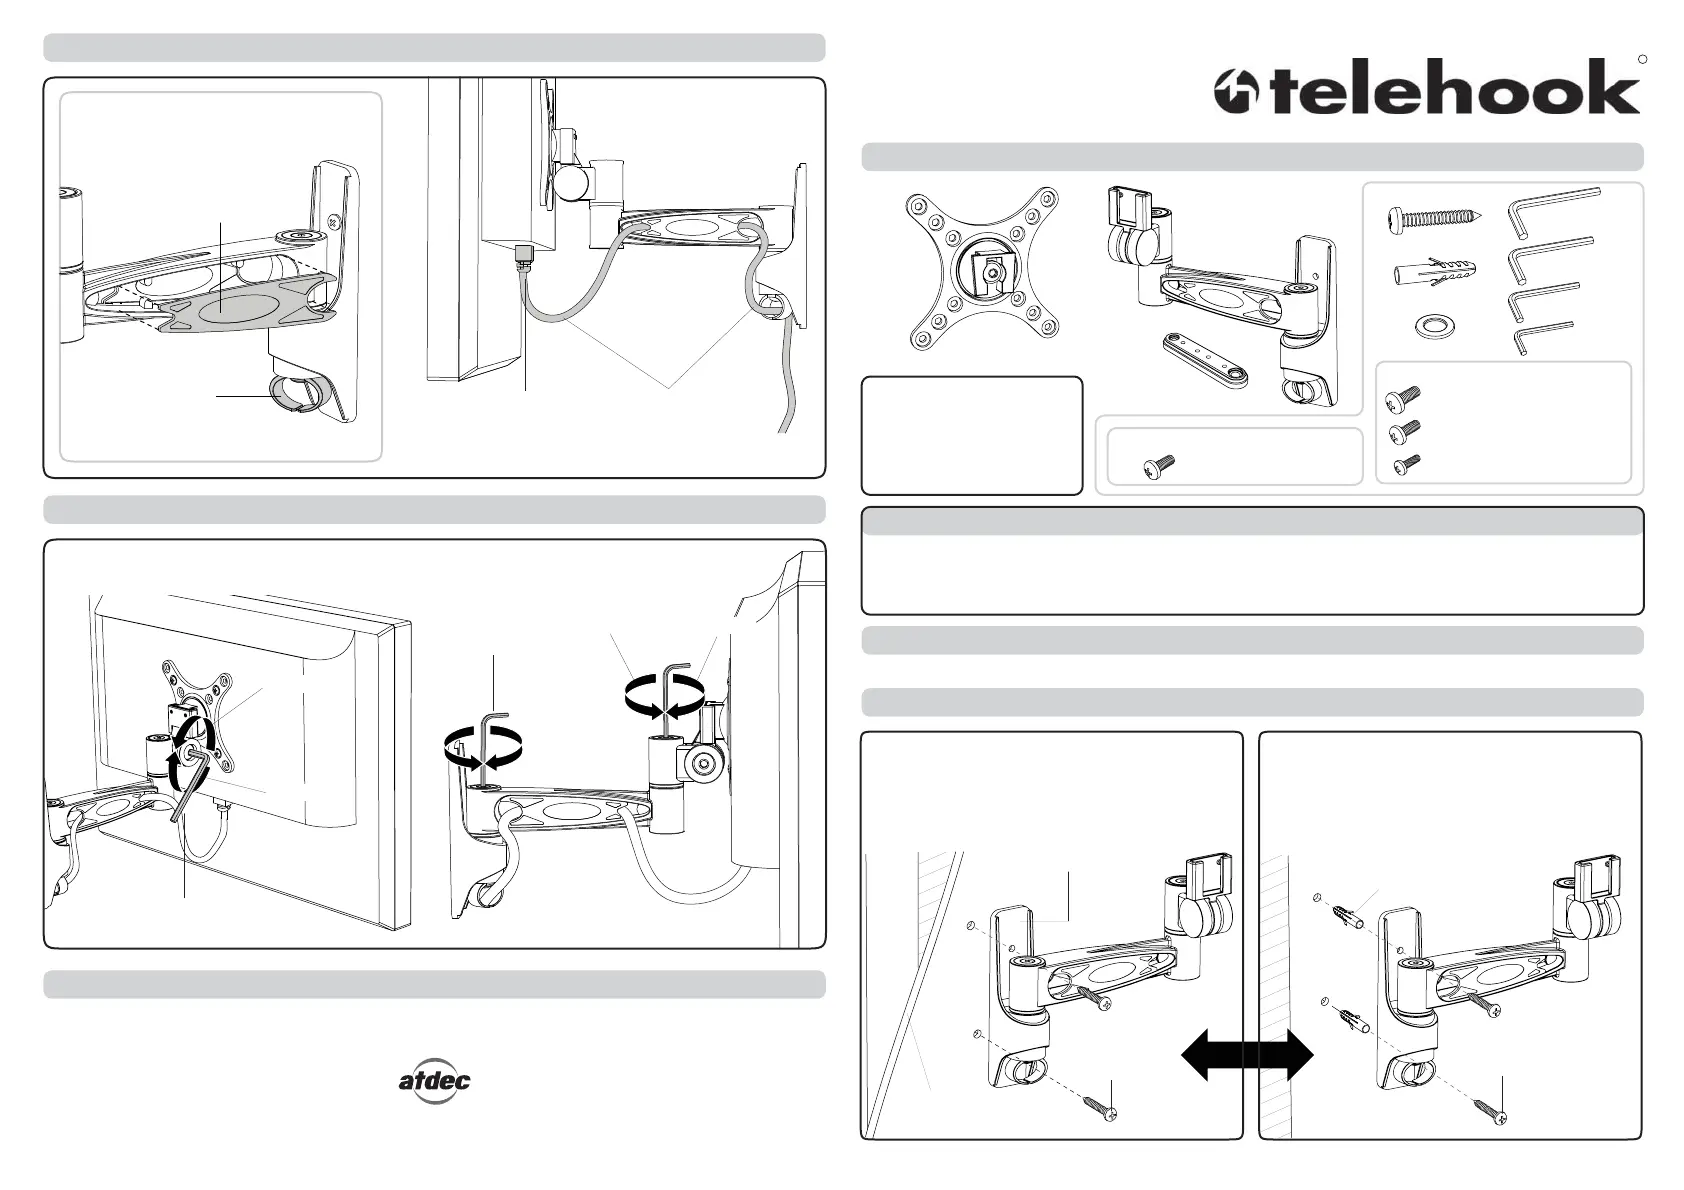
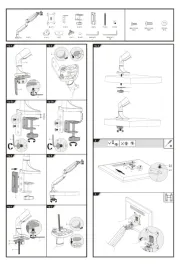
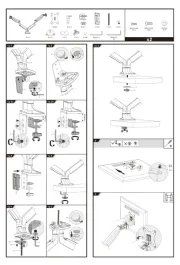
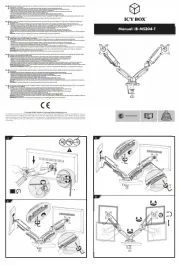
Step 7. Final Adjustment
Installation Complete
Your Telehook Wall Mount Swing Arm is complete and ready to use.
Position and angle your Display as desired, ensuring the Swing Arm moves freely.
Adjust the tension of the joints to suit, using the Allen Keys supplied.
4mm Allen Key
6mm Allen Key
As Display Manufacturers are constantly releasing new monitor models, Atdec does not accept responsibility if the VESA mounting does not comply with the international standards.
Due to continuing product development, the manufacturer reserves the right to alter specifications without notice. Published: 27.11.09 ©
LOOSEN
TIGHTEN
LOOSEN
TIGHTEN
Step 6. Cable Management
127( Leave enough
slack in the cables to
allow for full movement.
Connect cables
Cable Cover (x2)
Cable Clip
To utilise the Telehook Swing Arm cable
management system, use the Cable Covers
and Cable Clip as shown.
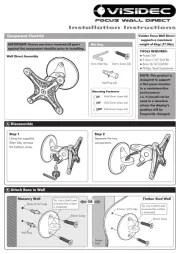
IMPORTANT INFORMATION
,03257$17,QVWDOO7HOHKRRN:DOO0RXQW6ZLQJ$UPDVSHUWKH,QVWDOODWLRQ,QVWUXFWLRQV
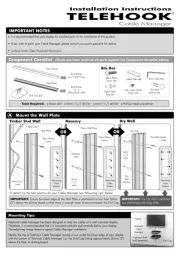
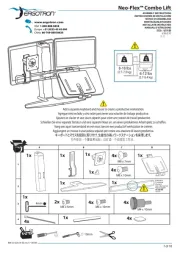
! Telehook Wall Mount Swing Arm supports displays weighing up to 20kg (44lbs), with VESA hole configurations:
75x75mm (3”x3”), 100x100mm (4”x4”), *200x100mm (8”x4”), and *200x200mm (8”x8”) (*using extension tabs supplied)
! The Manufacturer accepts no responsibility for incorrect installation.
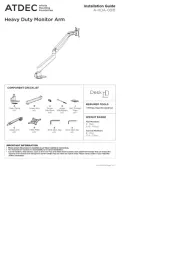
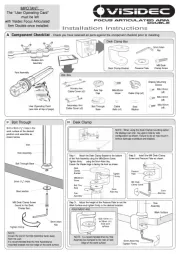
Step 1. Check Components
Check you have received all parts against the Component Checklist and Hardware above.
Step 2. Installing the Wall Bracket
Component Checklist
Stud
Masonry Wall
Nylon Anchor (x2)
Wall Mount
Screw (x2)
Wall Mount
Screw (x2)
Wall Material
Hardware
Flat Screen Wall Mount | Swing Arm
Installation Instructions
70
OR
TOOLS REQUIRED:
Power Drill
4mm (
5
/
32
”) Drill Bit
11mm (
7
/
16
”) Masonry Drill Bit
Phillips Head Screwdriver
Spirit Level
Mounting to a 7LPEHU6WXG:DOO Mounting to a 0DVRQU\:DOO:
7+9)0
Swing Arm
Vesa Plate
- Position the Wall Bracket vertically on the wall and mark the
2 mounting holes (use a spirit level to check).
- Drill two 60mm (2
3
/
8
“) deep holes using an 11mm (
7
/
16
”)
masonry drill bit.
- Secure the Wall Bracket using the Wall Mount Screws and
Nylon Anchors supplied.
- Position Wall Bracket vertically on the wall and mark the
2 mounting holes (use a spirit level to check).
- Drill two 60mm (2
3
/
8
”) deep holes using a 4mm (
5
/
32
”) drill bit.
- Secure the Wall Bracket using the Wall Mount Screws supplied.
2.5mm Allen Key
4mm Allen Key
5mm Allen Key
6mm Allen Key
Washer (x4)
Nylon Anchor (x2)
Wall Mount Screw (x2)
Wall Bracket
Extension
Tabs (x4)
Extension Mounting Screws
M4x12mm/M4x16mm (x4 each)
M5x12mm/M5x16mm (x4 each)
M6x12mm/M6x16mm (x4 each)
Display Mounting Screws
M5x12mm (x4)
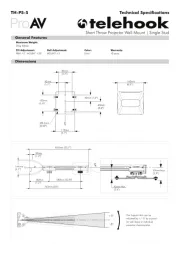
Produkspesifikasjoner
| Merke: | Atdec |
| Kategori: | Flatpanelstøtte |
| Modell: | TH-1030-VFM |
| Vekt (imperial): | 44 Ibs |
| Produktfarge: | Sort |
| Vippevinkelområde: | -10 - 20 ° |
| Skjermstørrelsekompabilitet: | -10 - 20 " |
| Monteringsgrensesnitt: | VESA 50 x 50 / 75 x 75 / 100 x 100 / 200 x 100 / 200 x 200 |
| Dreietapp/dreiemekanisme: | 5 ° |
| Omdreiningsakse/midtpunkt: | 360°/190° |
| Montasjetype: | Vegg |
| Vekt (maks): | 20 kg |
Trenger du hjelp?
Hvis du trenger hjelp med Atdec TH-1030-VFM still et spørsmål nedenfor, og andre brukere vil svare deg
Flatpanelstøtte Atdec Manualer

11 Oktober 2025
10 Oktober 2025
10 Oktober 2025
10 Oktober 2025
10 Oktober 2025
10 Oktober 2025

10 Oktober 2025
10 Oktober 2025
10 Oktober 2025
10 Oktober 2025
Flatpanelstøtte Manualer
- Hama
- ErgoAV
- Sanus
- Helder
- Proaim
- NeoMounts
- Chief
- Gembird
- LG
- SunBriteTV
- Reflecta
- Irradio
- Ultimate
- Multibrackets
- Iiyama
Nyeste Flatpanelstøtte Manualer
16 Oktober 2025

5 Oktober 2025
4 Oktober 2025
4 Oktober 2025
4 Oktober 2025
30 September 2025
29 September 2025
22 September 2025
22 September 2025

22 September 2025