Atdec TH-PS-D Bruksanvisning
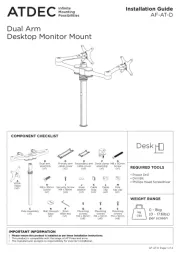
Atdec
Flatpanelstøtte
TH-PS-D
Les nedenfor 📖 manual på norsk for Atdec TH-PS-D (3 sider) i kategorien Flatpanelstøtte. Denne guiden var nyttig for 11 personer og ble vurdert med 4.5 stjerner i gjennomsnitt av 6 brukere
Side 1/3
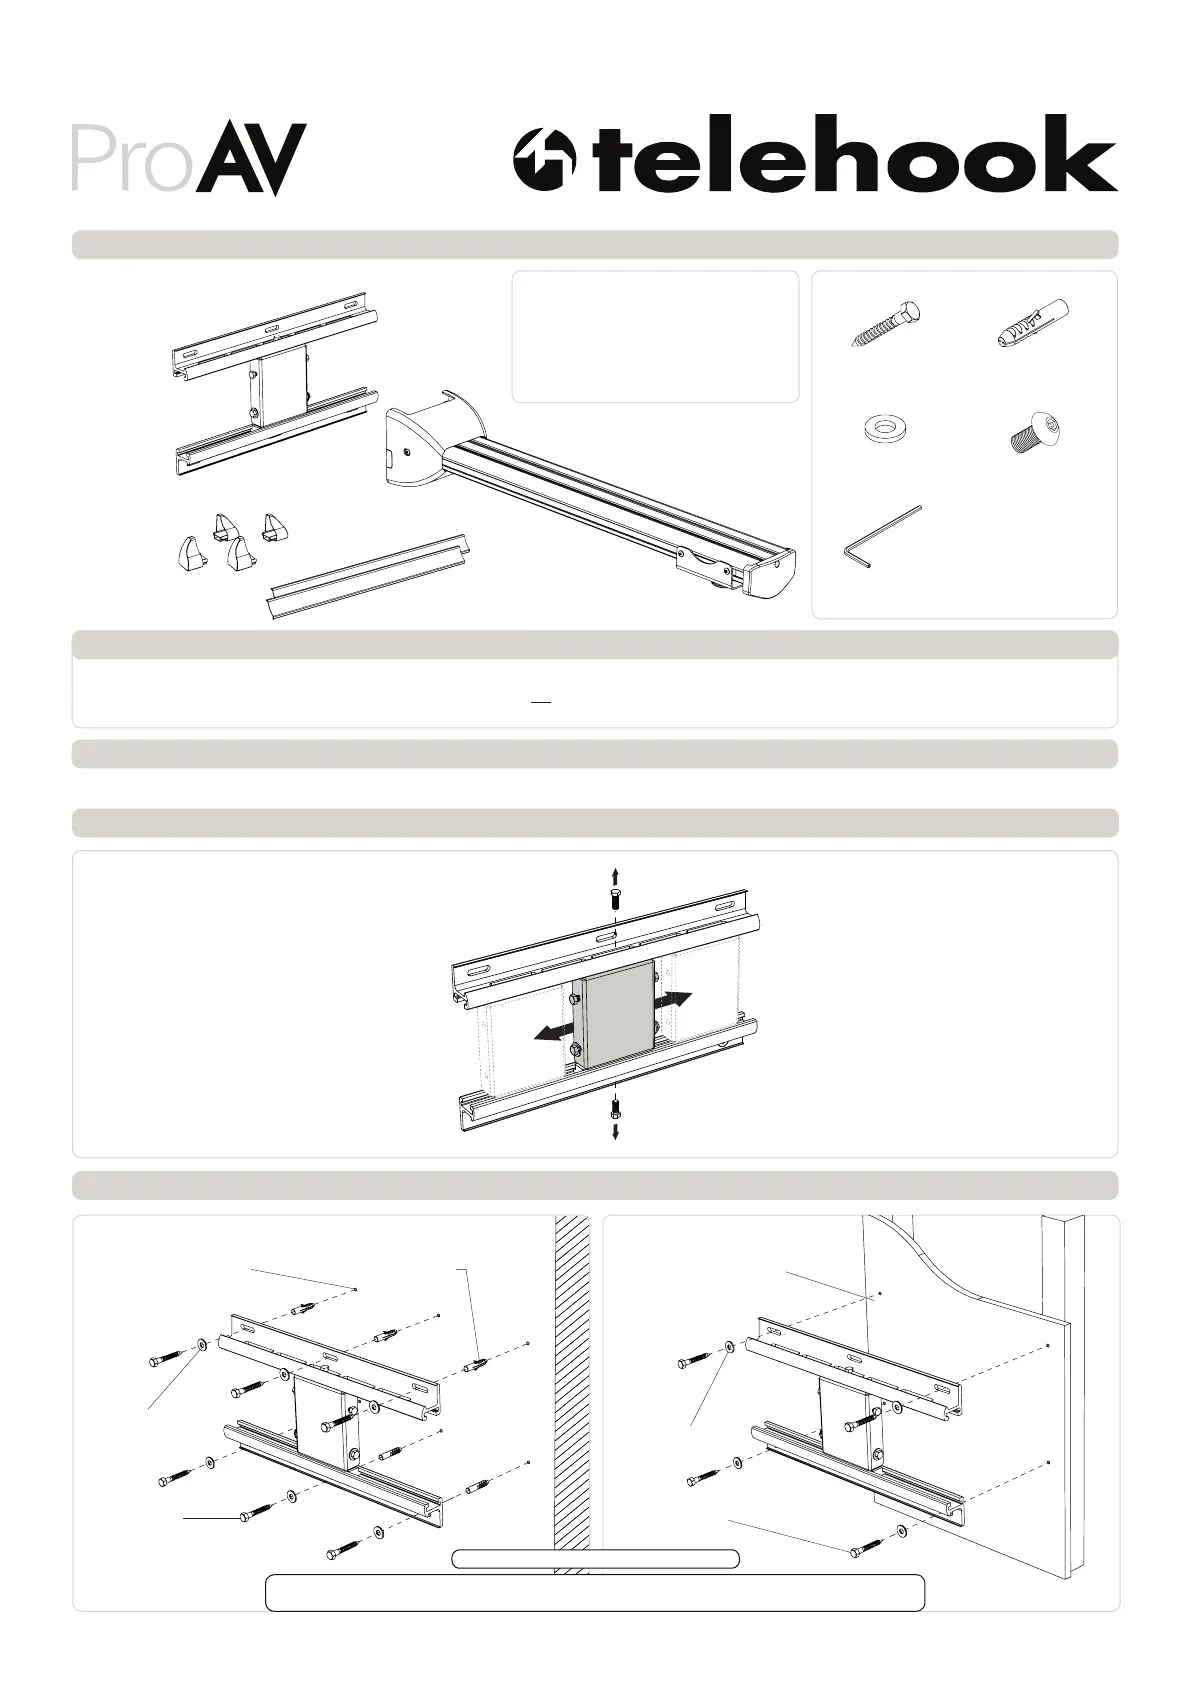
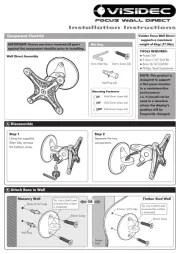
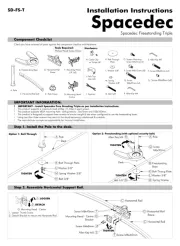
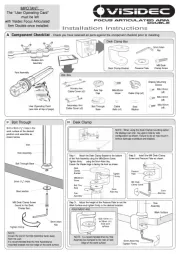
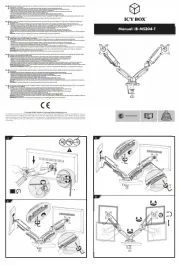
Step 2. Position Central Connector
Select the position of the Central
Connector before mounting the
Wall Plate to the wall.
TH-PS-D
Component Checklist
Short Throw Projector Wall Mount | Dual Stud
Support Arm
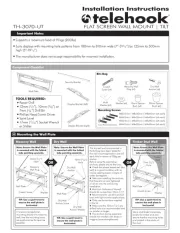
! IMPORTANT - Install Telehook Short Throw Projector Mount as per installation instruction.
! This product supports a maximum load of 25kg (55lbs.).
! The manufacturer accepts no responsibility for incorrect installation.
IMPORTANT INFORMATION:
Step 1. Check Components
Check you have received against the component checklist and hardware above.
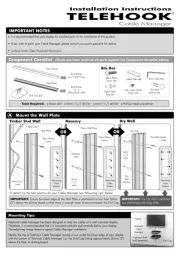
Wall Plate
End Covers
Extrusions
HARDWARE
Coach Screw
(x6)
Nylon
Anchor (x6)
Washer (x6)
3mm Security
Allen Key
Security Screw (x2)
Tools Required:
• Power Drill
• 6mm(0.23”) Drill Bit
• 12mm(0.47”) Masonry Drill Bit
• 13mm (0.5”) Socket Wrench Shifter
• Phillips Head Screwdriver
Step 3. Mounting Wall Plate
Masonary Timber Stud
Coach Screw
Coach Screw
Washer
Washer
Ø12mm x 65mm deep
Drilled Hole
Ø6mm x 65mm deep
Drilled Hole
Nylon Anchor
IMPORTANT! Any structural elements must be capable of supporting the combined weight of
all the equipment and devices being mounted. If in doubt, consult a structural engineer.
TIP: Use Mount as a drilling template.
Installation Instructions
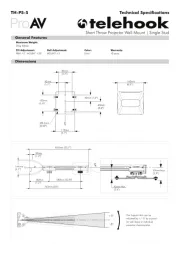
Produkspesifikasjoner
| Merke: | Atdec |
| Kategori: | Flatpanelstøtte |
| Modell: | TH-PS-D |
| Rotasjonsvinkel: | 360 ° |
| Justerbar arm: | Ja |
| Produktfarge: | Sølv |
| Vippevinkelområde: | -20 - 20 ° |
| Svingvinkel: | 5 ° |
| Montasjetype: | Vegg |
| Maksimalvekt (kapasitet): | 25 kg |
| Justerbar: | Ja |
| Distanse til vegg (maks.): | 1397 mm |
| Distanse til vegg (min.): | 189 mm |
Trenger du hjelp?
Hvis du trenger hjelp med Atdec TH-PS-D still et spørsmål nedenfor, og andre brukere vil svare deg
Flatpanelstøtte Atdec Manualer

11 Oktober 2025
10 Oktober 2025
10 Oktober 2025
10 Oktober 2025
10 Oktober 2025
10 Oktober 2025

10 Oktober 2025
10 Oktober 2025
10 Oktober 2025
10 Oktober 2025
Flatpanelstøtte Manualer
- Erard
- Alogic
- Nabo
- BlueBuilt
- Newstar
- Schwaiger
- KIMEX
- SunBriteTV
- Anywhere Cart
- StarTech.com
- Techly
- ErgoAV
- Dell
- Speaka
- DQ
Nyeste Flatpanelstøtte Manualer
16 Oktober 2025

5 Oktober 2025
4 Oktober 2025
4 Oktober 2025
4 Oktober 2025
30 September 2025
29 September 2025
22 September 2025
22 September 2025

22 September 2025