Biltema 15-1382 Bruksanvisning
Biltema
Ikke kategorisert
15-1382
Les nedenfor 📖 manual på norsk for Biltema 15-1382 (4 sider) i kategorien Ikke kategorisert. Denne guiden var nyttig for 10 personer og ble vurdert med 4.4 stjerner i gjennomsnitt av 5.5 brukere
Side 1/4
Art. 15-1382
1
© 2017-09-14 Biltema Nordic Services AB
SE
Vakuumtest (insugningsrör)
För högt eller för lågt vakuum eller onormala varia-
tioner är en indikation på eventuella problem med
insugningsröret, toppackning, förgasare eller ventiler.
1. Starta motorn och uppnå normal arbetstempera-
tur, låt därefter motorn gå på tomgång.
2. Anslut vakuumpumpen till önskad kontrollpunkt
med den bifogade anslutningsslangen, eller en
adapter vid behov (se g 1).
3. Läs av vakuumvärdet direkt på manometern.
Bromsluftning
1. Montera locket med ödeshål på behållaren
2. Anslut en slang mellan locket och vakuumpumpen.
3. Anslut den andra slangen mellan locket och
bromsnippeln.
4. Pumpa med vakuumpumpen för att suga ut
bromsvätska tills den fri från luftbubblor.
AVFALL
Lämna produkten och eventuella rester av bromsvät-
ska till avfallshantering enligt gällande föreskrifter.
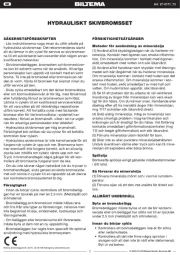
VAKUUMTESTARE/BROMSLUFTNINGSSET
INTRODUKTION
Denna bruksanvisning instruerar hur du använder Va-
kuumtestare/bromsluftningsset 15-1382. Läs den före
användning och observera säkerhetsföreskrifterna.
ANVÄNDNINGSOMRÅDE
Handmanövrerad vakuumpump för feldiagnostise-
ring av motor och bränslesystem m.m. Testar och
kontrollerar vakuummotorer/klockor, reglerventiler,
slangar och EGR-ventiler, samt andra komponenter
och system som kräver korrekt tätning, vakuum eller
tryck. Dessutom medföljer tillbehör för luftning av
bromssystem.
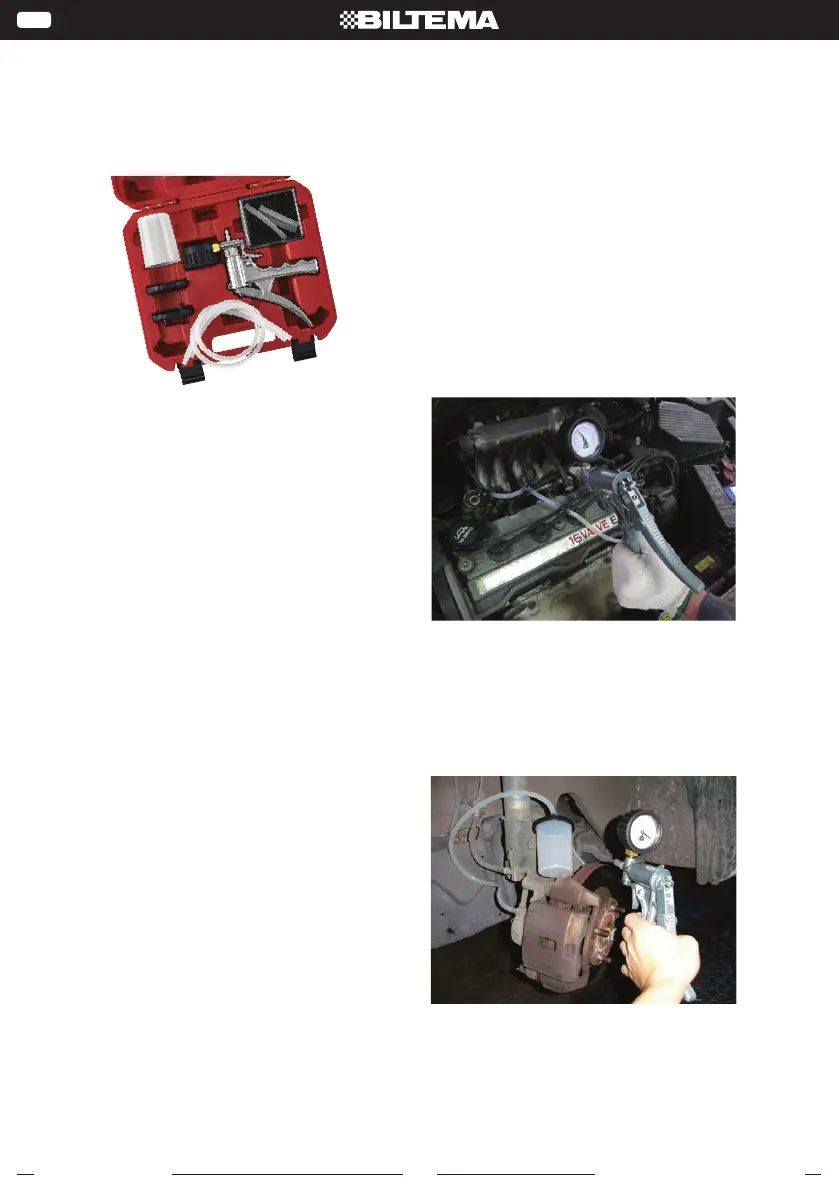
PRODUKTENS INNEHÅLL
• Vakuumpump med manometer
• Plastbehållare (200 ml)
• Förvaringslock
• Lock med fl ödeshål
• 2 st. plastslangar (60 cm)
• Kit med adaptrar och slangar för vakuumtester
och luftning av bromssystem
SÄKERHETSFÖRESKRIFTER
• Använd skyddsglasögon och arbetshandskar.
• Hantera bromsvätskan försiktigt, den är skadlig
för hud och material.
• Ta hand om förbrukad bromsvätska enligt gäl-
lande föreskrifter.
• Håll eld borta från arbetsområdet.
HANDHAVANDE
Skapa och släppa vakuum
Skapa vakuum: Anslut vakuumpumpen till önskad
punkt och pumpa med handtaget.
Släppa vakuum: Håll avtryckaren intryckt.
VACUUM PUMP AND
BRAKE BLEEDING KIT
A multi-function kit that provides a vacuum pump for
vacuum-related tests and brake bleeding.
The vacuum-operated systems includes intake manifold,
automatic transmission, fuel control, exhaust gas
recirculation (EGR), air conditioning and heating
systems.
Bleeding air in the brake system with this kit can be
operated individually, without needing another person
depressing the brake pedal while bleeding the air.
It is suitable for ABS, conventional brake system and
power brake system.
CAUTION
Wear safety glasses and gloves during operation.
DO NOT contact directly to the brake fluid.
Keep away fire in the working area.
Recycle the waste brake fluid to a waste authority.
DESCRIPTION
Vacuum pump with a gauge
A small kit with various adapters and tubes
A 200ml reservoir bottle
A storage lid
A fluid transfer lid
Connection hoses (2 pcs)
A.
B.
C.
D.
E.
F.
INSTRUCTION
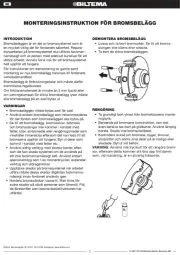
VACUUM TEST (Intake manifold)
Fig. 1
Start the engine and run to normal operating temperature.
Run the engine at idle.
Connect the vacuum pump to the intake manifold with
a connection hose (other tubes and adapters may be
required)
Connect the vacuum pump to the connection hose.
(as in Fig. 1)
1)
2)
3)
The gauge should be read according to the range it points
(e.g. -17 to -22 inHg) and the way it moves (steadily moving
towards the value as specified in auto manufacturing service
manual).
4)
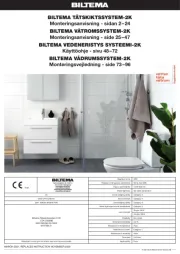
BRAKE BLEEDING
Fig. 2
Connect a hose to the vacuum pump and to the fluid
transfer lid.
Connect another hose to the fluid transfer lid and
to the brake bleed screw (as in Fig. 2).
Operate the pump to draw brake fluid out until
the fluid becomes bubble-free.
1)
2)
3)
NOTE DO NOT discharge waste brake fluid to the
environment. Recycle the waste fluid to a
waste authority.
NOTE Higher or lower vacuum or any abnormal movement is an
indication of problems in the intake manifold, head gasket,
carburetor or valves.
Page 1 of 1
VACUUM PUMP AND
BRAKE BLEEDING KIT
A multi-function kit that provides a vacuum pump for
vacuum-related tests and brake bleeding.
The vacuum-operated systems includes intake manifold,
automatic transmission, fuel control, exhaust gas
recirculation (EGR), air conditioning and heating
systems.
Bleeding air in the brake system with this kit can be
operated individually, without needing another person
depressing the brake pedal while bleeding the air.
It is suitable for ABS, conventional brake system and
power brake system.
CAUTION
Wear safety glasses and gloves during operation.
DO NOT contact directly to the brake fluid.
Keep away fire in the working area.
Recycle the waste brake fluid to a waste authority.
DESCRIPTION
Vacuum pump with a gauge
A small kit with various adapters and tubes
A 200ml reservoir bottle
A storage lid
A fluid transfer lid
Connection hoses (2 pcs)
A.
B.
C.
D.
E.
F.
INSTRUCTION
VACUUM TEST (Intake manifold)
Fig. 1
Start the engine and run to normal operating temperature.
Run the engine at idle.
Connect the vacuum pump to the intake manifold with
a connection hose (other tubes and adapters may be
required)
Connect the vacuum pump to the connection hose.
(as in Fig. 1)
1)
2)
3)
The gauge should be read according to the range it points
(e.g. -17 to -22 inHg) and the way it moves (steadily moving
towards the value as specified in auto manufacturing service
manual).
4)
BRAKE BLEEDING
Fig. 2
Connect a hose to the vacuum pump and to the fluid
transfer lid.
Connect another hose to the fluid transfer lid and
to the brake bleed screw (as in Fig. 2).
Operate the pump to draw brake fluid out until
the fluid becomes bubble-free.
1)
2)
3)
NOTE DO NOT discharge waste brake fluid to the
environment. Recycle the waste fluid to a
waste authority.
NOTE Higher or lower vacuum or any abnormal movement is an
indication of problems in the intake manifold, head gasket,
carburetor or valves.
Page 1 of 1
Original manual
Biltema, Garnisonsgatan 26, 2nd FL, SE-254 66 Helsingborg. www.biltema.com
Produkspesifikasjoner
| Merke: | Biltema |
| Kategori: | Ikke kategorisert |
| Modell: | 15-1382 |
Trenger du hjelp?
Hvis du trenger hjelp med Biltema 15-1382 still et spørsmål nedenfor, og andre brukere vil svare deg
Ikke kategorisert Biltema Manualer
14 September 2025

14 September 2025
14 September 2025
13 September 2025
13 September 2025

13 September 2025
13 September 2025
13 September 2025
13 September 2025
13 September 2025
Ikke kategorisert Manualer
- Dexibell
- Fakir
- Manta
- Mybeo
- Bebob
- Vermeiren
- Gembird
- GolfBuddy
- Eikon
- Vaddio
- Growatt
- KEF
- Vestil
- CRUX
- PureLink
Nyeste Ikke kategorisert Manualer

23 Oktober 2025

23 Oktober 2025

23 Oktober 2025

23 Oktober 2025

23 Oktober 2025

23 Oktober 2025

23 Oktober 2025

23 Oktober 2025

23 Oktober 2025

23 Oktober 2025