Biltema 20-795 Bruksanvisning
Les nedenfor 📖 manual på norsk for Biltema 20-795 (8 sider) i kategorien pumpe. Denne guiden var nyttig for 8 personer og ble vurdert med 4.9 stjerner i gjennomsnitt av 4.5 brukere
Side 1/8
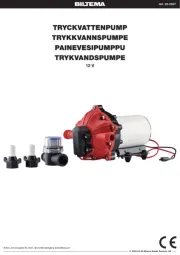
Art. 20-795
1
© 2018-08-27 Biltema Nordic Services AB
SE
FETTSPRUTA
• Använd arbetshandskar och skyddsglasögon.
• Håll fettsprutan ren och i funktionsdugligt skick.
• Använd inte fettsprutan för uppgifter den inte är
konstruerad för.
• Behandla fettsprutan varsamt. Använd inte fett-
sprutan om den är skadad.
• Bär inte fettsprutan i förlängningen.
• Överskrid inte maximalt arbetstryck 690 BAR.
• Håll slangen borta från värme, olja och skarpa
kanter. Kontrollera att slangen är hel före använd-
ning.
• Applicera inte för hårt handtryck på sprutan. Det
kan förstöra nipplar och fettsprutan.
• Använd inga defekta tillbehör.
• Rikta aldrig fettsprutan mot människor.
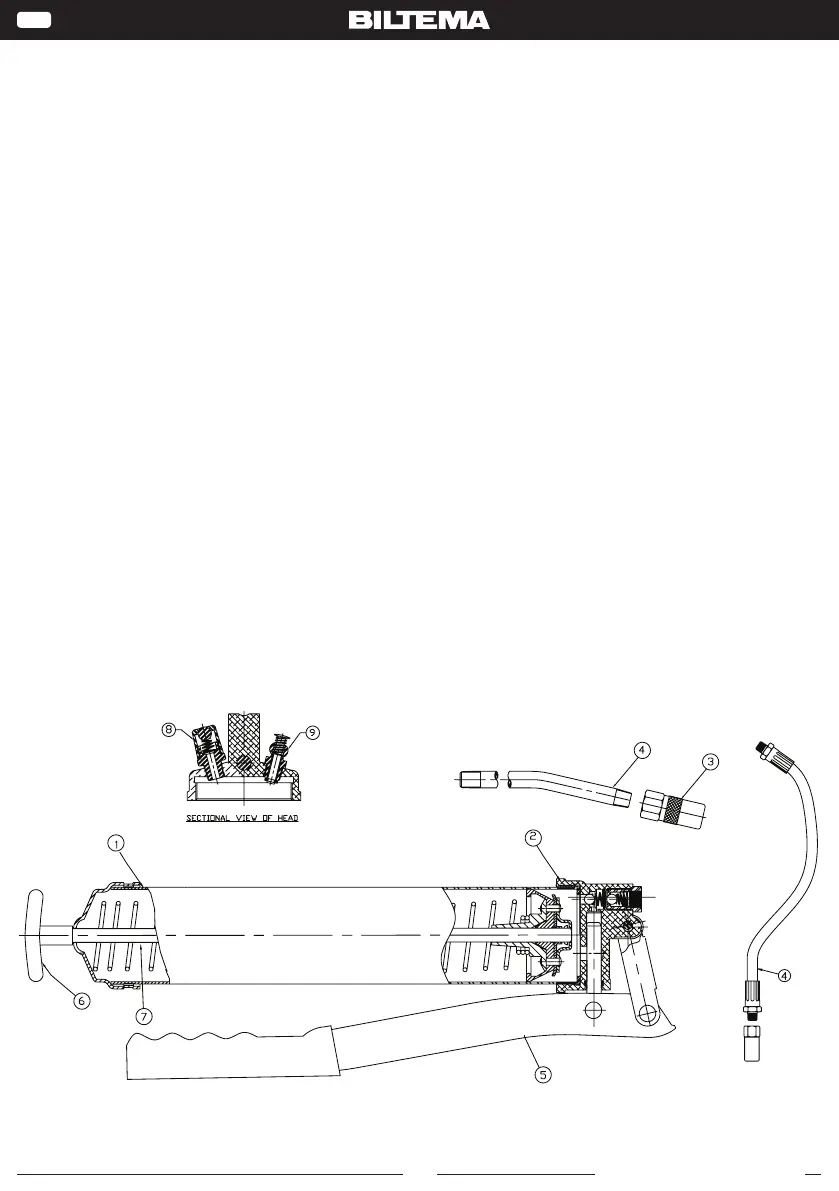
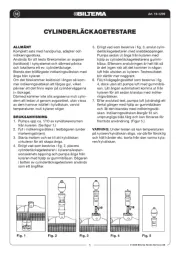
ÖVERSIKTSBILD
1. Behållare
2. Huvud
3. Koppling
4. Förlängning
5. Pumphandtag
6. Handtag, kolvstång
7. Kolvstång
8. Ventil för bulkladdning
9. Luftventil
INTRODUKTION
Läs denna bruksanvisning före användning och spara
den på en säker plats för framtida behov.
ANVÄNDNINGSOMRÅDE
Lättviktsfettspruta med högtrycksprestanda för pro-
fessionell användning inomhus och utomhus.
TEKNISKA DATA
Kapacitet: . . . . . . . . . . . . . . . . .1 GM/slag
Material: . . . . . . . . . . . . . . . . . .Av aluminium och stål.
Behållare: . . . . . . . . . . . . . . . . .400 g patron eller
lösvikt 500 cm
3
Standardnippel: . . . . . . . . . . . .1/8” NPT.
Arbetstryck: . . . . . . . . . . . . . . .690 BAR
Vikt: . . . . . . . . . . . . . . . . . . . . . .1,2 kg.
Storlek: . . . . . . . . . . . . . . . . . . .385 mm.
SÄKERHET
Säkerhetsföreskrifter
• Läs bruksanvisningen före användning och
respektera de lagar och regler som gäller på
arbetsplatsen.
• Kontrollera att fettsprutan och tillbehör är hela
och funktionella före användning.
• Använd endast rekommenderade delar.
Biltema, Garnisonsgatan 26, 2nd FL, SE-254 66 Helsingborg. www.biltema.com
3
CAUTION!
• Do not apply excessive torque or over-
tighten the grease gun head as this will apply
undue stress to the die cast outlet and may
cause it to fracture.
Removing trapped air
After filling grease gun, trapped air should be
removed by following the below steps
General procedure
1. After filling grease gun barrel (1) with
grease by any of the above methods, while
reassembling the gun keep at least 2-3 turns
open.
2. Move the plunger rod (7) forward and
backward to remove any trapped air pockets.
3. Release the plunger rod (7). Push down on
the plunger handle (6).
4. Tighten the grease gun head (2) to the
grease gun barrel (1).
5. The grease gun is now ready to use.
Procedure for lever grease gun with air release valve
1. After filling grease gun barrel (1) with grease
by any of the above methods, reassemble
the gun.
2. Tap the manual air release valve (9) to release
the trapped air.
3. Move the plunger rod (7) forward and
backward to remove any trapped air pockets.
4. Tap the manual air release valve (9) again to
release the trapped air.
5. The grease gun is now ready to use.
OPERATING INSTRUCTIONS (REFER "EXPLODED
VIEW)
1. The grease coupler (3) provided at the end of
the grease gun extension (4) has a jaw type
construction. The coupler jaws will snap on to
a grease fitting and maintain a tight fit.
2. When connecting the coupler (3) to the
grease fitting, press the coupler (3) straight
onto the grease fitting to form a snug fit.
3. Start operating the Lever (5) with the
coupler (3) as aligned to the grease fitting as
possible.
4. Once greasing is completed, slightly tilt the
coupler (3), twist and pull back.
5. The tilt and twist action will allow easy
removal of the coupler (3) from the grease
fitting
MAINTENANCE
• Grease guns and extension should be kept
clean and checked for damage before each
use.
EXPLODED VIEW
Produkspesifikasjoner
| Merke: | Biltema |
| Kategori: | pumpe |
| Modell: | 20-795 |
Trenger du hjelp?
Hvis du trenger hjelp med Biltema 20-795 still et spørsmål nedenfor, og andre brukere vil svare deg
pumpe Biltema Manualer
11 September 2025
11 September 2025

11 September 2025
11 September 2025

11 September 2025

11 September 2025
11 September 2025
10 September 2025
10 September 2025
10 September 2025
pumpe Manualer
- Hayward
- Draper
- JANDY
- Laguna
- MSW
- Einhell
- Liberty Pumps
- Comet
- Zipper
- POLARIS
- Fluke
- Zoeller
- Osram
- Toolcraft
- Eheim
Nyeste pumpe Manualer
6 Oktober 2025
6 Oktober 2025

6 Oktober 2025
6 Oktober 2025
6 Oktober 2025
5 Oktober 2025

5 Oktober 2025
5 Oktober 2025
5 Oktober 2025

5 Oktober 2025