Biltema 24-626 Bruksanvisning

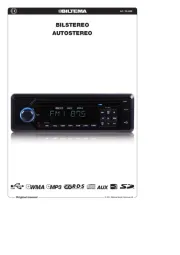
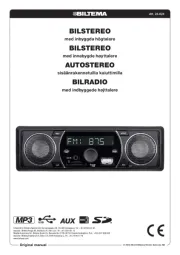
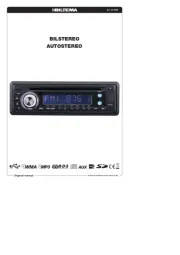
Biltema Bilradio 24-626

Les nedenfor 📖 manual på norsk for Biltema 24-626 (50 sider) i kategorien Bilradio. Denne guiden var nyttig for 2 personer og ble vurdert med 4.5 stjerner i gjennomsnitt av 2 brukere

Side 1/50
Art. 24-626
© 2018-05-04 Biltema Nordic Services AB
USB
Original manual
BILSTEREO
AUTOSTEREO
Art. 24-626
© 2018-05-04 Biltema Nordic Services AB
2
BRUKSANVISNING
rmed förkrar Biltema att denna typ av ra-
dioutrustning, Bilstereo, överenssmmer med
direktiv 2014/53/EU. Den fullsndiga texten till
EU-försäkran om överensstämmelse  nns på
följande webbadress: www.biltema.com.
Denna manual innehåller viktig information om
hur produkten används samt eventuella sä-
kerhetsrisker. Användaren uppmanas att läsa
manualen före användning.
Vi reserverar oss för att illustrationer och
beskrivningar av enstaka detaljer inte alltid
stämmer helt överens med produkten
Spara manualen för framtida bruk.
INNEHÅLLSFÖRTECKNING
1. Montering
2. Att använda den löstagbara frontpanelen
3. Kabelanslutningar
4. Användning
5. Radio
6. Avspelning av CD och MP3/WMA via CD-
spelare
7. Avspelning av MP3/WMA från USB-port
eller SD/MMC-kortläsare
8. Tekniska speci kationer
9. Felsökning
Egenskaper
Stereoradio utrustad med PLL Synthesizer
och RDS (Radio Data System).
Automatisk minneslagring.
Hanterar CD-skivor samt ljud ler i MP3 och
WMA-format.
Elektroniskt stöt/skakminne (ESP).
Utrustad med USB-port samt SD/MMC-
kortläsare.
Löstagbar frontpanel.
Förinställda equalizerlägen.
AUX-ingång för anslutning av extern
MP3-spelare.
1. MONTERING
Bilstereon bör monteras av en fackman.
Biltema ansvarar inte för problem som uppsr
p.g.a. felaktig installation.
Att tänka på före montering:
Innan du monterar fast bilstereon, anslut
kablaget, kontrollera att alla kopplingar
är korrekta och starta upp enheten för att
kontrollera att alla funktioner fungerar.
Använd endast delar som medföljer enhe-
ten vid montering. Vid montering av andra
delar eller kablage kan skador eller fel
uppstå.
Om du behöver borra i bilen, eller göra
andra ingrepp för att rymma bilstereon,
kontakta först en fackman.
Montera enheten på avsedd plats, där den
inte är i vägen för föraren eller där den
inte kan skada en passagerare vid en tr
inbromsning.
Enheten är enbart avsedd för horisontell
montering. Om enheten monteras i mer
än 30° vinkel fn horisontalläge riskerar
bilstereons funktion att påverkas.
Undvik att montera enheten på ställen i
bilen där den kan utttas för höga tempe-
raturer, direkt solsken, damm, smuts eller
starka vibrationer.
Front- och bakmontering
Denna enhet kan monteras antingen från fron-
ten (standard DIN-frontmontering) eller bakifrån
(DIN-bakmontering, använder sig av de
gängade hålen på sidorna av enhetens chassi).
För detaljbeskrivning, se följande två avsnitt.
BILSTEREO
3
INSTALLATION
Notes:
y Choose the mounting location where
the unit will not interfere with the normal
driving function of the driver.
y Before finally installing the unit, connect
the wiring temporarily and make sure it
is all connected up properly and the
unit and the system work properly.
y Use only the parts included with the
unit to ensure proper installation. The
use of unauthorized parts can cause
malfunctions.
y Consult with your nearest dealer if
installation requires the drilling of holes
or other modifications of the vehicle.
y Install the unit where it does not get in
the drivers way and cannot injure the
passenger if there is a sudden stop, like
an emergency stop.
y If installation angel exceeds 30° from
horizontal, the unit might not give its
optimum performance.
y Avoid installing the unit where it would
be subject to high temperature, such as
from direct sunlight, or hot air, from the
heater, or where it would be subject to
dust, dirt or excessive vibration.
DIN FRONT/REAR-MOUNT
This unit be can properly installed either
from “Front” (conventional DIN Front-mount)
or “Rear”(DIN Rear-mount installation,
utilizing threaded screw holes at the sides
of the unit chassis). For details, refer to the
following illustrated installation methods.
TAKE OUT SCREW BEFORE INSTALLATION
Before install the unit, please remove the
two screws.
DIN FRONT-MOUNT (Method A)
Installation Opening
This unit can be installed in any dashboard
having an opening as shown below:
Installing the unit
Be sure you test all connections first, and
then follow these steps to install the unit.
1. Make sure the ignition is turned off, and
then disconnect the cable from the
vehicle battery’s negative (-) terminal.
2. Disconnect the wire harness and the
antenna.
3. Press the release button on the front
panel and remove the control panel
(see the steps of “removing the front
panel”).
4. Lift the top of the outer trim ring then pull
it out to remove it.
5. The two supplied keys release tabs
inside the unit’s sleeve so you can
remove it. Insert the keys as far as they
will go (with the notches facing up) into
the appropriate slots at the middle left
and right sides of the unit. Then slide
the sleeve off the back of the unit.
30
Take out screw
before installation.
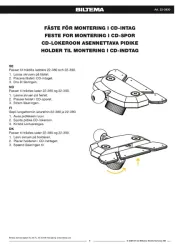
Lossa först de två skruvarna.
OBS! Innan
du monterar
enheten, se till
att lossa de t
skruvarna som
sitter fastskru-
vade på chassits
topp vid leverans.
Art. 24-626
© 2018-05-04 Biltema Nordic Services AB
3
Frontmontering (metod A)
Denna enhet kan frontmonteras i alla instru-
mentbrädor som har en öppning enligt bilden
nedan:
Förkra dig först om att alla anslutningar är
korrekt utförda och följ sedan följande steg:
1. Kontrollera att tändningen är avslagen och
koppla loss bilbatteriets minuspol.
2. Koppla loss kabelhärvan och antennen
från enheten.
3
INSTALLATION
Notes:
Choose the mounting location where
the unit will not interfere with the
normal driving function of the driver.
Before finally installing the unit, connect
the wiring temporarily and make sure it
is all connected up properly and the
unit and the system work properly.
Use only the parts included with the
unit to ensure proper installation. The
use of unauthorized parts can cause
malfunctions.
Consult with your nearest dealer if
installation requires the drilling of holes
or other modifications of the vehicle.
Install the unit where it does not get in
the drivers way and cannot injure the
passenger if there is a sudden stop, like
an emergency stop.
If installation angel exceeds 30°from
horizontal, the unit might not give its
optimum performance.
Avoid installing the unit where it would
be subject to high temperature, such as
from direct sunlight, or from hot air,
from the heater, or where it would be
subject to dust, dirt or excessive
vibration.
DIN FRONT/REAR-MOUNT
This unit can be properly installed either
from “Front (conventional DIN Front-mount)
or “Rear” (DIN Rear-mount installation,
utilizing threaded screw holes at the sides
of the unit chassis). For details, refer to the
following illustrated installation methods.
DIN FRONT-MOUNT (Method A)
Installation Opening
This unit can be installed in any dashboard
having an opening as shown below:
Installing the unit
Be sure you test all connections first, and
then follow these steps to install the unit.
1. Make sure the ignition is turned off, and
then disconnect the cable from the
vehicle batterys negative (-) terminal.
2. Disconnect the wire harness and the
antenna.
3. Press the release button on the front
panel and remove the control panel
(see the steps of removing the front
panel).
4. Lift the top of the outer trim ring then pull
it out to remove it.
5. The two supplied keys release tabs
inside the units sleeve so you can
remove it. Insert the keys as far as
they will go (with the notches facing up)
into the appropriate slots at the middle
left and right sides of the unit. Then slide
the sleeve off the back of the unit.
30
Outer Trim Ring
Front Panel
L Key
Sleeve
R Key
53mm
182mm
5. Höger nyckel
1. Frontpanel
2. Sarg
3. Hölje
4. Vänster nyckel
4
INSTALLATION
6. Mount the sleeve by inserting the sleeve
into the opening of the dashboard and
bend open the tabs located around the
sleeve with a screwdriver. Not all tabs
will be able to make contact, so
examine which ones will be most
effective. Bending open the appropriate
tabs behind the dashboard to secure
the sleeve in place.
Tabs
Screwdriver
Sleeve
Dashboard
7. Reconnect the wire harness and the
antenna and be careful not to pinch any
wires or cables.
8. Slide the unit into the sleeve until it
locks into place.
9. To further secure the unit, use the
supplied metal strap to secure the
back of the unit in place. Use the
supplied hardware (Hex Nut (M5mm)
and Spring Washer) to attach one end of
the strap to the mounting bolt on the back
of the unit. If necessary, bend the metal
strap to fit your vehicle’s mounting area.
Then use the supplied hardware
(Tapping Screw (5x25mm) and Plain
Washer) to attach the other end of metal
strap to a solid metal part of the vehicle
under the dashboard. This strap also
helps ensure proper electrical grounding
of the unit.
Note to install the short threading
terminal of the mounting bolt to the back
of the unit and the other long threading
terminal to the dashboard.
Mounting Bolt
Spring Washer
Plain Washer
Tapping Screw
Hex Nut
Metal Strap
10. Reconnect the cable to the vehicle
batterys negative (-) terminal. Then
replace the outer trim ring and install the
units front panel (see the steps of
installing the front panel).
Removing the unit
1. Make sure the ignition is turned off, then
disconnect the cable from the vehicle
batterys negative (-) terminal.
2. Remove the metal strap attached the
back of the unit (if attached).
3. Press the release button to remove the
front panel.
4. Lift the top of the outer trim ring then pull
it out to remove it.
5. Insert both of the supplied keys into the
slots at the middle left and right sides of
the unit, then pull the unit out of the
dashboard.
DIN REAR-MOUNT (Method B)
If your vehicle is a Nissan, Toyota, follow
these mounting instructions.Use the screw
holes marked T (Toyota), N (Nissan)
located on both sides of the unit to
1. Instrumentbräda
2. Flik/spärr
3. Skruvmejsel
4. Hölje
3. Tryck på frontpanelens releaseknapp och
lossa panelen (för närmare detaljer, se
avsnittet ’Att använda den löstagbara front-
panelen’).
4. Ta tag i toppsidan av sargen, lyft den försik-
tigt uppåt och drag sedan utåt för att lossa
den.
5. De två medföljande metallnycklarna an-
vänds för att lossa enheten fn höljet. För
in nycklarna, med märkningen pekande
uppåt, i de smala hål som  nns i mitten av
höljets höger och vänsterkanter (se illustra-
tion). Genom att trycka in nycklarna så los-
sar du de två metallspärrar som håller fast
höljet. Lossa höljet genom att trycka det
bakåt med hjälp av nycklarna.
6. Montera höljet genom att försiktigt passa in
det i instrumentbrädans öppning och böj ut
metall ikarna med en skruvmejsel. Troligen
kommer inte alla  ikar att vara användbara
för att låsa höljet, så kontrollera vilka  ikar
som lämpar sig bäst och säkra höljet med
hjälp av dessa.

Produkspesifikasjoner

Merke: Biltema
Kategori: Bilradio
Modell: 24-626

Trenger du hjelp?

Hvis du trenger hjelp med Biltema 24-626 still et spørsmål nedenfor, og andre brukere vil svare deg