Blizzard Hype 150 Bruksanvisning
Blizzard
Ikke kategorisert
Hype 150
Les nedenfor 📖 manual på norsk for Blizzard Hype 150 (16 sider) i kategorien Ikke kategorisert. Denne guiden var nyttig for 35 personer og ble vurdert med 5.0 stjerner i gjennomsnitt av 18 brukere
Side 1/16

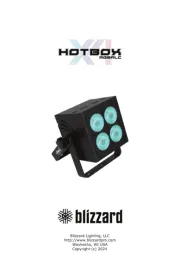
Blizzard Lighting, LLC
http://www.blizzardpro.com
Waukesha, WI USA
Copyright (c) 2022
Produkspesifikasjoner
| Merke: | Blizzard |
| Kategori: | Ikke kategorisert |
| Modell: | Hype 150 |
Trenger du hjelp?
Hvis du trenger hjelp med Blizzard Hype 150 still et spørsmål nedenfor, og andre brukere vil svare deg
Ikke kategorisert Blizzard Manualer
10 Oktober 2025

7 Januar 2025

27 Oktober 2024

27 Oktober 2024

27 Oktober 2024
Ikke kategorisert Manualer
- Huslog
- Ansmann
- Onkyo
- Brentwood
- BASSBOSS
- Racktime
- Graphite
- Ebro
- Flame
- NightStick
- Goodwe
- Avid
- Ikegami
- New Pol
- Cres Cor
Nyeste Ikke kategorisert Manualer

23 Oktober 2025

23 Oktober 2025

23 Oktober 2025

23 Oktober 2025

23 Oktober 2025

23 Oktober 2025

23 Oktober 2025

23 Oktober 2025

23 Oktober 2025

23 Oktober 2025