Broan 345SOWW Bruksanvisning
Broan
Ikke kategorisert
345SOWW
Les nedenfor 📖 manual på norsk for Broan 345SOWW (18 sider) i kategorien Ikke kategorisert. Denne guiden var nyttig for 11 personer og ble vurdert med 4.7 stjerner i gjennomsnitt av 6 brukere
Side 1/18
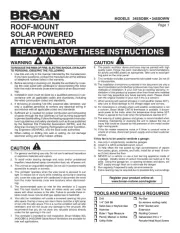
MODELS 345SOBK • 345SOWW
Page 1
WARNING
TO REDUCE THE RISK OF FIRE, ELECTRIC SHOCK, OR INJURY
TO PERSONS, OBSERVE THE FOLLOWING:
1. Use this unit only in the manner intended by the manufacturer.
If you have questions, contact the manufacturer at the address
or telephone number listed in the warranty.
2. Before servicing or cleaning unit, disable the ventilator by cover-
ing the solar panel with cardboard or disconnecting the wires
from the motor terminals (note wire locations when disconnect-
ing).
3. Installation work must be done by a qualified person(s) in ac-
cordance with all applicable codes and standards, including
fire-rated construction codes and standards.
4. If removing an existing 120 VAC powered attic ventilator, use
only a qualified person(s) to remove any electrical wiring in
accordance with all applicable codes and standards.
5. Sufficient air is needed for proper combustion and exhausting
of gases through the flue (chimney) of fuel burning equipment
to prevent backdrafting. Follow the heating equipment manufac-
turer's guidelines and safety standards such as those published
by the National Fire Protection Association (NFPA), and the
American Society for Heating, Refrigeration and Air Condition-
ing Engineers (ASHRAE), and the local code authorities.
6. When cutting or drilling into wall or ceiling, do not damage
electrical wiring and other hidden utilities.
CAUTION
ROOF-MOUNT
SOLAR POWERED
ATTIC VENTILATOR
READ AND SAVE THESE INSTRUCTIONS
r
Drill
r
1/4" Drill Bit
r
Sabre Saw or Keyhole Saw
r
Hammer
r
Ruler / Tape Measure
r
Pencil, Marker or Scribe
r
Utility Knife
r
Pry Bar
(to remove roofing nails)
r
5/16" Socket and
Extension
r
Roofing Cement
r
Galvanized #10 x 1"
Pancake Head Wood Screws
TOOLS AND MATERIALS REQUIRED
Register your product online at:
www.broan-nutone.com/register
CAUTION
1. For general ventilating use only. Do not use to exhaust hazardous
or explosive materials and vapors.
2. To avoid motor bearing damage and noisy and/or unbalanced
impellers, keep drywall spray, construction dust, etc. off power unit.
3. This unit has an unguarded impeller. Do not use in locations readily
accessible to people or animals.
4. This ventilator operates when the solar panel is exposed to sun
light. To reduce risk of injury while installing, servicing or cleaning
unit, cover the solar panel with cardboard or disconnect the wires
from the motor terminals (note wire locations when disconnect-
ing).
5. The recommended open air inlet for this ventilator is 2 square
feet. The best location for these air intake vents are under the
eaves with direct access to the attic. Failure to provide these in-
takes could cause natural-draft gas appliances to backdraft.
6. Your attic fan installation will create a screened opening into your
attic space. During a heavy rain storm there could be a light spray
of rain into this attic space. This is a normal condition with all attic
ventilators and will not cause any damage to the structure. We
recommend that you do not store any valuable articles directly
under the fan opening in the roof.
7. This ventilator is intended for roof installation. Broan Models 353,
345GOBK & 345GOWW Gable Mount Ventilators are available for
side wall applications.
8. The plastic ventilator dome and base may be painted with high
quality paint. Follow the paint manufacturer's recommendations
for acrylic and ABS plastic as appropriate. Take care to avoid get-
ting paint on the solar panel.
9. This ventilator includes a permanently lubricated motor. Do not oil
or disassemble.
10. The installation instructions contained in this document are only a
recommendation and individual professionals may have their own
methods of installation. If your roof has an existing warranty, in-
stallation of this product by anyone other than those who installed
the roof may jeopardize any future warranty claim. Please check
with the original installer of your roof if this is a concern.
11. When working with asphalt shingles in cold weather (below 40
o
F),
take care to avoid damage to the shingle edges and corners.
12.
For installations in climates where cold weather condensation is not
a concern, Broan Model CWT45 thermostat is available. It discon-
nects power to the motor when the temperature drops below 50
o
F.
Power is applied to the motor when the temperature reaches 61
o
F.
13. The wearing of safety glasses and gloves is recommended when
installing, maintaining or cleaning the unit to reduce the risk of
injury that could be caused by the presence of thin metal and/or
high moving parts.
14. If the fan makes excessive noise or if there is unusual noise or
smells of smoke, disconnect power supply and contact customer
service.
If this fan is to be used to ventilate a garage:
A. Use only in single family, residential garages
B. Install in a GFCI protected branch circuit
C. To help offset the risk posed by high concentrations of vapors
from paints, glues, solvents, and fuels, install fan at least 18 inch-
es (0.5m) above the floor
D. NEVER run a vehicle or use a fuel burning appliance inside of
a garage. Deadly levels of carbon monoxide can build up in the
area. Using this garage fan, or opening windows and doors, will
NOT supply enough fresh air to eliminate the danger.
E. Run regularly if exposed to salty air environments
F. Extra cleaning may be required due to possible dirty surroundings
Produkspesifikasjoner
| Merke: | Broan |
| Kategori: | Ikke kategorisert |
| Modell: | 345SOWW |
Trenger du hjelp?
Hvis du trenger hjelp med Broan 345SOWW still et spørsmål nedenfor, og andre brukere vil svare deg
Ikke kategorisert Broan Manualer
4 August 2025
Ikke kategorisert Manualer
- Prince Castle
- Westinghouse
- Sven
- BaByliss
- Gravity
- Lantus
- GOgroove
- Stamos
- Studio Titan
- Glyph
- Dinstar
- Vincent
- Reber
- Antelope Audio
- CEDAR
Nyeste Ikke kategorisert Manualer

23 Oktober 2025

23 Oktober 2025

23 Oktober 2025

23 Oktober 2025

23 Oktober 2025

23 Oktober 2025

23 Oktober 2025

23 Oktober 2025

23 Oktober 2025

23 Oktober 2025