DMT Alpha Series A1.9i Bruksanvisning
Les nedenfor 📖 manual på norsk for DMT Alpha Series A1.9i (40 sider) i kategorien Lettelse. Denne guiden var nyttig for 27 personer og ble vurdert med 4.6 stjerner i gjennomsnitt av 14 brukere
Side 1/40
USER MANUAL
ENGLISH
V1.0
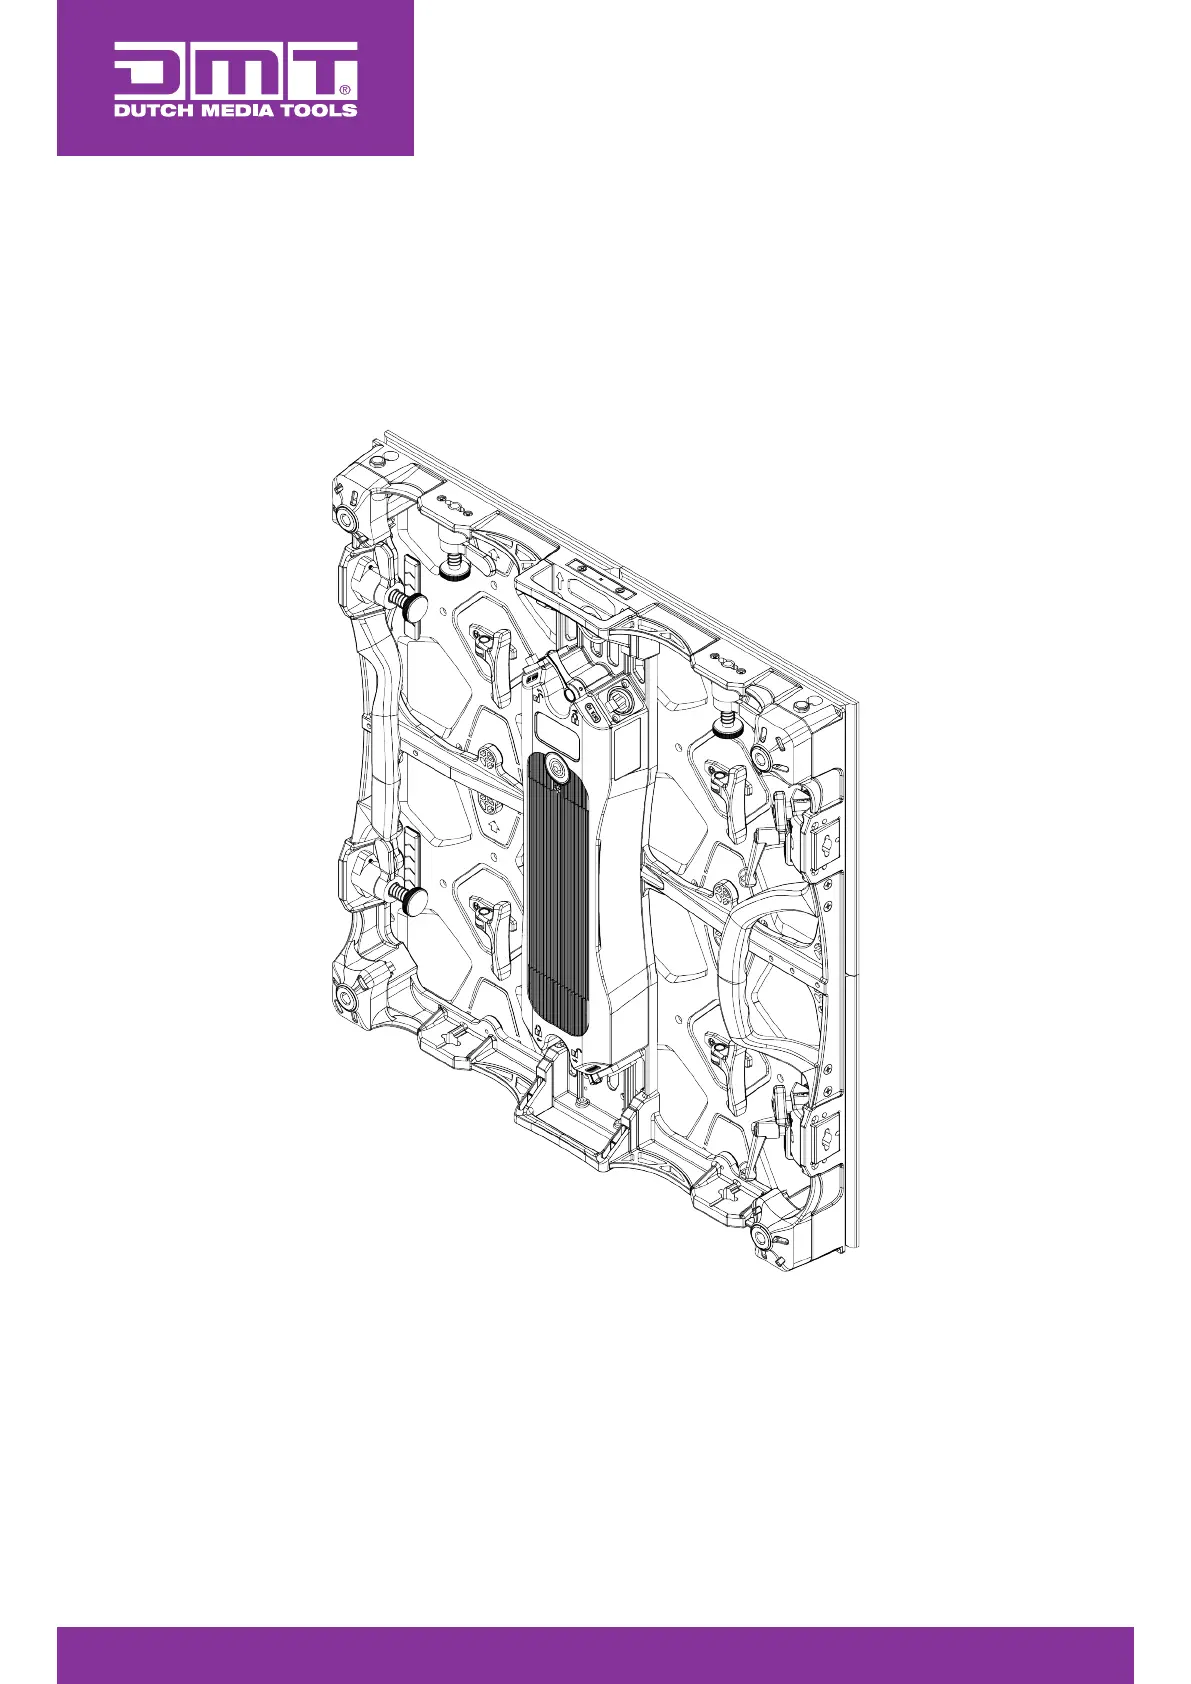
Alpha Series A1.9i
Product code: 101812
cc c
Produkspesifikasjoner
| Merke: | DMT |
| Kategori: | Lettelse |
| Modell: | Alpha Series A1.9i |
Trenger du hjelp?
Hvis du trenger hjelp med DMT Alpha Series A1.9i still et spørsmål nedenfor, og andre brukere vil svare deg
Lettelse DMT Manualer

20 Desember 2024
Lettelse Manualer
- Kuzco
- Klein Tools
- Setti+
- Eurolite
- Aqara
- Kinotehnik
- Maginon
- XQ-Lite
- Nitecore
- Aveo Engineering
- ADB
- Light4Me
- CSL
- LUPO
- GlobalTronics
Nyeste Lettelse Manualer

9 April 2025

9 April 2025

8 April 2025

8 April 2025

8 April 2025

7 April 2025

6 April 2025

6 April 2025

6 April 2025

6 April 2025