Epson EcoTank ET-2980U Bruksanvisning
Les nedenfor 📖 manual på norsk for Epson EcoTank ET-2980U (2 sider) i kategorien Printer. Denne guiden var nyttig for 14 personer og ble vurdert med 4.1 stjerner i gjennomsnitt av 7.5 brukere
Side 1/2
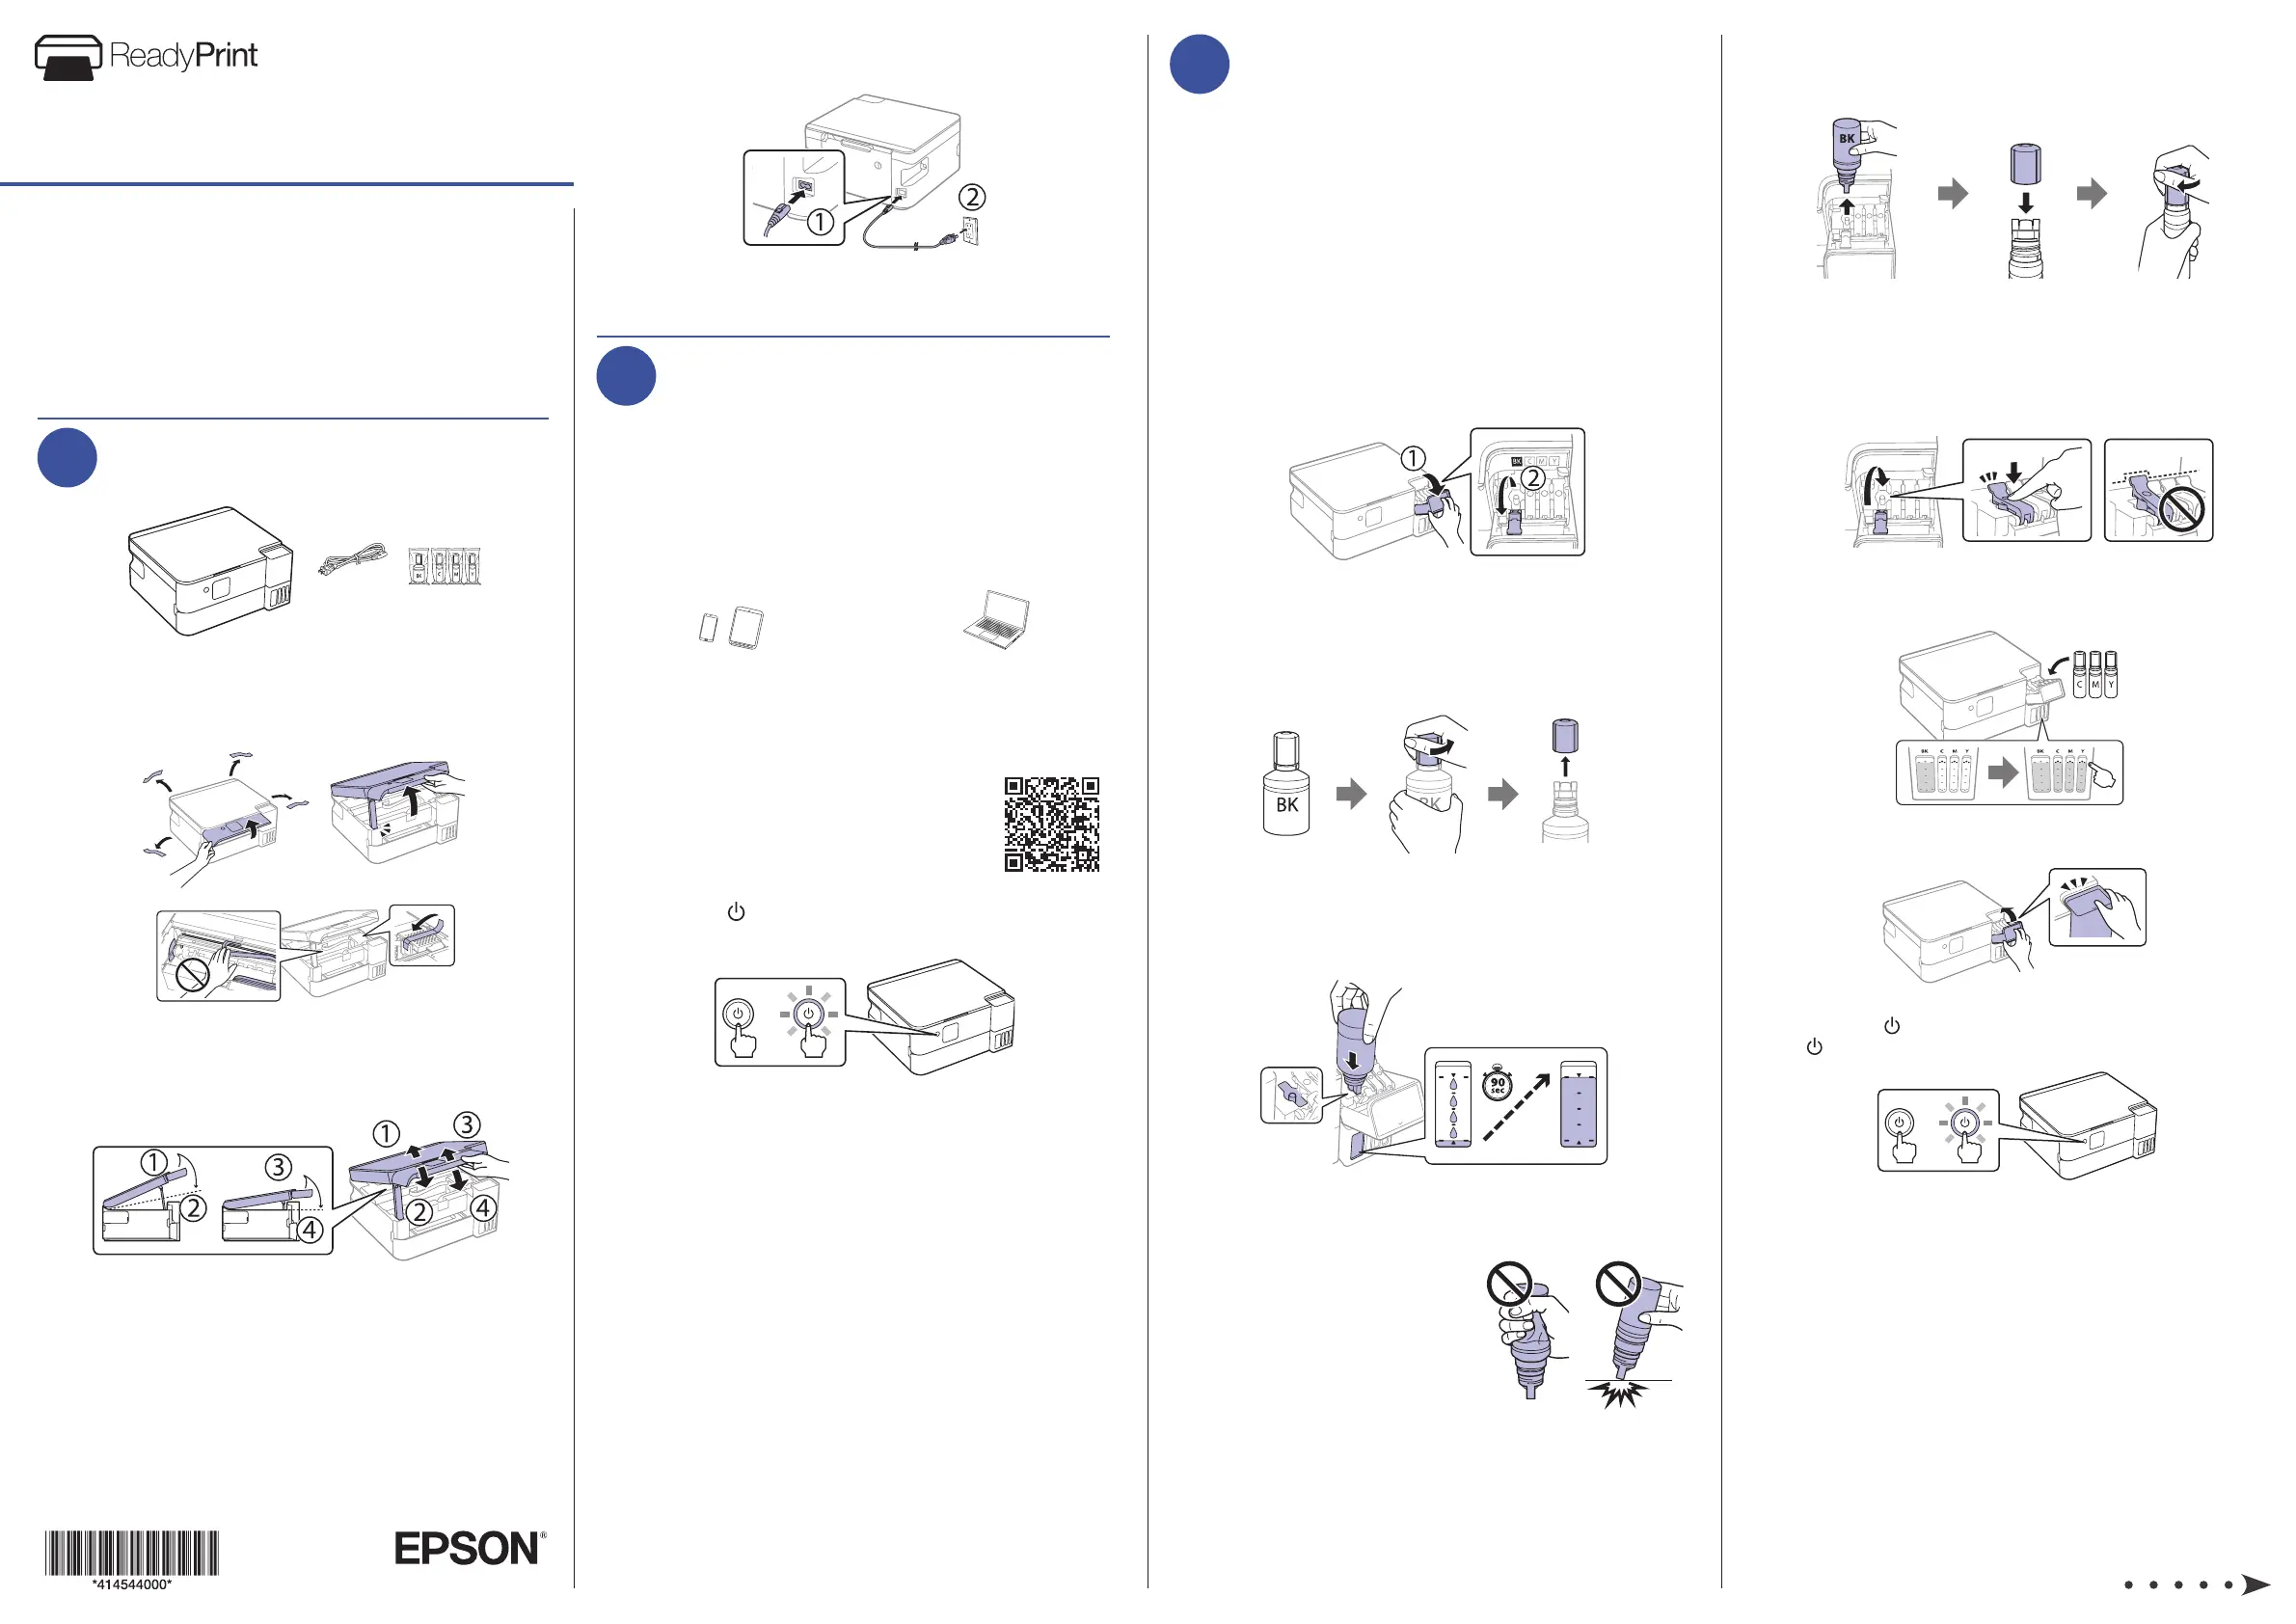
5 When the ink tank is full, remove the ink bottle and
securely close it with the bottle cap. Place the remaining
ink aside; you will need it later.
Note: Do not leave the ink bottle inserted; otherwise the bottle
may be damaged or ink may leak. If any ink remains in the bottle,
initial setup.
6 Securely close the black ink tank cap.
7 Repeat the previous steps for the other colors.
8 Close the ink tank cover.
9 Press the power button to turn on the product. The
Note:
that no protective material has been left inside the product.
10 Select your language.
Note: You can change this setting later using the product’s
control panel. For more information, see the online User’s Guide.
11 When an Epson Smart Panel setup message appears on
the LCD screen, select the option to continue setup.
IMPORTANT: Before using this product, make sure you read
these instructions and the safety instructions in the online
User’sGuide.
Note: As part of the ReadyPrint
TM
program, Epson monitors ink
usage remotely to provide you with additional ink before you
run out of it. The product must be connected to the Internet to
function and monitor ink usage.
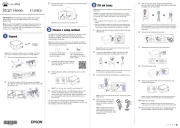
1
Unpack
Note:
tanks. The ink bottles are vacuum packed to maintain reliability.
1 Remove all protective materials from the product.
2 To close the scanner unit, lift the scanner unit slightly,
then lower it until it stops. Repeat the motion to fully close
the scanner unit.
3 Connect the power cord to the back of the product and to
an electrical outlet.
Caution: Do not connect to your computer yet.
2
Choose a setup method
The Epson Smart Panel
®
app can help you set up your printer
through an interactive, step-by-step process using your
smartphone or tablet. After setup, you’ll be able to print and
scan directly from the app.
Note: If you want to print and scan from your computer, you need to
install the product’s software. See the “Install software” section on the
back of this sheet for instructions.
If you do not want to
use a mobile device for
setup, skip to the “Fill ink
tanks” section.
To use your mobile device
for setup (recommended),
continue to step 1.
OR
1 Download the Epson Smart Panel app
from your device’s app store. Do not
launch the app yet.
2 Hold the power button until it lights up to turn on the
product.
Note: Do not connect your product to your computer yet.
3 Launch the app and follow its instructions to set up your
product. If necessary, tap the
+
icon on the top right
corner of the app’s home screen, select the option to set
up a new product, and follow the instructions to set up
your product.
For information on connecting your product to a computer,
solving problems, or for details on reaching Epson support, see
the sections on the back of this sheet.
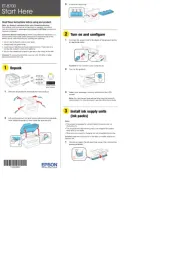
3
Fill ink tanks
Warning: Keep the ink bottles out of the reach of children and do not
drink the ink.
Caution: This product requires careful handling of ink. If ink spills,
Note:
• Use only Epson
®
570 ink provided to you under the ReadyPrint
program.
• Use the ink bottles included with the printer to set up the product.
Part of the ink will be used to charge the printhead. These bottles
may print fewer pages compared with replacement ink bottles.
1 Open the ink tank cover, then open the cap for the black
(BK) ink tank.
Note: Refer to the color-coded sticker on the ink tank unit to
identify the color of each tank.
2 Unpack the black (BK) ink bottle. Hold the ink bottle
upright and slowly turn the bottle cap to remove it.
Caution: Do not shake or squeeze the ink bottle. Do not touch
the top of the ink bottle after its cap is removed.
3
Note: Do not force the bottle into position; each bottle is keyed
for each color.
4
Do not squeeze the bottle or
allow it to contact any other
surface.
Note:
stops automatically when the ink
reinsert the bottle.
Start Here
ET-2980U
Produkspesifikasjoner
| Merke: | Epson |
| Kategori: | Printer |
| Modell: | EcoTank ET-2980U |
Trenger du hjelp?
Hvis du trenger hjelp med Epson EcoTank ET-2980U still et spørsmål nedenfor, og andre brukere vil svare deg
Printer Epson Manualer
6 Oktober 2025
6 Oktober 2025
6 Oktober 2025
6 Oktober 2025
6 Oktober 2025
6 Oktober 2025
6 Oktober 2025
6 Oktober 2025
6 Oktober 2025
6 Oktober 2025
Printer Manualer
- Fujifilm
- Pantum
- Lexmark
- GoDEX
- Oce
- Kogan
- OKI
- StarTech.com
- Panasonic
- Star
- Videology
- TSC
- Middle Atlantic
- Microboards
- Panduit
Nyeste Printer Manualer

17 Oktober 2025
16 Oktober 2025

16 Oktober 2025

16 Oktober 2025
16 Oktober 2025
16 Oktober 2025
16 Oktober 2025
16 Oktober 2025

16 Oktober 2025
16 Oktober 2025