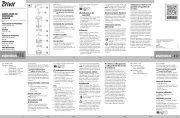
Eura ADP-26A3 Bruksanvisning

Les nedenfor 📖 manual på norsk for Eura ADP-26A3 (32 sider) i kategorien Ikke kategorisert. Denne guiden var nyttig for 3 personer og ble vurdert med 4.5 stjerner i gjennomsnitt av 2 brukere

Side 1/32
PL
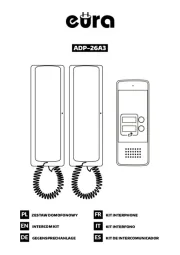
ZESTAW DOMOFONOWY
EN
INTERCOM KIT
DE
GEGENSPRECHANLAGE
FR
KIT INTERPHONE
IT
KIT INTERFONO
ES
KIT DE INTERCOMUNICADOR
ADP-26A3
2
I. ZESTAWIENIE RYSUNKÓW / LIST OF FIGURES / ZUSAMMENFASSUNG DER ABBILDUNGEN/ LISTE DES FIGURES /
ELENCO DEI DISEGNI / I. LISTADO DE FIGURAS
A
G
D
V
A
G
D
V
1
2 3 45
6
JW1
J6 J1
S1
JW2
23
4
5
6
7
98
1
4
5
6
7
8
a
ab
b
c
1
3
2
1
2
3
4
5
6
7
8
9
1
3 4
5 6
7 8
2
3
PL
PL
EN DE FR IT ES
1
Skład zestawu:
1. Unifon - 2 szt.
2. Kaseta zewnętrzna
- 1 szt.
3. Daszek ochronny do
kasety zewnętrznej
- 1 szt.
4. Śruby samogwintujące
- 4 szt.
5. Zasilacz sieciowy
6. Kołki do montażu
- 4 szt.
7. Śruba zabezpieczająca
8. Brelok użytkownika
- 5 szt.
9. Brelok administratora
- 2 szt.
Set contents:
1. Intercom – 2 pc.
2. Outdoor station – 1 pc.
3. Protective cover for the
external casing – 1 pc.
4. Self-tapping screws
– 4 pcs.
5. Power socket – 1 pc.
6. Mounting pins – 4 pcs.
7. Security screw – 1 pc.
8. User key fob – 5 pcs.
9. Administrator key fob
– 2 pcs.
Lieferumfang:
1. Gegensprechanlage
– 2 Stk.
2. Außengehäuse – 1 Stk.
3. Schutzabdeckung für
das Außengehäuse
– 1 Stk.
4. Selbstschneidende
Schrauben – 4 Stk.
5. Strombuchse – 1 Stk.
6. Montagedübel – 4 Stk.
7. Sicherheitsschraube
– 1 Stk.
8. Benutzer-Schlüsselan-
hänger – 5 Stk.
9. Administrator- Schlüsse-
lanhänger – 2 Stk.
Contenu du kit :
1. Interphone – 2 pc.
2. Platine extérieure
– 1 pc.
3. Couvercle de protection
pour le boîtier externe
– 1 pc.
4. Vis autotaraudeuses
– 4 pcs.
5. Prise d’alimentation
– 1 pc.
6. Chevilles de montage
– 4 pcs.
7. Vis de sécurité – 1 pc.
8. Porte-clés utilisateur
– 5 pcs.
9. Porte-clés administra-
teur – 2 pcs.
Contenuto del set:
1. Citofono – 2 pz.
2. Pulsantiera esterna
– 1 pz.
3. Copertura protettiva
per la custodia esterna
– 1 pz.
4. Viti autolettanti
– 4 pz.
5. Presa di alimentazione
– 1 pz.
6. Tasselli di montaggio
– 4 pz.
7. Vite di sicurezza – 1 pz.
8. Portachiavi utente
- 5 pz.
9. Portachiavi amministra-
tore – 2 pz.
Contenido del conjunto:
1. Intercomunicadores de
Audio – 2 ud.
2. Panel exterior – 1 ud.
3. Cubierta protectora
para la caja externa
– 1 ud.
4. Tornillos autorroscantes
– 4 uds.
5. Toma de corriente
– 1 ud.
6. Tacos de montaje
– 4 uds.
7. Tornillo de seguridad
– 1 ud.
8. Llavero de usuario –
5 uds.
9. Llavero de administra-
dor – 2 uds.
2
Budowa unifonu:
1. Gośnik
2. Mikrofon
3. Przycisk odblokowywa-
nia rygla
4. Przełącznik głośności
dzwonka: a. wysoki, b.
średni, c. niski
5. Wskaźnik LED
6. Przycisk otwierania
bramy
7. Zaciski połączeniowe
8. Gniazdo zasilania
12V DC
Handset structure:
1. Speaker
2. Microphone
3. Door lock release
button
4. Call volume switch:
high, medium, low
5. LED indicator
6. Gate opening button
7. Connection terminals
8. 12 V DC power socket
Auau des Innenhörers:
1. Lautsprecher
2. Mikrofon
3. Türöner-Taste
4. Lautstärkeschalter:
hoch, mittel, niedrig
5. LED-Anzeige
6. Toröner-Taste
7. Anschlussklemmen
8. 12-V-DC-Strombuchse
Structure du combiné:
1. Haut-parleur
2. Microphone
3. Bouton d’ouverture de
la serrure
4. Commutateur de
volume: fort, moyen,
faible
5. Indicateur LED
6. Bouton d’ouverture de
portail
7. Bornes de connexion
8. Prise d’alimentation
12 V CC
Struttura del citofono:
1. Altoparlante
2. Microfono
3. Pulsante di sblocco
della serratura
4. Interruttore del volume:
alto, medio, basso
5. Indicatore LED
6. Pulsante di apertura
cancello
7. Terminali di collega-
mento
8. Presa di alimentazione
12V CC
Estructura del interfono:
1. Altavoz
2. Micrófono
3. Botón de desbloqueo
de cerradura
4. Interruptor de volumen:
alto, medio, bajo
5. Indicador LED
6. Botón de apertura de
puerta
7. Terminales de conexión
8. Toma de alimentación
12 V CC
3
Budowa kasety:
1. Mikrofon
2. Daszek ochronny
3. Głośnik
4. Przycisk wywołania
5. Czytnik breloków
zbliżeniowych
6. Gniazdo rygla 12V DC
(elektrozaczepu)
7. Gniazda do podłączenia
unifonu (JW1 / JW2)
8. Przycisk kodowania
nowych breloków
Administratora
9. Gniazdo przycisku
opuszczania posesji
Casing structure:
1. Microphone
2. Protective cover
3. Speaker
4. Call button
5. Key fob reader
6. 12 V DC electric strike
output
7. Connection terminals
8. Button for program-
ming new key fobs
9. Administrator session
release button
Auau des Außenge-
häuses:
1. Mikrofon
2. Schutzabdeckung
3. Lautsprecher
4. Ruaste
5. Schlüsselanhänger-
Lesegerät
6. Ausgang für 12-V-DC
Türöner
7. Anschlussklemmen
8. Taste zur Programmie-
rung neuer Schlüsselan-
hänger
9. Taste zum Beenden der
Administrator-Sitzung
Construction de la
Platine extérieure:
1. Microphone
2. Couvercle de protection
3. Haut-parleur
4. Bouton d’appel
5. Lecteur de porte-clés
6. Sortie pour gâche
électrique 12 V CC
7. Bornes de connexion
8. Bouton de program-
mation de nouveaux
porte-clés
9. Bouton de n de ses-
sion administrateur
Struttura della Pulsan-
tiera esterna:
1. Microfono
2. Copertura protettiva
3. Altoparlante
4. Pulsante di chiamata
5. Lettore di portachiavi
6. Uscita per serratura
elettrica 12 V CC
7. Terminali di collega-
mento
8. Pulsante di program-
mazione di nuovi
portachiavi
9. Pulsante di rilascio ses-
sione amministratore
Estructura de la Panel
exterior:
1. Micrófono
2. Cubierta protectora
3. Altavoz
4. Botón de llamada
5. Lector de llaveros
6. Salida para cerradura
eléctrica de 12 V CC
7. Terminales de conexión
8. Botón para programar
nuevos llaveros
9. Botón de nalización de
sesión de administrador
4
Właściwie umiejscowienie
kasety zewnętrznej
Proper placement of the
outdoor station
Richtige Platzierung des
Außengehäuses
Placement correct du
platine extérieure
Posizionamento corretto
della pulsantiera esterna
Colocación correcta de la
panel exterior
5a
Montaż daszku
ochronnego
Montage der Schutzab-
deckung
Installation du couvercle de
protection
Installation du couvercle
de protection
Installazione della coper-
tura protettiva
Instalación de la cubierta
protectora
5b
Montaż kasety w daszku
ochronnym
Installation of the casing in
the protective cover
Montage des Gehäuses in
der Schutzabdeckung
Installation du boîtier
dans le
couvercle de protection
Installazione della cassetta
nella copertura protettiva
Instalación de la caja en la
cubierta protectora
6
Instalacja ramki montażo-
wej nifonu
Installation of the protecti-
ve frame in the recess
Installation des Schutzrah-
mens in der Nische
Installation du cadre de
protection dans la niche
Installazione del telaio
protettivo nella nicchia
Instalación del marco
protector en el hueco
7
Montaż unifonu na ścianie Installation of the handset
on the wall
Montage des Innenhörers
an der Wand
Installation du combiné au
mur
Installazione del citofono a
parete
Instalación del interfono
en la pared
8
Prowadzenie rozmowy Conducting a conversation Gesprächsführung Conduite d’une conver-
sation
Conduzione della conver-
sazione
Realización de una
conversación

Produkspesifikasjoner

Merke: Eura
Kategori: Ikke kategorisert
Modell: ADP-26A3

Trenger du hjelp?

Hvis du trenger hjelp med Eura ADP-26A3 still et spørsmål nedenfor, og andre brukere vil svare deg


Ikke kategorisert Eura Manualer
Ikke kategorisert Manualer

Nyeste Ikke kategorisert Manualer