Genexis FiberTwist FTU-1010 Bruksanvisning
Genexis
Ikke kategorisert
FiberTwist FTU-1010
Les nedenfor 📖 manual på norsk for Genexis FiberTwist FTU-1010 (7 sider) i kategorien Ikke kategorisert. Denne guiden var nyttig for 41 personer og ble vurdert med 3.8 stjerner i gjennomsnitt av 21 brukere
Side 1/7

FTU-1000
FiberTwist–Series
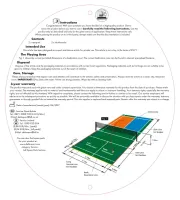
Installation Guide
Produkspesifikasjoner
| Merke: | Genexis |
| Kategori: | Ikke kategorisert |
| Modell: | FiberTwist FTU-1010 |
Trenger du hjelp?
Hvis du trenger hjelp med Genexis FiberTwist FTU-1010 still et spørsmål nedenfor, og andre brukere vil svare deg
Ikke kategorisert Genexis Manualer

24 September 2025

24 September 2025
24 September 2025
24 September 2025

25 Mars 2025

9 Januar 2025

9 Januar 2025

9 Januar 2025

9 Januar 2025

9 Januar 2025
Ikke kategorisert Manualer
- Stairville
- Xiaomi
- ARNOLD Lichttechnik
- Pyrex
- Princeton Tec
- V-Zug
- Medisana
- Redrock Micro
- InFocus
- Aqua Joe
- Rademacher
- Rocketfish
- SKROSS
- Indiana Line
- Kyocera
Nyeste Ikke kategorisert Manualer
23 Oktober 2025
23 Oktober 2025
23 Oktober 2025

23 Oktober 2025
23 Oktober 2025

23 Oktober 2025
23 Oktober 2025

23 Oktober 2025
23 Oktober 2025
23 Oktober 2025