Golden Lighting Torbellino 8106-3P CDB Bruksanvisning
Golden Lighting
Lettelse
Torbellino 8106-3P CDB
Les nedenfor 📖 manual på norsk for Golden Lighting Torbellino 8106-3P CDB (3 sider) i kategorien Lettelse. Denne guiden var nyttig for 13 personer og ble vurdert med 4.9 stjerner i gjennomsnitt av 7 brukere
Side 1/3
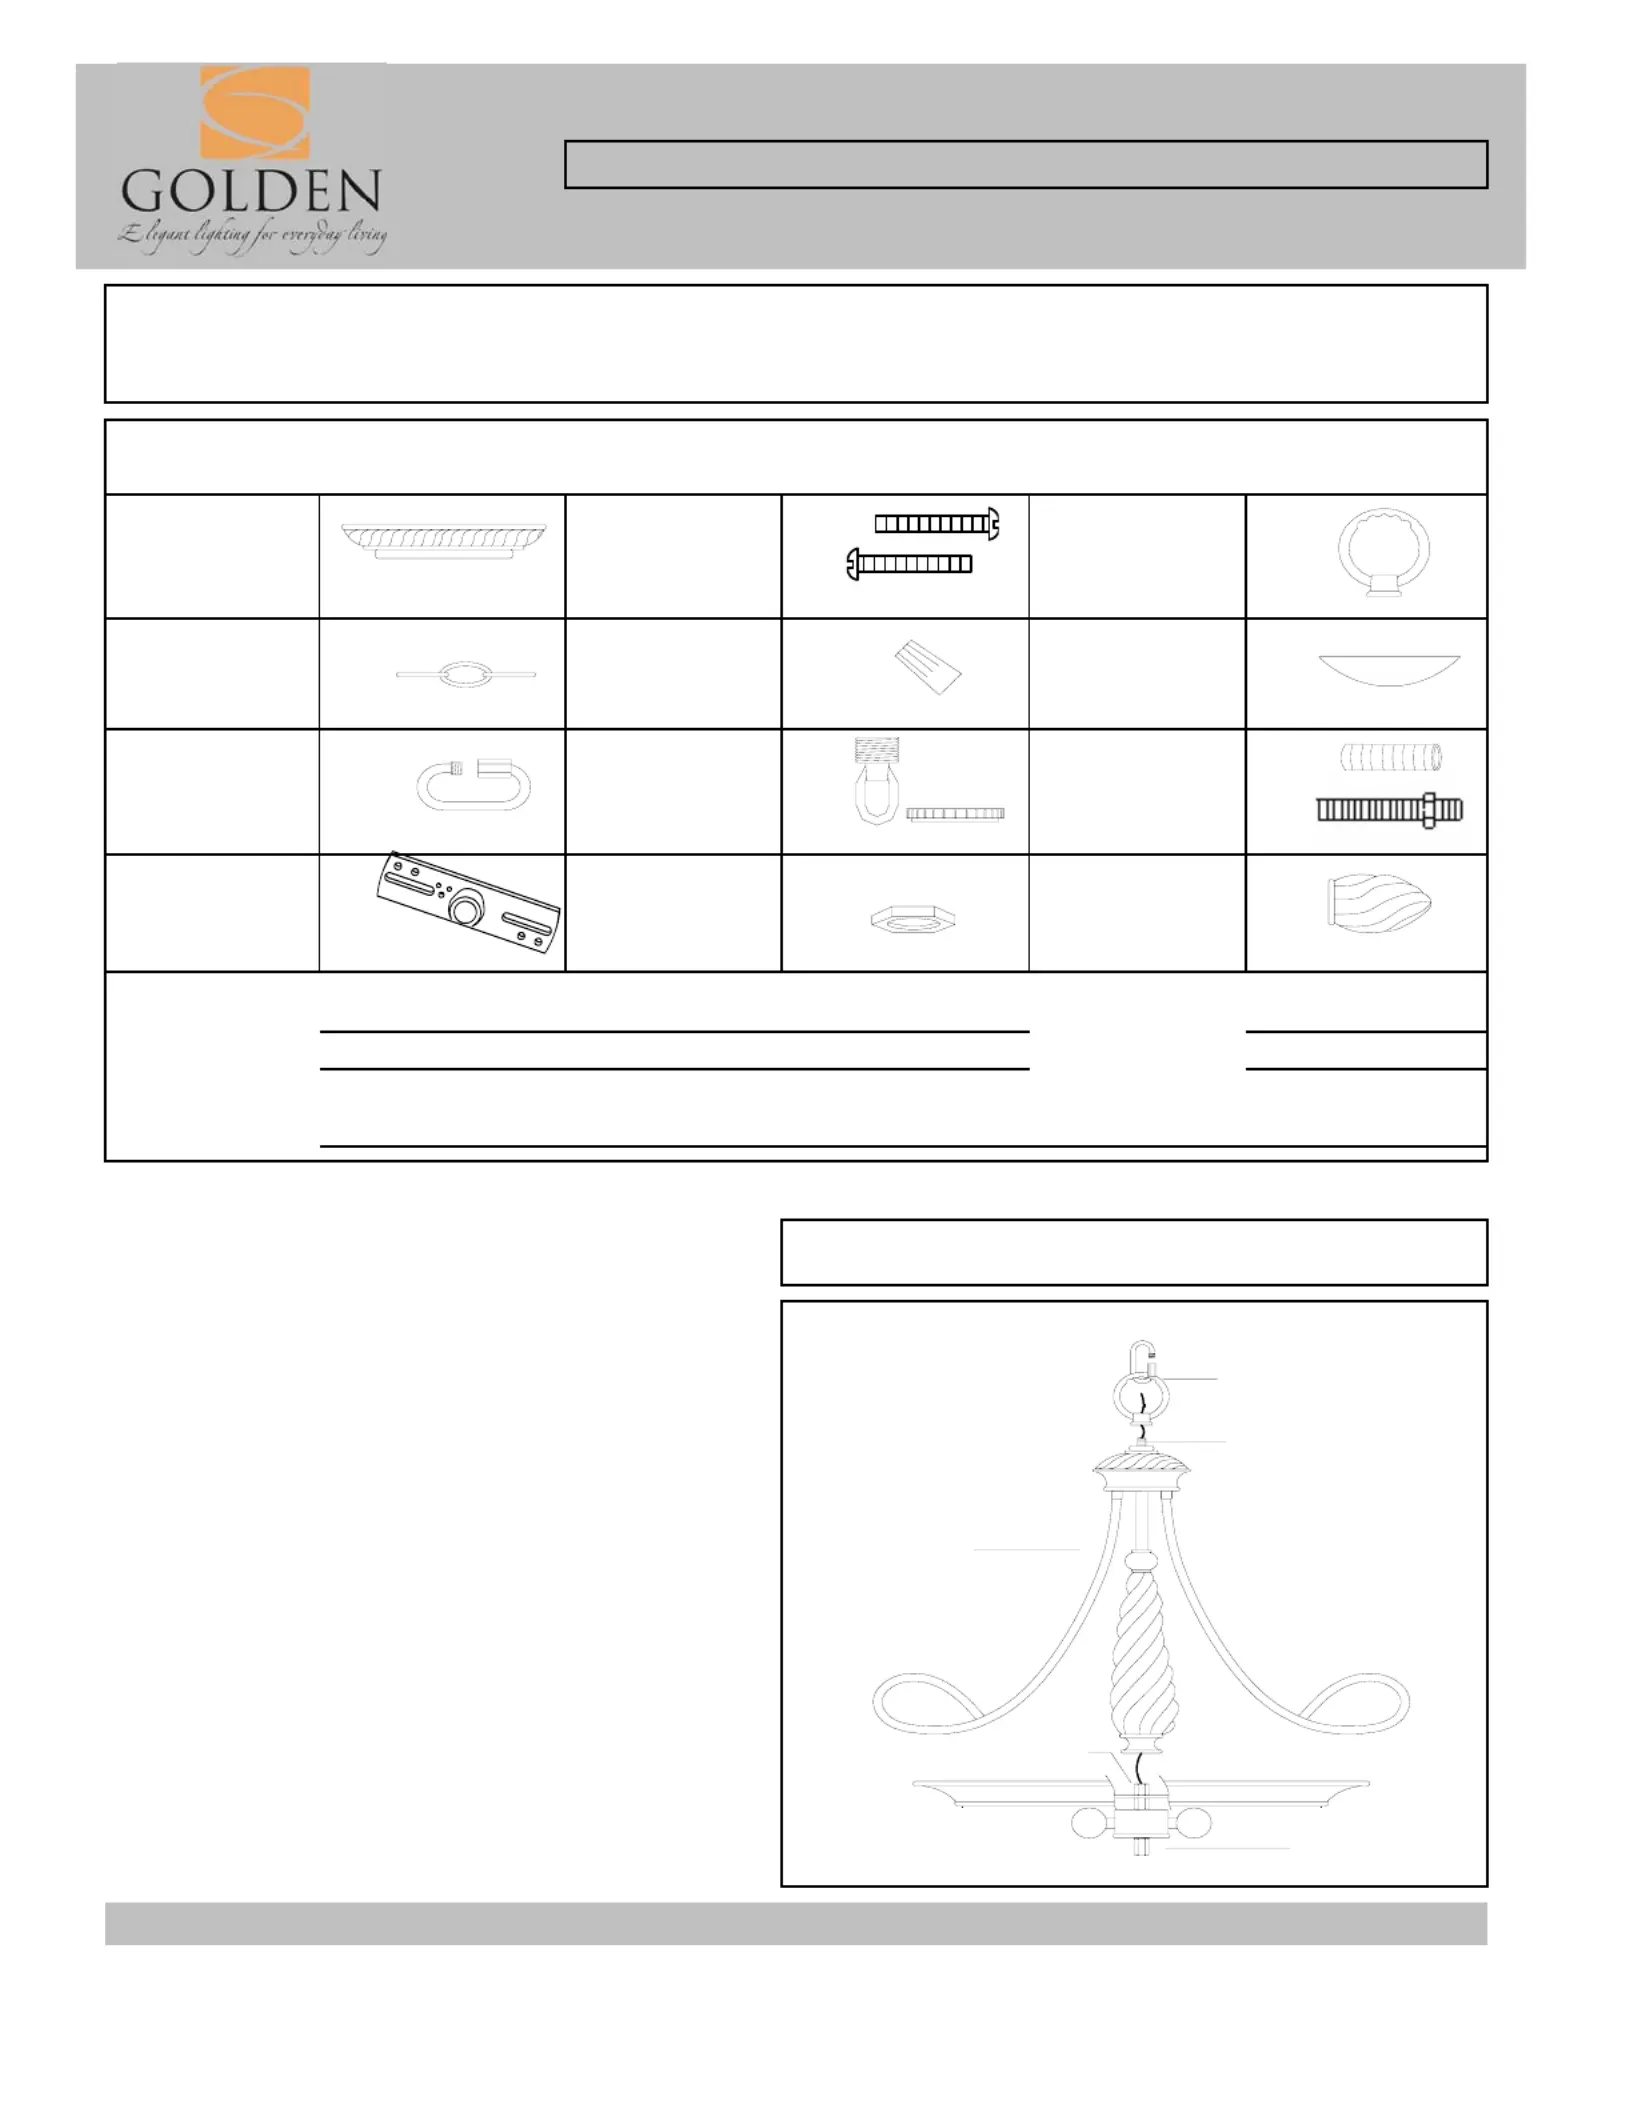
Canopy
1ea
Mounting
Screws
2ea Top loop 1ea
Chain 6ft Wire connectors 3ea Bottom cap 1ea
Chain connector
2ea
Canopy loop
and Canopy
loop collar
1ea Nipple 2ea
Mounting Strap 1ea Hex Nut 2ea Finial 1ea
Part Needed Quantity
Part Needed Quantity
Reason why ( missing, scratched, broken glass, bent, bad nish)
Comments
F A IIXTURE SSEMBLY NSTRUCTIONS
For Customer Service, contact the place of purchase to arrange for replacement parts.
NOTE: INSTALL THE GLASS ASSEMBLY
AFTER THE FIXTURE IS HUNG.
1. Thread the Body (L) onto the Coupling (M) and
until tight.
2. Then screw the Top Loop (J) to the threaded
Nipple (K) at top of Frame until tight.
8106-3P CDB
Read and review installation instruction sheet before
assembling the xture.
Fig 1
PARTS & ASSEMBLY SHEET
This xture assembled PO:__________ Date: ________
Fixture Name: Torbellino 8106-3P CDB
Notice: Please review the parts listing and check for all parts before assembling the xture. If any parts are
missing or damaged, please note onthis sheet and contact the place of purchase to arrange for
replacement parts.
PARTS LIST
Company Name:_______________________Co. Account #:_____________
to be lled out by retailer
K
L
M
N
J
Produkspesifikasjoner
| Merke: | Golden Lighting |
| Kategori: | Lettelse |
| Modell: | Torbellino 8106-3P CDB |
Trenger du hjelp?
Hvis du trenger hjelp med Golden Lighting Torbellino 8106-3P CDB still et spørsmål nedenfor, og andre brukere vil svare deg
Lettelse Golden Lighting Manualer

16 Oktober 2024

15 Oktober 2024

15 Oktober 2024

15 Oktober 2024

15 Oktober 2024

15 Oktober 2024

15 Oktober 2024

15 Oktober 2024

15 Oktober 2024

15 Oktober 2024
Lettelse Manualer
- Lexon
- Crystorama
- NUVO
- Fuzzix
- Maginon
- Lowel
- WAC Lighting
- Media-tech
- Livarno Lux
- Behringer
- Light4Me
- Bosch
- Westinghouse
- Litepanels
- Beghelli
Nyeste Lettelse Manualer

9 April 2025

9 April 2025

8 April 2025

8 April 2025

8 April 2025

7 April 2025

6 April 2025

6 April 2025

6 April 2025

6 April 2025