Heatmiser DS1-E Bruksanvisning
Les nedenfor 📖 manual på norsk for Heatmiser DS1-E (4 sider) i kategorien Termostat. Denne guiden var nyttig for 32 personer og ble vurdert med 4.3 stjerner i gjennomsnitt av 16.5 brukere
Side 1/4
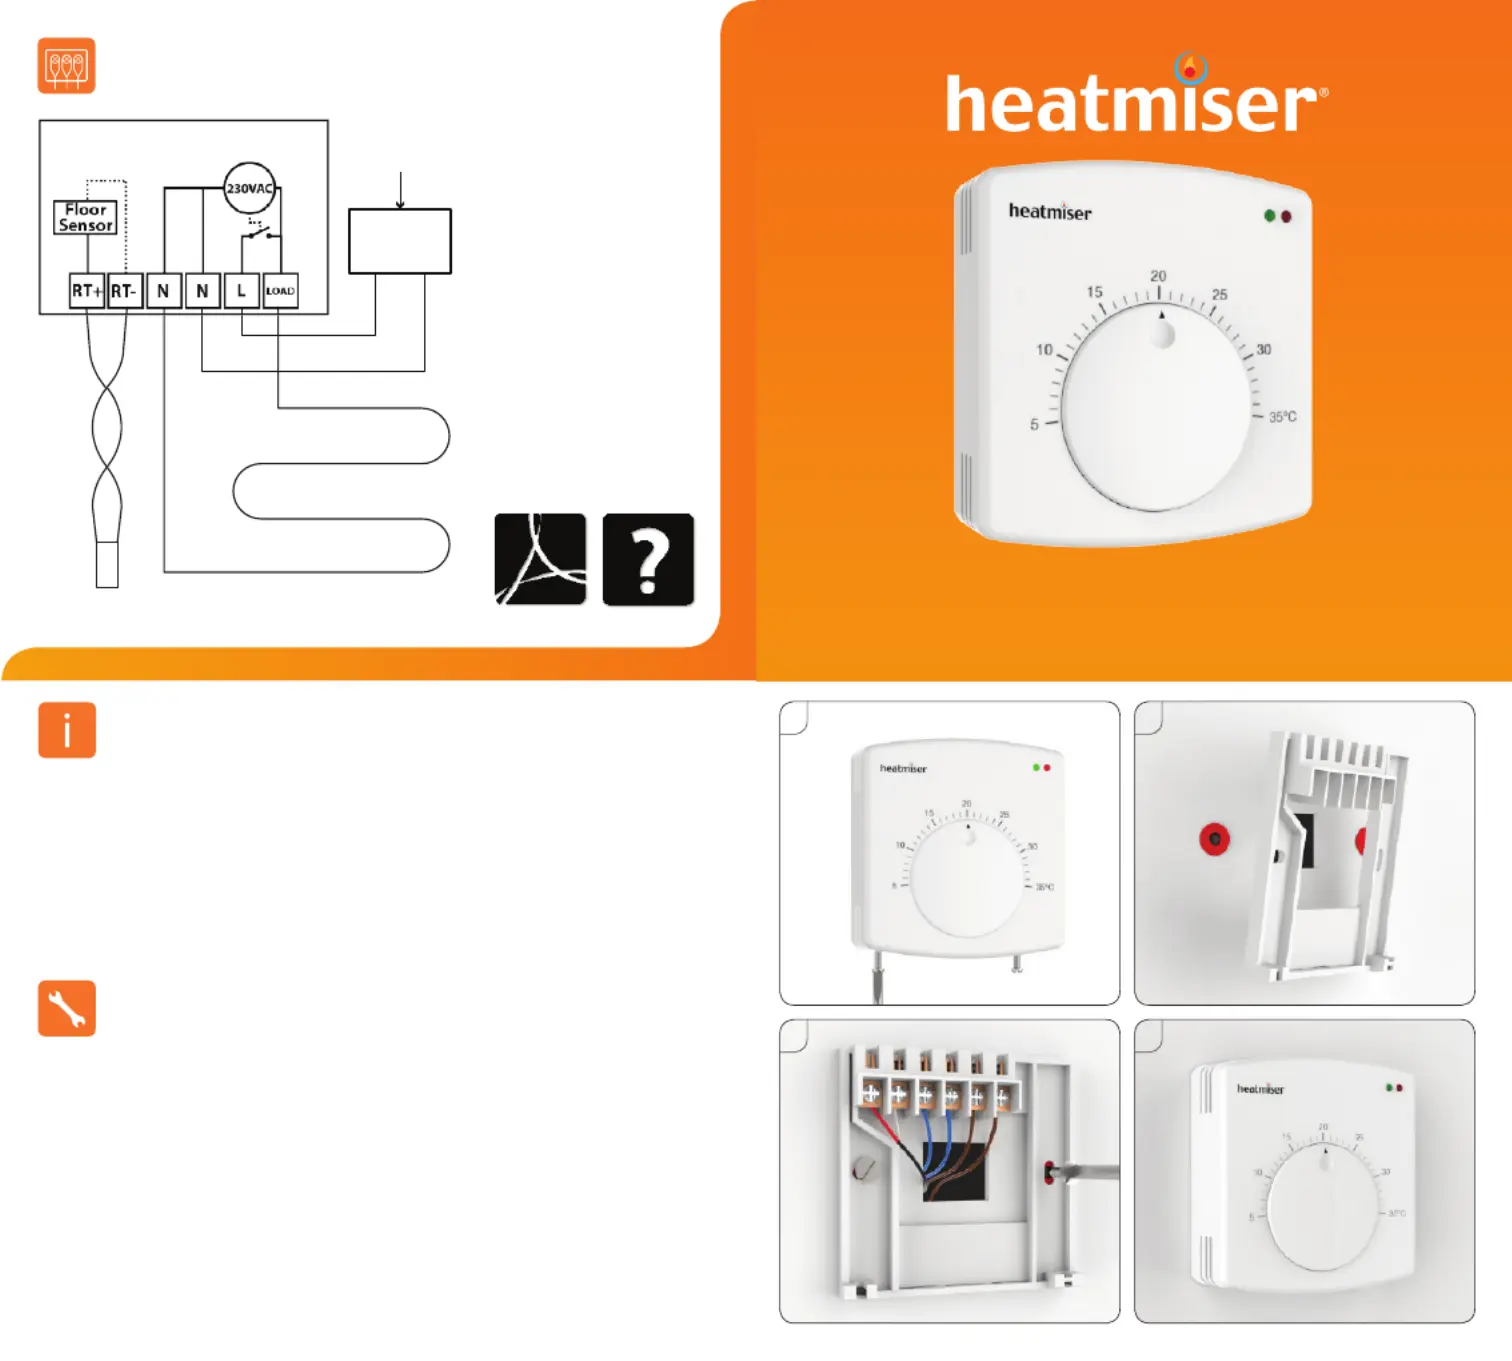
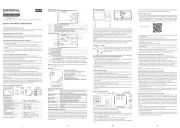
Wiring Diagram
RCD
MAINS SUPPLY
L N
MATTING OR WIRE
FlOOR PROBE
DS1-E
The Heatmiser DS1-E dial type thermostat is designed
specically for electric underoor heating.
This thermostat incorporates the following functions;
• Adjustable Switching Dierential
• LED Heat and Power Indication
• 230v AC, 13A Switching
Want More Information?
Call our support team on:
+44 (0)1254 669090
Or view video specications
directly on our website:
www.heatmiser.com
Introduction
1
4
Model: DS1-E
IN ORDER TO AVOID ANY RISK OF ELECTRIC SHOCK, TURN OFF THE POWER TO THE
HEATING SYSTEM.
This dial thermostat is designed to be surface mounted.
1. Separate the front part of the thermostat by unscrewing securing screws on the
bottom face of the thermostat.
2. Mark 2 hole positions on the wall using the backplate as a positioning template. Drill at
the marked positions and insert a wall plug in to each hole.
3. Terminate the thermostat as per wiring diagram and screw the DS1-E back plate to the
back box.
4. Reconnect the thermostat front plate and insert the securing screws.
Installation
PDF FAQ
2
3
Produkspesifikasjoner
| Merke: | Heatmiser |
| Kategori: | Termostat |
| Modell: | DS1-E |
Trenger du hjelp?
Hvis du trenger hjelp med Heatmiser DS1-E still et spørsmål nedenfor, og andre brukere vil svare deg
Termostat Heatmiser Manualer

26 Oktober 2024

26 Oktober 2024

26 Oktober 2024

26 Oktober 2024

26 Oktober 2024

26 Oktober 2024

26 Oktober 2024

26 Oktober 2024

26 Oktober 2024

26 Oktober 2024
Termostat Manualer
- Plugwise
- Crestron
- ATTACK
- Rose LM
- REMKO
- Brennenstuhl
- Thermy
- Plieger
- UPM
- Emmeti
- TP Link
- Innogy
- Webasto
- Delta Dore
- Eqiva
Nyeste Termostat Manualer
19 Oktober 2025
19 Oktober 2025
9 Oktober 2025
8 Oktober 2025
6 Oktober 2025
6 Oktober 2025
6 Oktober 2025
24 September 2025

24 September 2025
24 September 2025