Jensen VX3012 Bruksanvisning
Les nedenfor 📖 manual på norsk for Jensen VX3012 (4 sider) i kategorien Mottaker. Denne guiden var nyttig for 12 personer og ble vurdert med 4.7 stjerner i gjennomsnitt av 6.5 brukere
Side 1/4
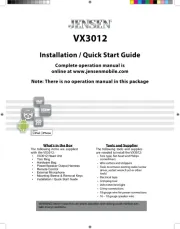
VX3012
What’s in the Box
The following items are supplied
with the VX3012:
• VX3012HeadUnit
• Trim Ring
• Hardware Bag
• Power/Speaker Output Harness
• Remote Control
• External Microphone
•MountingSleeve& RemovalKeys
• Installation Guide/ Quick Start
Tools and Supplies
The following tools and supplies
are needed to install the VX3012:
• Torx type, fl t-head and Philipsa
screwdrivers
• Wire cutters and strippers
• Tools to remove existing radio (screw
driver, socket wrench set or other
tools)
• Electrical tape
• Crimping tool
• Volt meter/test light
• Crimp connections
• 18 gauge wire for power connections
• 16 – 18 gauge speaker wire
WARNING! Never install this unit where operation and viewing could interfere with
safe driving conditions.
Installation / Quick Start Guide
Complete o mperation anual is
online at www.jensenmobile.com
Note: There is no operation manual in this package
Produkspesifikasjoner
| Merke: | Jensen |
| Kategori: | Mottaker |
| Modell: | VX3012 |
| Bredde: | - mm |
| Dybde: | - mm |
| Høyde: | - mm |
| Bluetooth: | Ja |
| Tilkoblingsteknologi: | Ledning & Trådløs |
| Produktfarge: | Sort |
| Antall USB-porter: | 1 |
| Fjernkontroll medfølger: | Nei |
| Optisk stasjon inkludert: | Ja |
| Optisk stasjonstype: | DVD-spiller |
| Lyd-utgang kanaler: | - kanaler |
| Display: | TFT |
| Effekt pr. kanal (20-20KHz@8 Ohm): | - W |
Trenger du hjelp?
Hvis du trenger hjelp med Jensen VX3012 still et spørsmål nedenfor, og andre brukere vil svare deg
Mottaker Jensen Manualer
26 August 2025

26 August 2025
26 August 2025

26 August 2025

26 August 2025

24 Januar 2025

7 Januar 2025

11 Desember 2024

26 Oktober 2024

15 Oktober 2024
Mottaker Manualer
- Lumantek
- Boss
- Graupner
- Yaesu
- Koda
- Blustream
- Kenwood
- Coastal Source
- RetroSound
- Rolls
- Audibax
- Tangent
- Irradio
- Yamaha
- Lab Gruppen
Nyeste Mottaker Manualer

20 Oktober 2025
20 Oktober 2025

20 Oktober 2025
20 Oktober 2025

20 Oktober 2025

20 Oktober 2025
20 Oktober 2025

20 Oktober 2025
20 Oktober 2025
20 Oktober 2025