Kenwood KMR-M300BT Bruksanvisning

Kenwood Mottaker KMR-M300BT

Les nedenfor 📖 manual på norsk for Kenwood KMR-M300BT (64 sider) i kategorien Mottaker. Denne guiden var nyttig for 2 personer og ble vurdert med 4.5 stjerner i gjennomsnitt av 2 brukere

Side 1/64
B5A-4399-00 (K)© 2023 JVCKENWOOD Corporation
di
sponible desde
Updated information (the latest Instruction Manual, etc.) is available from
Des informations actualisées (le dernier mode d’emploi, etc.) sont disponibles sur le site
La información actualizada (el Manual de instrucciones más actualizado, etc.) está
<
h
ttps://www.kenwood.com/cs/ce/>.
<https://www.kenwood.com/cs/ce/>.
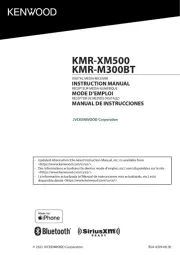
KMR-XM500
KMR-M300BT
DIGITAL MEDIA RECEIVER
INSTRUC
TION MANUAL
RÉCEPTEUR MÉDIA NUMÉRIQUE
MODE D’EMPL
OI
RECEPTOR DE MEDIOS DIGITALES
MANU
AL DE INSTRUCCIONES
2
Bef
ore use
Ho
w to read this manual
T
h
e panels shown in this guide are examples used to
provide clear explanations of the operations. For this
reason, they may be different from the actual panels.
In operation procedures, bracket shape indicates the
item you should control.
[ ]: indicates the selected items or menu.
< >: indicates the name of panel buttons.
! This symbol on the product means there
are important operating and maintenance
instructions in this manual.
Be sure to carefully read instructions in this
manual.
Pre
cautions
#
Co
ntents
B
e
fore use
.......................................
.........................................
2
Ho
w to read this manual
..................................................................................2
Pre
cautions
...............................................................................................................2
Getting Started ...................................................................... 3
Se
t the general settings
...................................................................................3
Bas
ics
......................................................................................... 4
Com
mon operations
.......................................................................................... 4
Se
lect a source
........................................................................................................4
USB ............................................................................................. 5
Pre
paration
................................................................................................................5
Pl
ayback operations
............................................................................................ 5
F
u
nction settings
.................................................................................................. 5
iP
hone
....................................................................................... 6
Preparation ................................................................................................................6
Playback operations
............................................................................................ 6
F
u
nction settings
.................................................................................................. 6
Radi
o
.......................................................................................... 7
Ra
dio basic operations
...................................................................................... 7
F
u
nction settings
.................................................................................................. 7
Si
riusX
.................................................................................. 8
Ac
tivating subscription
.....................................................................................8
N
OT
E
..............................................................................................................................8
Si
riusXM® basic operations
............................................................................. 8
Fu
nction settings
.................................................................................................. 9
P
a
rental Control
..................................................................................................... 9
Res
et to the default settings
.......................................................................10
Ex
ternal Components
....................................................... 10
Us
ing external audio players
.......................................................................10
Cam
era
.......................................................................................................................10
Blu
etooth® smartphone
................................................... 11
Re
gister your smartphone to the unit
..................................................11
Pl
aying Bluetooth Audio Device
............................................................... 11
Fu
nction settings
................................................................................................ 11
Setu
p
........................................................................................12
Se
ttings
......................................................................................................................12
Re
mote control
....................................................................13
Fu
nctions of the remote control buttons
...........................................13
Ins
tallation
.............................................................................14
Be
fore installation
...............................................................................................14
In
stalling the unit
................................................................................................15
Ab
out this Unit
.....................................................................17
Ma
intenance
..........................................................................................................17
Mo
re information
................................................................................................17
Tr
oubleshooting
..................................................................................................17
Sp
e
cications
........................................................................................................19
Co
pyrights
.............................................................................................................. 20
WAR
NING
Ñ To prevent injury or fire, take the
following precautions:
T
o p
revent a short circuit, never put or leave any
metallic objects (such as coins or metal tools)
inside the unit.
Do not watch or fix your eyes on the unit’s display
when you are driving for any extended period.
If you experience problems during installation,
consult your KENWOOD dealer.
Ñ P
r
ecautions on using this unit
Wh
en you purchase optional accessories, check
with your KENWOOD dealer to make sure that
they work with your model and in your area.
You can select a language to display menus, audio
file tags, etc. See Set the general settings(P.3)
The Tuner Data System or Tuner Broadcast Data
System feature won’t work where the service is
not supported by any broadcasting station.
Ñ Protecting the monitor
To p
rotect the monitor from damage, do not
operate the monitor using a ballpoint pen or
similar tool with the sharp tip.
3
English |
Ge
tting Started
Se
t the general settings
1
Pres
s <
> to t
urn on the power.
2
Pr
ess and hold <
> to d
isplay the settings.
3
Pres
s <E>/<F> to select [
] (G
eneral
Settings).
4 T
u
rn the volume knob to select an item (see the
following table), then press the knob.
5
Re
peat step 4 until the desired item is selected/
activated or follow the instructions stated on
the selected item.
6
Pres
s <
>.
Be
ep
Tu
rn the key touch tone on or off.
“ON” (Default), “OFF
Language
Select the language used for the control screen and
setting items. Default is “English”.
You can set the button illumination color, select the
. “LIGHTBLUE” (KMR-XM500 Default)
/ “USER” (KMR-M300BT Default).
The Preset color as below:
Variable, RED1,RED2,RED3
,PU
RPLE1,
PURPLE2,PURPLE3,PURPLE4,BLUE1,
BLUE2,BLUE3,SKYBLUE1,SKYBLUE2,
LIGHTBLUE,AQUA1,AQUA2,GREEN1,
GREEN2,GREEN3,YELLOW GREEN1,
YELLOW GREEN2,YELLOW,ORANGE1,
ORANGE2,ORANGE RED, USER
T
o m
ake your own color, select . The
color you have made will be stored in
1 Press the volume knob to enter the detailed color
adjustment.
2 Press the volume knob select the color ( [R] /[G]/
[B]) to adjust.
3 Turn the volume knob to adjust the level ([0] to
[9]), then press the knob
Tuner Region
N.
America (Default): For North America, AM/FM
intervals: 10 kHz/200 kHz
S.America: For Central/South America, AM/FM
intervals: 10 kHz/50 kHz
Eur/Rus/Asia: For Europe, Russia and Asia, AM/FM
intervals: 9 kHz/50 kHz.
Japan: For Japan, AM/FM intervals: 9 kHz/100 kHz.
M.East: For Middle East, AM/FM intervals: 9 kHz/50 kHz.
Aust.: For Australia, AM/FM intervals: 9 kHz/50 kHz.
Display Setting
You can change the display design. “Night” (Default),
Auto”, “Day”
AUX Input
SiriusXM (Default): Set to [SiriusXM] when
connecting the SiriusXM® Satellite Radio.
AUX: Set to [AUX] when connecting the Portable
audio player.
Source Gain
Finely adjust the volume of the current source
to minimize the difference in volume between
different sources.
“-3dB” – “0dB” (Default) – “3dB”
Global Input: “-18dB” – “0dB” (Default)
Int. Amplifier
Selecting “OFF” turns off the built-in amplifier.
Turning off the built-in amplifier improves the
quality of the sound from Preout.
“ON” (Default), “OFF
Voltage Gauge
Display the supplied voltage.
Information
To view all detailed information of the system
Factory Reset
Select [Audio], [System], or [SiriusXM] and then
select [Yes] to set all the settings to the initial default
settings.
Co
lor

Produkspesifikasjoner

Merke: Kenwood
Kategori: Mottaker
Modell: KMR-M300BT

Trenger du hjelp?

Hvis du trenger hjelp med Kenwood KMR-M300BT still et spørsmål nedenfor, og andre brukere vil svare deg


Mottaker Kenwood Manualer

Mottaker Manualer

Nyeste Mottaker Manualer