Memphis Audio MJP69 Bruksanvisning
Memphis Audio
Høyttaler
MJP69
Les nedenfor 📖 manual på norsk for Memphis Audio MJP69 (10 sider) i kategorien Høyttaler. Denne guiden var nyttig for 26 personer og ble vurdert med 4.7 stjerner i gjennomsnitt av 13.5 brukere
Side 1/10
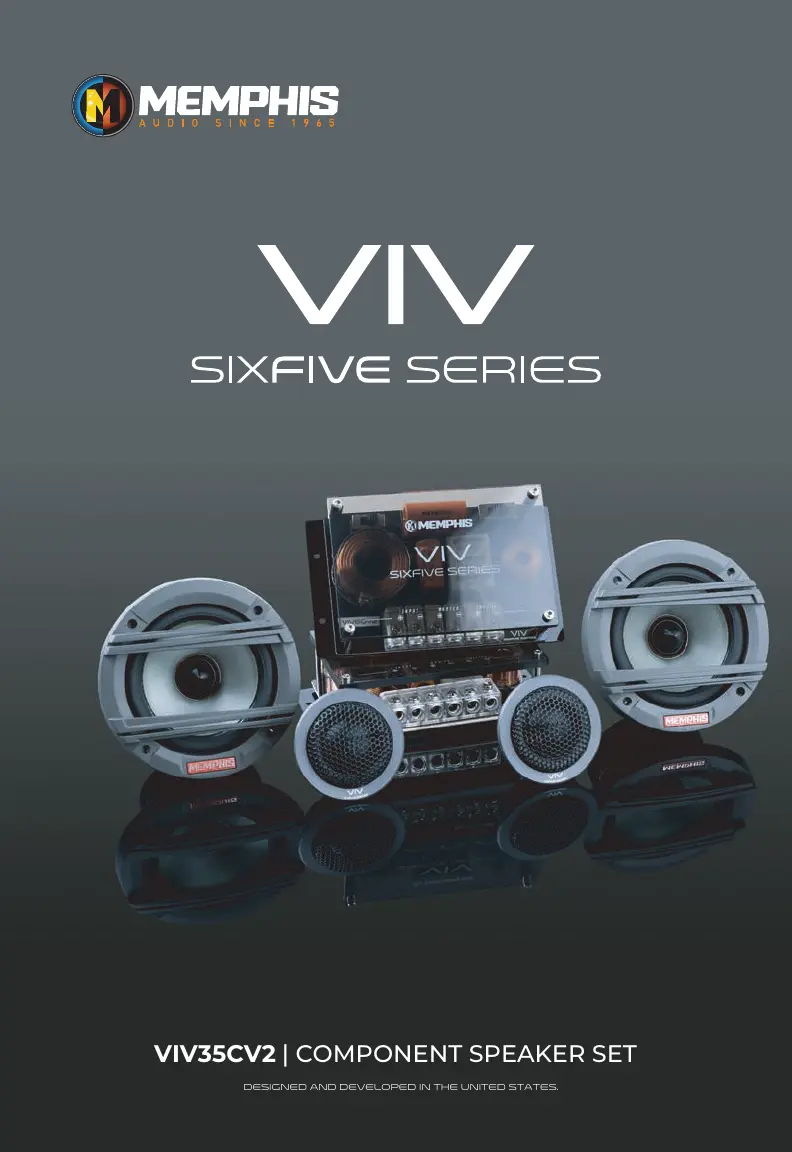
VIV35CV2 | COMPONENT SPEAKER SET
designed and developed in the united states.
VIV35CV2 | COMPONENT SPEAKER SET
designed and developed in the united states.
VIV35CV2 | COMPONENT SPEAKER SET
designed and developed in the united states.
□
Produkspesifikasjoner
| Merke: | Memphis Audio |
| Kategori: | Høyttaler |
| Modell: | MJP69 |
Trenger du hjelp?
Hvis du trenger hjelp med Memphis Audio MJP69 still et spørsmål nedenfor, og andre brukere vil svare deg
Høyttaler Memphis Audio Manualer
25 August 2025

9 Februar 2025

24 Januar 2025

24 Januar 2025

24 Januar 2025

3 Januar 2025

3 Januar 2025

3 Januar 2025

3 Januar 2025

3 Januar 2025
Høyttaler Manualer
- Power Dynamics
- Adam Hall
- Monoprice
- Continental Edison
- Draper
- V-Tone
- NGS
- SOUNDBOKS
- Fender
- Woxter
- Monitor Audio
- Krüger&Matz
- Mac Audio
- Magnavox
- Dynaudio
Nyeste Høyttaler Manualer

23 Oktober 2025
21 Oktober 2025
21 Oktober 2025

20 Oktober 2025
20 Oktober 2025

20 Oktober 2025
20 Oktober 2025
20 Oktober 2025
20 Oktober 2025
20 Oktober 2025