Metra AX-DSP Bruksanvisning
Metra
lyd / video konverterer
AX-DSP
Les nedenfor 📖 manual på norsk for Metra AX-DSP (10 sider) i kategorien lyd / video konverterer. Denne guiden var nyttig for 8 personer og ble vurdert med 4.4 stjerner i gjennomsnitt av 4.5 brukere
Side 1/10
CAUTION!
All accessories, switches, climate
controls panels, and especially air bag indicator
lights must be connected before cycling the
ignition. Also, do not remove the factory radio
with the key in the on position, or while the
vehicle is running.
AX-DSP
INSTALLATION INSTRUCTIONS
axxessinterfaces.com © COPYRIGHT 2017 METRA ELECTRONICS CORPORATION REV. 8/10/17 INSTAX-DSP
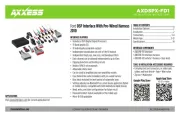
INTERFACE FEATURES
INTERFACE COMPONENTS
TOOLS REQUIRED
• Cutting tool • Crimping tool • Tape
• Connectors (example: butt-connectors, bell
caps, etc.)
TABLE OF CONTENTS
Installation Options ...............................................2
Installing the AX-DSP .............................................2
Wire Description
(20-pin Microfit)..................................................3
(16-pin Microfit) ..................................................4
DSP application .................................................4-10
Axxess Digital Signal Processor
• 31 Band graphic EQ
• 6 Inputs and 6 Outputs, including front, rear and subwoofer
• Selectable High and Low level inputs
•
Front, rear and subwoofer outputs have an independent two-way
crossover in-line with the EQ
• Front and rear outputs can be delayed independently up to 10ms
• Easy behind the radio installation
• Can be used with OE and aftermarket radios
• Chime control for vehicles with amp-generated chimes (When
retaining OEM radio)
• Retains Sonar sensors in vehicles where the tone is provided by the
amplifier(when retaining OEM radio)
• Clipping detection and limiting circuits
• Retains OE voice prompts (SYNC and OnStar)
• Settings adjusted via Bluetooth application, compatible with both
Android and Apple devices
• Read, Write, and Store your configuration for future recall
• DSP interface
• Universal harness
Produkspesifikasjoner
| Merke: | Metra |
| Kategori: | lyd / video konverterer |
| Modell: | AX-DSP |
Trenger du hjelp?
Hvis du trenger hjelp med Metra AX-DSP still et spørsmål nedenfor, og andre brukere vil svare deg
lyd / video konverterer Metra Manualer
9 Oktober 2025

9 Oktober 2025

8 Oktober 2025

8 Oktober 2025
8 Oktober 2025
7 Oktober 2025
7 Oktober 2025
7 Oktober 2025
7 Oktober 2025
7 Oktober 2025
lyd / video konverterer Manualer
- RDL
- Furman
- Kathrein
- TV One
- Steinberg
- Biltema
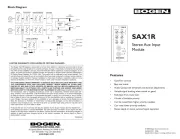
- Bogen
- DataVideo
- LevelOne
- Gefen
- Sescom
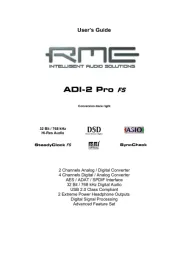
- RME
- Appsys ProAudio
- Elecom
- AVM
Nyeste lyd / video konverterer Manualer
16 Oktober 2025
13 Oktober 2025
12 Oktober 2025
8 Oktober 2025
8 Oktober 2025
8 Oktober 2025
8 Oktober 2025
6 Oktober 2025
6 Oktober 2025
6 Oktober 2025