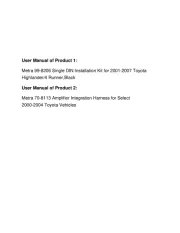
Metra Axxess AX-LR90092 Bruksanvisning
Metra
Ikke kategorisert
Axxess AX-LR90092
Les nedenfor 📖 manual på norsk for Metra Axxess AX-LR90092 (4 sider) i kategorien Ikke kategorisert. Denne guiden var nyttig for 7 personer og ble vurdert med 4.1 stjerner i gjennomsnitt av 4 brukere
Side 1/4

CAUTION!
All accessories, switches, climate
controls panels, and especially air bag indicator
lights must be connected before cycling the
ignition. Also, do not remove the factory radio
with the key in the on position, or while the
vehicle is running.
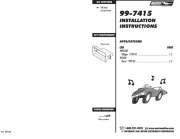
AX-LR90092
INSTALLATION INSTRUCTIONS
AxxessInterfaces.com © COPYRIGHT 2018 METRA ELECTRONICS CORPORATION REV. 5/10/18 INSTAX-LR90092
INTERFACE FEATURES
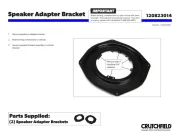
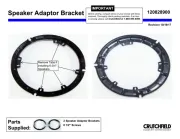
INTERFACE COMPONENTS
TOOLS REQUIRED
• Wire cutter • Crimp tool • Solder gun • Tape
• Connectors (example: butt-connectors, bell
caps, etc.)
TABLE OF CONTENTS
Connections to be made .......................................2
Installing the AX-LR90092 interface ....................3
Programming the ASWC-1 interface .....................3
Land Rover Range Rover Sport* (with M.O.S.T. 25 amplifier) Data Interface with SWC 2005-2009 †
Land Rover Discovery** (with M.O.S.T. 25 amplifier) Data Interface with SWC 2004-2009
†
• Provides accessory power
• Retains R.A.P. (retained accessory power)
• Designed for amplified models
• Provides NAV outputs (parking brake, reverse, speed sense)
• Retains audio controls on the steering wheel
• Micro “B” USB updatable
• AX-LR90092 interface
• AX-LR90092 amplifier interface
• ASWC-1 interface
• AX-LR90092 harness
• ASWC-1 harness
• Female 3.5mm connector with stripped leads
* 1st gen no time retention
** No time retention
† NAV screen will only show LR logo
Produkspesifikasjoner
| Merke: | Metra |
| Kategori: | Ikke kategorisert |
| Modell: | Axxess AX-LR90092 |
Trenger du hjelp?
Hvis du trenger hjelp med Metra Axxess AX-LR90092 still et spørsmål nedenfor, og andre brukere vil svare deg
Ikke kategorisert Metra Manualer

11 Oktober 2025
10 Oktober 2025
10 Oktober 2025
10 Oktober 2025
10 Oktober 2025

10 Oktober 2025
10 Oktober 2025
10 Oktober 2025
10 Oktober 2025
9 Oktober 2025
Ikke kategorisert Manualer
- Foreo
- Apogee
- American DJ
- Gossen Metrawatt
- Foscam
- TomTom
- Sonnet
- Beem
- Intertechno
- Audiolab
- MOZA
- Needit
- STANDARD
- Jung
- Ilve
Nyeste Ikke kategorisert Manualer

23 Oktober 2025

23 Oktober 2025

23 Oktober 2025

23 Oktober 2025

23 Oktober 2025

23 Oktober 2025

23 Oktober 2025

23 Oktober 2025

23 Oktober 2025

23 Oktober 2025