NAD PP3I Bruksanvisning
NAD
Hi-fi system
PP3I
Les nedenfor 📖 manual på norsk for NAD PP3I (2 sider) i kategorien Hi-fi system. Denne guiden var nyttig for 18 personer og ble vurdert med 4.6 stjerner i gjennomsnitt av 9.5 brukere
Side 1/2
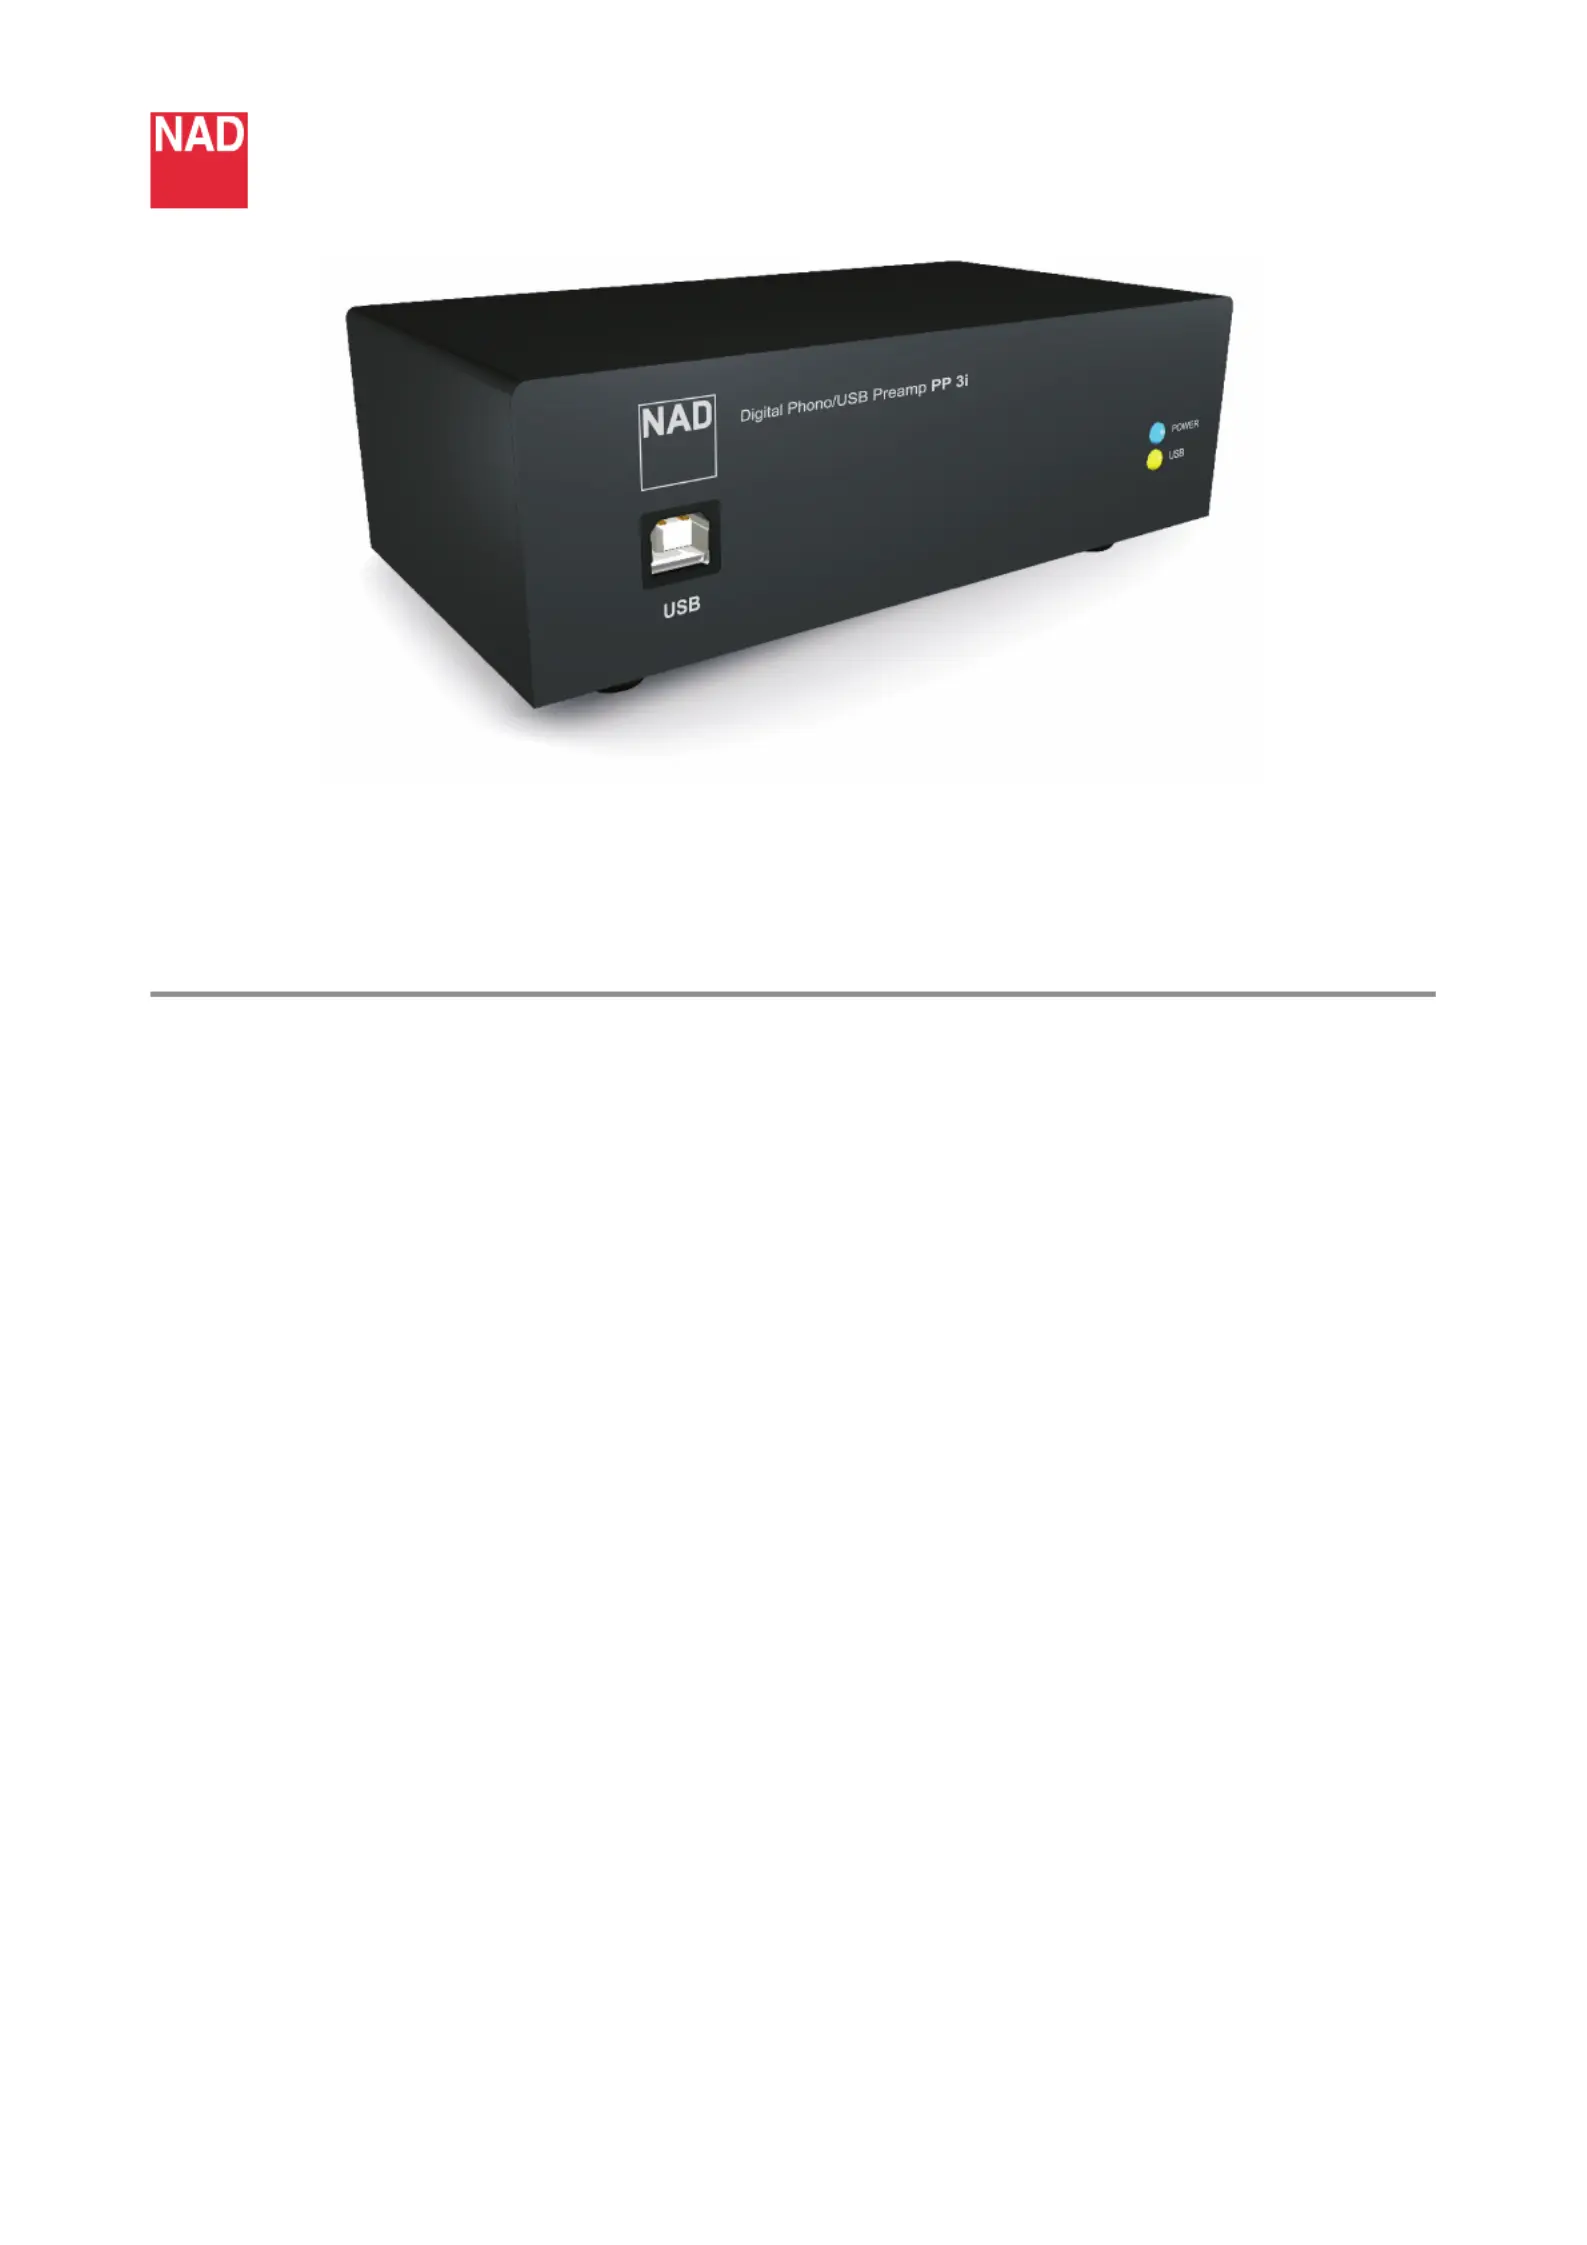
· Low noise, wide band MC/MM phono stage
· Connect your Turntable to most Ampliers, Receivers, and PCs
· Switched Line Level Input
· Highly accurate Analog-to-Digital Converter
· USB interface to PC for Vinyl-to-Hard Drive recording, USB cable
included
· Analog Line Level Output
· External 24V DC power supply
INSTALLATION AND OPERATION
CONNECT THE TURNTABLE TO THE PP 3i
1 Please make sure all ancillary equipment is turned o and that the NAD
PP 3i is not yet connected to its dedicated Power Supply.
2 Connect the leads from the turntable to the appropriate input sockets
on the back of the NAD PP 3i - MC for moving coil, MM for moving
magnet cartridge. Make sure you connect the Right channel to the
Right input; the Left channel to the Left input. Normally, red connector
denotes the Right Channel; white denotes the Left channel.
3 Once the turntable leads are connected, set the MC/MM switch on the
back of the NAD PP 3i to the correct input setting.
CONNECT THE PP 3i TO AN AMPLIFIER OR RECEIVER
1 Connect suitable RCA leads from the NAD PP 3i to the amplier or
receiver. Always use a so-called “Line-Level” input such as CD, AUX,
Tuner or Tape. Never connect the lead from the NAD PP 3i to an input
marked Phono or turntable.
2 Again, make sure to connect the red plug to the Right channel, and the
white plug to the Left channel of the amplier or receiver.
3 If the lead from your turntable is equipped with a separate earth (GND)
lead, connect this directly to a ground connection on the NAD PP 3i.
Use the thumb screw terminal “GND” which provides the grounding.
CONNECT THE POWER SUPPLY TO THE PP 3i
1 Connect the dedicated Plug-in Power Supply to the NAD PP 3i
(marked24V).
2 Insert the Plug-in Power Supply to a live mains socket; the blue LED on
the NAD PP 3i’s front panel will light up. Installation is now complete.
As the power consumption of the NAD PP 3i is negligible, it can always be
left switched on. It is recommended however that you disconnect the Plug-
in Power Supply from the mains if you are not going to use the NAD PP 3i
for a prolonged period of time (such as a holiday).
CONNECT THE PP 3i TO A PERSONAL COMPUTER
1 Connect the supplied USB cable (or any approved USB cable) between
the USB socket of the PP 3i and the USB socket of your PC. Your PC
should automatically recognize the PP 3i as a “new device” - the amber
LED of the PP 3i will illuminate conrming the connection.
2 Place the supplied “Vinyl Studio” CD in your PC’s disc drive and follow
the instructions to load the program into your PC.
3 Open the program and follow the instructions to get started recording
your LP’s to your PC’s Hard Disc Drive or other digital device.
®
DIGITAL PHONO / USB PREAMP PP 3i
User Guide
Produkspesifikasjoner
| Merke: | NAD |
| Kategori: | Hi-fi system |
| Modell: | PP3I |
Trenger du hjelp?
Hvis du trenger hjelp med NAD PP3I still et spørsmål nedenfor, og andre brukere vil svare deg
Hi-fi system NAD Manualer

12 August 2025

15 Oktober 2024
Hi-fi system Manualer
- Kiloview
- NEAR
- Bowers Wilkins
- Energy Sistem
- Sony
- Bang Olufsen
- INKEE
- Jensen
- AudioControl
- Creative
- Boston Acoustics
- Atoll
- Pyle
- HiFi ROSE
- Acoustic Solutions
Nyeste Hi-fi system Manualer

20 Oktober 2025

20 Oktober 2025

19 Oktober 2025

18 Oktober 2025
18 Oktober 2025

18 Oktober 2025

18 Oktober 2025

18 Oktober 2025
18 Oktober 2025
17 Oktober 2025