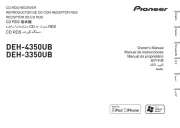
Pioneer DEH-4350UB Bruksanvisning

Pioneer Mottaker DEH-4350UB

Les nedenfor 📖 manual på norsk for Pioneer DEH-4350UB (72 sider) i kategorien Mottaker. Denne guiden var nyttig for 3 personer og ble vurdert med 4.5 stjerner i gjennomsnitt av 2 brukere

Side 1/72
Português (B)
Español
English
Owner’s Manual
Manual de instrucciones
Manual do proprietário
DEH-4350UB
DEH-3350UB
CD RDS RECEIVER
REPRODUCTOR DE CD CON RECEPTOR RDS
RECEPTOR DE CD RDS
<CRD4527-A/N>1
Thank you for purchasing this PIONEER
product.
To ensure proper use, please read through this
manual before using this product. It is espe-
cially important that you read and observe
WARNINGs and CAUTIONs in this manual.
Please k eep the manual in a safe and accessible
place for future reference.
About this unit
CAUTION
! Do not allow this unit to come into contact
with liquids. Electrical shock could result.
Also, damage to this unit, smoke, and over-
heating could result from contact with liquids.
! Always keep the volume low enough to hear
outside sounds.
! Avoid exposure to moisture.
! If the battery is disconnected or discharged,
any preset memory will be erased.
CAUTION
This product is a class 1 laser product classi-
fied under the Safety of laser products, IEC
60825-1:2007, and contains a class 1M laser
module. To ensure continued safety, do not re-
move any covers or attempt to gain access to
the inside of the product. Refer all servicing to
qualified personnel.
CAUTION—CLASS 1M INVISIBLE LASER
RADIATION WHEN OPEN, DO NOT VIEW
DIRECTLY WITH OPTICAL INSTRUMENTS.
CAUTION:
USE OF CONTROL OR ADJUSTMENT OR
PERFORMANCE OF PROCEDURES
OTHER THAN THOSE SPECIFIED HEREIN
MAY RESULT IN HAZARDOUS RADIATION
EXPOSURE.
CAUTION:
THE USE OF OPTICAL INSTRUMENTS
WITH THIS PRODUCT WILL INCREASE
EYE HAZARD.
Notes
! Function setting operations are completed
even if the menu is cancelled before the op-
erations are confirmed.
! In this manual, iPod and iPhone will be re-
ferred to as iPod.
Demo mode
Important
! Failure to connect the red lead (ACC) of this
unit to a terminal coupled with ignition switch
on/off operations may lead to battery drain.
! Remember that if the feature demo continues
operating when the car engine is turned off, it
may drain battery power.
The demo automatically starts when the igni-
tion switch is set to ACC or ON while the unit
is turned off. Turning off the unit does not can-
cel demo mode. To cancel the demo mode, op-
erate the function in the initial setting menu.
Operating the demo while the ignition switch
is set to ACC may drain battery power.
En
2
Section
01
Before You Start
Head unit
1
24 5 63
78 a b c d9
Part Part
1 S (SRC/OFF) 8
(Back/display/
scroll)
2 h (eject) 9 a/b/c/d
3
(list) a /DISP OFF
4
MULTI-CONTROL
(M.C.)
b 1 to 6
5 Disc loading slot c
AUX input jack (3.5
mm stereo jack)
6 USB port d Detach button
7 B (BAND/ESC)
CAUTION
! Use an optional Pioneer USB cable (CD-U50E)
to connect the USB audio player/USB mem-
ory as any device connected directly to the
unit will protrude out from the unit and may
be dangerous.
! Do not use unauthorized products.
Remote control
e
k
i
f
h
gj
7
1
9
Part Operation
e VOLUME
Press to increase or decrease vo-
lume.
f MUTE
Press to mute. Press again to un-
mute.
g AUDIO Press to select an audio function.
h DISP/SCRL
Press to select different displays.
Press and hold to scroll through
the text information.
i e
Press to pause or resume play-
back.
j FUNCTION
Press to select functions.
Press and hold to recall the initial
setting menu when the sources
are off.
k
LIST/
ENTER
Press to display the disc title,
track title, folder, or file list de-
pending on the source.
While in the operating menu,
press to control functions.
En
3
English
Section
02
Operating this unit
<CRD4527-A/N>2
Display indication
4 5
6
3
8
a
b
9
1
2
7
Indicator State
1
Main dis-
play sec-
tion
! Tuner: band and frequency
! Program service name
! Built-in CD, USB storage de-
vice and iPod: elapsed play-
back time and text
information
2 c
An upper tier of the folder or
menu exists.
3 d
A lower tier of the folder or menu
exists.
It flashes when a song/album re-
lated to the song currently playing
is selected from iPod.
4
(list) The list function is operated.
5
(artist)
The disc (track) artist name is dis-
played.
Artist search refinement of the
iPod browsing functio n is in use.
6
(disc)
The disc (album) name is dis-
played.
Album search refinement of the
iPod browsing functio n is in use.
7
(song)
The track (song) name is displayed.
A playable audio file has been se-
lected while operating the list.
Song search refinement of the
iPod browsing functio n is in use.
8 LOC Local seek tuning is on.
9
(repeat) Track or folder repeat is on.
a
(ran-
dom/shuf-
fle)
Random play is on.
The iPod source is selected and the
shuffle or shuffle all function is on
.
b (sound re-
triever)
The sound retriever function is
on.
Basic Operations
Important
! Handle gently when removing or attaching
the front panel.
! Avoid subjecting the front panel to excessive
shock.
! Keep the front panel out of direct sunlight and
high temperatures.
! To avoid damaging the device or vehicle inter-
ior, remove any cables and devices attached
to the front panel before detaching it.
Removing the front panel to protect your unit from
theft
1 Press the detach button to release the front
panel.
2 Push the front panel upward and pull it toward
you.
3 Always keep the detached front panel in a protec-
tion device such as a protection case.
Re-attaching the front panel
1 Slide the front panel to the left.
Make sure to insert the tabs on the left side of the
head unit into the slots on the front panel.
2 Press the right side of the front panel until it is
firmly seated.
If you cannot attach the front panel to the head
unit successfully, make sure that you are placing
the front panel onto the head unit correctly. For-
cing the front panel into place may result in da-
mage to the front panel or head unit.
Turning the unit on
1 Press S (SRC/OFF) to turn the unit on.
En
4
Section
02
Operating this unit
Turning the unit off
1 Press S (SRC/OFF) and hold until the unit turns
off.
Selecting a sour ce
1 Press S (SRC/OFF) to cycle between:
TUNER (tuner)CD (built-in CD player)USB
(USB)/iPod (iPod)AUX (AUX)
Adjusting the volume
1 Turn M.C. to adjust the volume.
Turning the display off and on
1 Press
/DISP OFF and hold until the display
turns off and on.
CAUTION
For safety reasons, park your vehicle when remov-
ing the front panel.
Note
When this units blue/white lead is connected to
the vehicles auto-antenna relay control terminal,
the vehicles antenna extends when this units
source is turned on. To retract the antenna, turn
the source off.
Use and care of the remote
control
Using the remote control
1 Point the remote control in the direction of the
front panel to operate.
When using for the first time, pull out the film
protruding from the tray.
Replacing the battery
1 Slide the tray out on the back of the remote con-
trol.
2 Insert the battery with the plus (+) and minus ()
poles aligned prope rly.
WARNING
! Keep the battery out of the reach of children.
Should the battery be swallowed, consult a
doctor immediately.
! Batteries (battery pack or batteries installed)
must not be exposed to excessive heat such
as sunshine, fire or the like.
CAUTION
! Use one CR2025 (3 V) lithium battery.
! Remove the battery if the remote control is not
used for a month or longer.
! There is a danger of explosion if the battery is
incorrectly replaced. Replace only with the
same or equivalent type.
! Do not handle the battery with metallic tools.
! Do not store the battery with metallic objects.
! If the battery leaks, wipe the remote control
completely clean and install a new battery.
! When disposing of used batteries, comply
with governmental regulations or environmen-
tal public institutions rules that apply in your
country/area.
Important
! Do not store the remote control in high tem-
peratures or direct sunlight.
! The remote control may not function properly
in direct sunlight.
! Do not let the remote control fall onto the
floor, where it may become jammed under the
brake or accelerator pedal.
En
5
English
Section
02
Operating this unit
<CRD4527-A/N>3

Produkspesifikasjoner

Merke: Pioneer
Kategori: Mottaker
Modell: DEH-4350UB

Trenger du hjelp?

Hvis du trenger hjelp med Pioneer DEH-4350UB still et spørsmål nedenfor, og andre brukere vil svare deg


Mottaker Pioneer Manualer
Mottaker Manualer

Nyeste Mottaker Manualer