Quasar Science Single Spectrum T8 Bruksanvisning
Quasar Science
Ikke kategorisert
Single Spectrum T8
Les nedenfor 📖 manual på norsk for Quasar Science Single Spectrum T8 (1 sider) i kategorien Ikke kategorisert. Denne guiden var nyttig for 28 personer og ble vurdert med 3.7 stjerner i gjennomsnitt av 14.5 brukere
Side 1/1
|
®
QUASAR SCIENCE
Questions? info@quasarscience.com (800) 876-0665 Questions? info@quasarscience.com (800) 876-0665
Quasar Science 687 S. Anderson St., Los Angeles, CA 90023
Single Spectrum T8
Installation Instructions
Warning: To reduce the risk of fire and electrical shock, do not remove the retrofit
LED tube lamp enclosure (cover and caps).
•No user-serviceable parts inside. Refer servicing to qualified service personnel
•DO NOT EXPOSE THIS APPARATUS TO RAIN.
•LUMINAIRE CONVERSION, RETROFIT.
•FOR USE ONLY WITH FLUORESCENT LUMINAIRES IDENTIFIED IN MANUFACTURER'S
INSTRUCTIONS
•THIS PRODUCT MUST BE INSTALLED IN ACCORDANCE WITH THE APPLICABLE
INSTALLATION CODE BY A PERSON FAMILIAR WITH THE CONSTRUCTION AND
OPERATION OF THE PRODUCT AND THE HAZARDS INVOLVED.
•For the 120VAC version lamp, determine if the power source provides 120VAC. For the 240VAC
version lamp, determine if the power source is 220-240VAC.
•Luminaires wiring, ballasts, or other electrical parts may be damaged when drilling for
Installation of reflector kit hardware. Check for enclosed wiring and components.
•LED tube installation requires knowledge of fluorescent lighting luminaires electrical systems.
If not qualified, do not attempt installation. Contact a qualified electrician.
•Install this kit only in the luminaries that has the construction features and dimensions shown
in the photographs and/or drawings and where the input rating of the LED tube does not
exceed the input rating of the luminaire.
•To prevent wiring damage or abrasion, do not expose wiring to edges of sheet metal or other
sharp objects. Do not make or alter any open holes in an enclosure of wiring or electrical
components during kit installation.
•Do not use this LED tube in luminaires employing shunted bipin lampholders. Note: Shunted
lamp holders are found only in fluorescent luminaires with InstantStart ballasts. Instantstart
ballasts can be identified by the words “Instant Start” or “I.S.” marked on the ballast. This
designation may be in the form of a statement pertaining to the ballast itself, or may be
combined with the marking for the lamps with which the ballast is intended to be used, for
example F40T12/IS. For more information, contact the LED luminaire manufacturer.
•Installers should not disconnect existing wires from lampholder terminals to make new
connections at lampholder terminals. Instead installers should cut existing lampholder leads
away from the lampholder and make new electrical connections to lampholder lead wires by
employing applicable connectors.
|
®
QUASAR SCIENCE
Quasar Science 687 S. Anderson St., Los Angeles, CA 90023
Single Spectrum T8
Installation Instructions
*Caution - Risk of Electric Shock – Use In Dry Location.
*End retrofit luminaire has been modified and can no longer operate the originally intended lamp.
*This device is not intended for use with emergency exit fixtures or emergency exit lights.
*The luminaries shall be installed by an electrician.
INSTALLATION INSTRUCTIONS
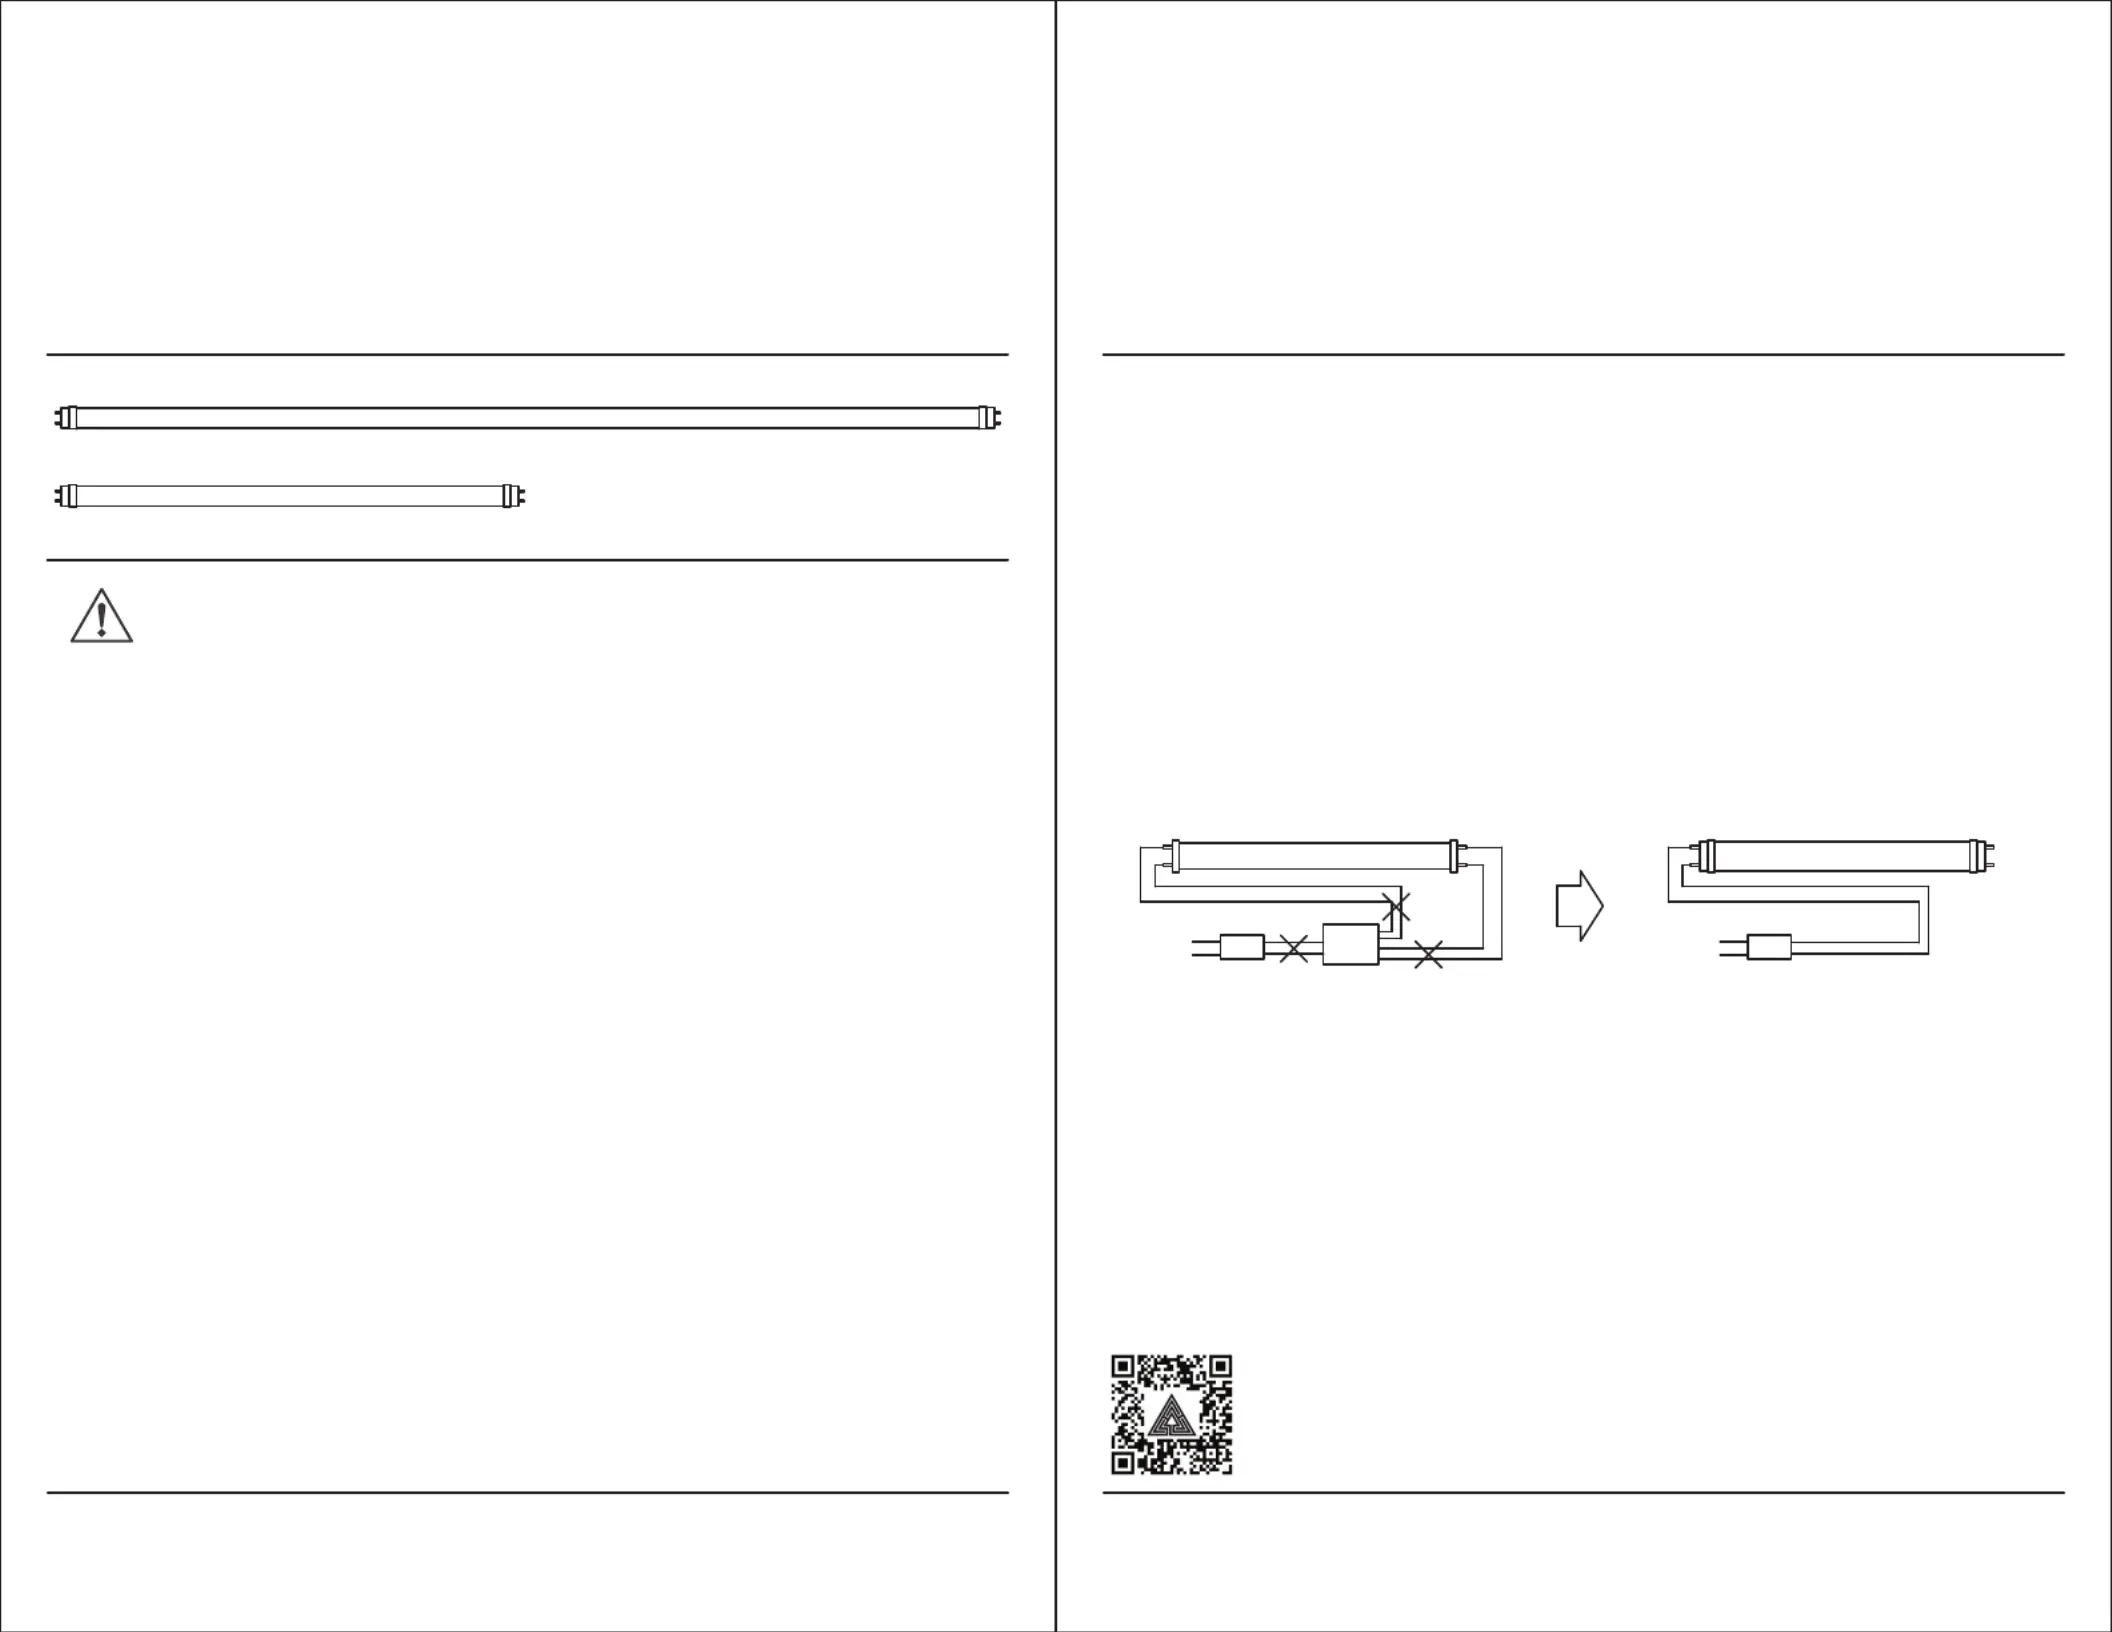
1. Disconnect all power to the lamp fixture.
2. Take off the fluorescent lamp.
3. Remove the ballast and starter where applicable and remove the leads from the connector
where no use.
4. Designate one side of the fixtures lamp sockets as the “LIVE END” and mark for future
reference.
X: Cut Wire
Fluorescent tube
G13 Lamp holder G13 Lamp holder
L
N
Junction Box Electric Ballast
120-277VAC
Step 1
LED Light Tube
G13 Lamp holder G13 Lamp holder
L
N
Junction Box Electric Ballast
120-277VAC
Step 2
5. Connect the line lead to one of the two wires connected to the lamp pin base and connect
the neutral lead to the second of the two wires connected to the same lamp pin base (above),
and the lamp pin L to connect lamp base positive lead,the lamp pin N to connect lamp base
negative lead.
*For any 1,2,3,bulb fixture, simply connect all the line leads from each lamp pin bases to the
line lead in and connect all the neutral leads from each lamp pin bases to the neutral lead in.
6. After modification completes, then affix the Lamping Replacement Marking label and
cautionary label to painted surface and bare aluminum , located this where visible during
relamping on the retrofitted luminaire.
For Operations Manual and Photometrics,
visit QuasarScience.com/support
Produkspesifikasjoner
| Merke: | Quasar Science |
| Kategori: | Ikke kategorisert |
| Modell: | Single Spectrum T8 |
Trenger du hjelp?
Hvis du trenger hjelp med Quasar Science Single Spectrum T8 still et spørsmål nedenfor, og andre brukere vil svare deg
Ikke kategorisert Quasar Science Manualer

13 Mars 2025
Ikke kategorisert Manualer
- Vogue
- Avantco
- Genelec
- Creative
- Schneider
- Peerless-AV
- Savio
- T-Rex
- Aguilar
- Morel
- Hawke
- Advance
- Postium
- Aspes
- Infantino
Nyeste Ikke kategorisert Manualer

23 Oktober 2025

23 Oktober 2025

23 Oktober 2025

23 Oktober 2025

23 Oktober 2025

23 Oktober 2025

23 Oktober 2025

23 Oktober 2025

23 Oktober 2025

23 Oktober 2025