Roland XPS-10X Bruksanvisning
Roland
Synthesizer
XPS-10X
Les nedenfor 📖 manual på norsk for Roland XPS-10X (24 sider) i kategorien Synthesizer. Denne guiden var nyttig for 15 personer og ble vurdert med 4.5 stjerner i gjennomsnitt av 8 brukere
Side 1/24
Startup Guide (this document)
Read this rst. It explains the basic things you need to know in order to use the XPS-10X.
PDF manual (download from Roland website)
¹ Reference Manual
This explains how to operate all the functions and parameters of
this instrument.
¹ Parameter Guide
This explains about the parameters of the unit.
¹ Sound List
This is a list of the sounds built into the unit.
¹ Roland Cloud User’s Guide
This explains how to use tone les from Roland Cloud with this
instrument.
¹ MIDI Implementation
This is detailed information about MIDI messages.
Before using this unit, carefully read “USING THE UNIT SAFELY” and “IMPORTANT NOTES” (the leaet “USING THE UNIT SAFELY” and the Startup Guide (p. 22,
p. 23)). After reading, keep the document(s) where it will be available for immediate reference.
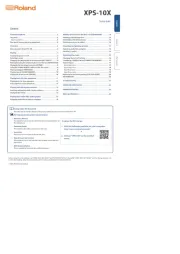
Contents
© 2025 Roland Corporation
Startup Guide
Panel descriptions ......................................2
Top panel ..................................................2
Basic operation ............................................4
Rear panel (connecting your equipment) ......................5
Overview ..............................................6
Basic structure of the XPS-10X ...............................6
Playing ................................................7
Turning the power on/o ....................................7
Selecting a scene ...........................................7
Changing the playing feel of the keyboard (KEY TOUCH) ........8
Raising/lowering the keyboard pitch in semitones (TRANSPOSE) 8
Changing the key range in octaves (OCTAVE) ..................9
Using the SOUND MODIFY sliders to alter the sound ...........9
Playing arpeggios (ARPEGGIO) ...............................9
Playing chords (CHORD MEMORY) .......................... 10
Playing the drum sounds (DRUMS) ......................... 10
Playing back the step sequencer ........................11
Playing back the step sequencer ........................... 11
Step sequencer: basic operations ........................... 11
Playing back the rhythm patterns ......................12
Selecting and playing back a rhythm pattern ................ 12
Changing the tempo ...................................... 12
Playing back audio les (audio player) ..................13
Assigning audio les to pads for playback ................... 13
Adding more tones to the XPS-10X (EXPANSION) ........14
Installing a World Expansion ............................... 14
Uninstalling a World Expansion ............................ 14
Selecting tones you’ve added .............................. 14
Importing and playing samples ........................15
Importing audio les (samples) ............................ 15
Recalling a sample ........................................ 15
Operating the menu ...................................16
Changing the auto o setting .............................. 16
Formatting a USB ash drive (FORMAT USB MEMORY) ........ 17
Import/export ............................................ 17
Importing tones ......................................... 17
Importing scenes ........................................ 18
Exporting tones .......................................... 19
Exporting scenes ......................................... 19
Returning to the factory settings (FACTORY RESET) .......... 20
INFORMATION ............................................ 20
Troubleshooting ......................................21
USING THE UNIT SAFELY ...............................22
IMPORTANT NOTES ....................................23
Main specications ....................................24
To obtain the PDF manual
1. Visit the following website on your computer.
https://www.roland.com/manuals/
á
2. Choose “XPS-10X” as the product
name.
Produkspesifikasjoner
| Merke: | Roland |
| Kategori: | Synthesizer |
| Modell: | XPS-10X |
Trenger du hjelp?
Hvis du trenger hjelp med Roland XPS-10X still et spørsmål nedenfor, og andre brukere vil svare deg
Synthesizer Roland Manualer
31 August 2025
24 August 2025

13 Desember 2024

13 Desember 2024

13 Desember 2024

22 Oktober 2024

22 Oktober 2024

22 Oktober 2024
Synthesizer Manualer
- ADDAC System
- Yamaha
- Suzuki
- IK Multimedia
- Sonicware
- Ferrofish
- Dnipro
- NANO Modules
- Noise Engineering
- 2hp
- Sequential
- Twisted Electrons
- Korg
- Nystrom
- M-Audio
Nyeste Synthesizer Manualer
13 Oktober 2025

12 Oktober 2025
12 Oktober 2025
12 Oktober 2025
11 Oktober 2025
7 Oktober 2025
6 Oktober 2025
6 Oktober 2025
3 Oktober 2025
6 August 2025