RTS KP-5032PB Bruksanvisning
RTS
Ikke kategorisert
KP-5032PB
Les nedenfor 📖 manual på norsk for RTS KP-5032PB (2 sider) i kategorien Ikke kategorisert. Denne guiden var nyttig for 15 personer og ble vurdert med 4.8 stjerner i gjennomsnitt av 8 brukere
Side 1/2

Quick Start Guide
KP-5032 Push Button
Keypanel
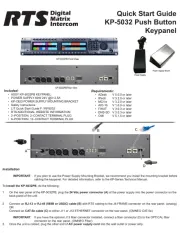
Included:
• ASSY KP-5032PB KEYPANEL
• POWER SUPPLY 60W 24V @0~2.5A
• KP-OEI2 POWER SUPPLY MOUNTING BRACKET
• Safety Instructions
• LIT Quick Start Guide F / RP5032
• RTS ADDITIONAL WEBSITE INFORMATION
• 2–POSITION, 2–CONTACT TERMINAL PLUG
• 6–POSITION, 12–CONTACT TERMINAL PLUG
Requirements:
• AZedit V 5.0.0 or later
• IPedit V 3.2.0 or later
• MCII-e V 3.2.0 or later
• AIO-16 V 1.6.0 or later
• FWUT V 3.0.3 or later
• DNS-SD V 3.0.3 or later
• OMI V 5.1.5 or later
Installation
IMPORTANT: If you plan to use the Power Supply Mounting Bracket, we recommend you install the mounting bracket before
cabling the keypanel. For detailed information, refer to the KP-Series Technical Manual.
To install the KP-5032PB, do the following:
1. On the rear panel of the KP-5032PB, plug the 24 Vdc power connector (A) of the power supply into the power connector on the
back panel of the unit.
2. Connect an RJ-12 or RJ-45 (568B or USOC) cable (B) with RTS cabling to the J8 FRAME connector on the rear panel. (analog)
OR
Connect an CAT-5e cable (C) to either J11 or J12 ETHERNET connector on the rear panel. (OMNEO CAT-5e)
IMPORTANT: IfyouhavetheoptionalJ13berconnectorinstalled,connectaberconnector(D)totheOPTICALber
connector on the rear panel. (OMNEO Fiber)
3. Once the unit is cabled, plug the other end of AC power supply cord into the wall outlet or power strip.
Produkspesifikasjoner
| Merke: | RTS |
| Kategori: | Ikke kategorisert |
| Modell: | KP-5032PB |
Trenger du hjelp?
Hvis du trenger hjelp med RTS KP-5032PB still et spørsmål nedenfor, og andre brukere vil svare deg
Ikke kategorisert RTS Manualer
25 September 2025
25 September 2025
25 September 2025

17 Desember 2024

12 Desember 2024

12 Desember 2024
Ikke kategorisert Manualer
- JVC
- Fezz
- Fire Sense
- Somfy
- Milesight
- ZyXEL
- InFocus
- Polti
- Neewer
- Mirage
- Ilve
- Impact
- Victrola
- Venom
- Harley Benton
Nyeste Ikke kategorisert Manualer
23 Oktober 2025
23 Oktober 2025
23 Oktober 2025
23 Oktober 2025
23 Oktober 2025

23 Oktober 2025
23 Oktober 2025

23 Oktober 2025
23 Oktober 2025
23 Oktober 2025