Russound V-PS-2 Bruksanvisning
Russound
Hi-fi system
V-PS-2
Les nedenfor 📖 manual på norsk for Russound V-PS-2 (8 sider) i kategorien Hi-fi system. Denne guiden var nyttig for 21 personer og ble vurdert med 4.5 stjerner i gjennomsnitt av 2 brukere
Side 1/8

V-PS-2
GOW
Power
Supply
Ru
ssound
Mode
l: V-PS-2
60W
Audio
Power
Supply
POWER
F
AULT
0 0 0
1 2
'-
/

INTRODUCTION
Thank you
for
purchasing the Russound V-PS-2 power supply. It's designed
to
provide crisp, audio-quality power
for
up
to
two
Russound V-KP-1
amplified touchpads with Al
exa
Built-
in™.
Note: All wiring connections
must
be made with the system powered
off
and
the
V-PS-2 power cord
disco
n
nected
from
th
e electrical mains (unplugged from
the
wall outlet).
Installation of the power supply may be done locally in
the
same room as a V-KP-1
or
may be run
to
a central wiring
location using CL-2 rated cable from the room where
the
V-KP-1 is installed. The V-PS-2 can be p
ut
on a
shelf
and is
also wall-mountable
if
desired.
Replacing
An
Existing Audio
System
The majority
of
existing installed audio systems utilize a
"home
run"
of
speaker w
ir
es
from some central location
to
a volume
control or keypad in each
of
the rooms
of
the home. If
your
system uses this
type
of
"home run" wiring, you can use the
exis
ti
ng
wiring
to
car
ry the power from
the
V-
PS
-2 Power
Supply
to
the V-KP-1 , making installation
quick
and easy.
The V-PS-2 includes important
safety
features such as over-
current
over-temperature and
short-c
ircuit protection and can
even indicate trouble in an existing wiring configuration which
is especially critical when utilizing existing wiring in a home
to
ensure a
pro
p
er
electrical
co
nnection.
Examples
of
common
wiring configurations in
existing installations.
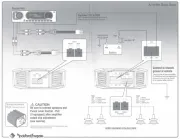
The following diagrams show
(A)
a common wiring scheme
for
a keypad based audio system
that
uses Cat5 wiring from a
central location
to
each room and then speaker wire
from
the
keypad
to
the room's speakers and
(B)
a standard "homerun"
wiring system
that
uses speaker wire from the central location
to
each room's
vo
lume control and then additional speaker
wire from the volume
co
ntrol
to
the room's speakers. Both
of
these wiring
co
nfigurations can be re-utilized with the V-PS-2
when powering
yo
ur V-KP
-1
touchpads.
A-BUS (A)
Old
Old
Volume Control
(BJ
[I
New
New
=
1612
or
Similar Speaker Wire
-
CATS
Cable
=
1612
or
Similar Speaker Wire

New Installation
For
a
new
installatio
n,
th
e
loc
a
tion
of
the
V-PS-2
power
supply
will
be
based
on
the
wiring being
don
e in
the
room
and around
the
home
at
any
other
rooms. Depending
on
the
wiring
that
will be
done
in
the
home,
it
might
be
best
to
locate
your
power
supplies in a central wiring
loc
a
tion
for
the
entire home, or in a central
lo
c
ation
for
each
floor
or
section
of
a
home,
or
in a wiring
closet
near adjacent
rooms
,
etc
.
Wiring
Be sure
to
observ
e
proper
polarity.
The
positive and negative
term
inals
on
the
V-KP-1
must
correspond with
the
positive and negative terminals
on
the
V-PS-2.
The
connection
between
the
V-PS-2 and
the
V-KP-1 can
be
made using
multiple wire
types
.
If
running
the
wire inside any walls, use CL-2 rated
wire
or
other
wiring as required
to
meet
any local building
codes
. '
New Wiring
or
Replacing a Spe
ak
er
Wire-ba
s
ed
System
Follow
these
instruct
ions when using new wiring
or
if
you are re-using
any
exi
sting
speaker wiring
to
c
onnect
the
V-
PS
-2
with
the
V-KP-1 . For
new
installations, we recommend using
18/2
stranded
cable as
it
is
inexpensive and readily available.
If
re-using existing speaker wiring,
this
is usually either
18/2
or
16/2
and
either
can
be
used.
With
the
V-
PS
-2
disconnected
from
electrical power,
strip¼"
(about
6mm) from each
of
the
two
wiring
conductor
s and
insert
them
into
Powering On
Once
the
connections
have been made,
connect
the
V-PS-2
power
supply
to
the
electrical mains
to
power
up
the
system.
You
will see a
green
light
on
the
front
of
the
V-PS-2
when
it
is plugged in.
Troubleshooting
The
Fault LEDs on
the
front
of
th
e V-PS-2 are designed
to
help
troubleshoot
any possible wiring
prob
l
ems
which is especially useful
when
re-using existing wiring. If-either Fault LED illuminates red,
it
indicates
that
th
ere is a
short-circuit
somewhere in
that
wiring
connection. Power
down
the
V-
PS
-2 and
check
that
wiring
to
find and
r
es
olve
the
issue
and
th
en
re-connect
all wiring and
power
up
the
V-PS-
2 when
the
wiring issue has been resolved. The Fault LEDs should
both
illuminate green when everything is
connected
properly
.
the
removable screw-down terminal
on
the
V-PS-
2,
making sure
to
match
the
proper
polarity
of
each
connection
. Tighten
the
screw-down
connections
securely and make sure
that
there are
no
exposed strands
that
might cause a short-circuit.
Replacing a
Cats
Wire-Based System
If
using an existing Cat5 wire
to
connect
the
V-PS-2
to
the
V-KP-1, use
a wire
stripper
to
take
off
as
much
of
the
outer insulation sleeve as you
need
to
fan
out
the
wires.
Untwist
about
2 inches
(5
cm)
of
each
of
the
cond
u
ctor
pairs. Then
strip
3/8
" (about 1 cm) from each
of
the
individual
conductors
.
You
are going
to
twist
together
2 sets
of
4
conductors
to
make
the
Cat5 wire
into
a
2-conductor
wire.
To
make
things
easy
to
remember, we recomm
end
twisting
all
of
the
striped
conductors
together
to
serve as
your
negative w
ir
e and twisting all
of
the
solid
colored
conductors
together
to
serve as
your
positive wire.
Condu
ct
or Set 1 Condu
ct
or S
et
2
1 - Blue,
Solid
1 - Blue,
St
riped
2 - Or
ang
e, S
olid
2 -
Orange
,
Strip
ed
3 - Gre
en
,
So
lid
3 -
Gr
een,
Str
i
ped
Conductor
Set
2 .Jr
4 -
Brown
,
Sol
id 4 -
Bro
wn, S
triped
Insert
th
e new wires in
to
the
removable
screw
-
down
terminal
on
the
V-PS-2, making
sure
to
match
the
proper
polarity
of each connection. Tighten
the
screw-down
c
onnection
s
sec
ur
e
ly
and make sure
that
there are
no
ex
po
s
ed
strands
that
might
cause a
short-
circuit.
r
~
'-.
I
TOTAL ZONE
PO
WER
(24VOC
/
60W)
II
-
ZONE!
ZONE2
0 0 0 0
~
,......,
■ ■
- -
C
l('
NECT
TO
V.U
j
'
I
\/
Connect up
to
2
V-KP-1
■
-
100-240\'
"\,
S<>-60Hl
60W
I
Ill
~
0
D
MAOEI CHI
NA
-
I/
Power Supply
Produkspesifikasjoner
Merke: | Russound |
Kategori: | Hi-fi system |
Modell: | V-PS-2 |
Trenger du hjelp?
Hvis du trenger hjelp med Russound V-PS-2 still et spørsmål nedenfor, og andre brukere vil svare deg
Hi-fi system Russound Manualer
18 August 2025
18 August 2025
24 Januar 2025
24 Januar 2025
24 Januar 2025
24 Januar 2025
24 Januar 2025
24 Januar 2025
24 Januar 2025
24 Januar 2025
Hi-fi system Manualer
- Hi-fi system Aiwa
- Hi-fi system Thomson
- Hi-fi system Denver
- Hi-fi system LG
- Hi-fi system Power Dynamics
- Hi-fi system Vonyx
- Hi-fi system Grundig
- Hi-fi system Jensen
- Hi-fi system AOC
- Hi-fi system Philips
- Hi-fi system Samsung
- Hi-fi system Razer
- Hi-fi system Teufel
- Hi-fi system McIntosh
- Hi-fi system Behringer
- Hi-fi system Sony
- Hi-fi system GoGEN
- Hi-fi system Glorious
- Hi-fi system Pro-Ject
- Hi-fi system Yamaha
- Hi-fi system Morel
- Hi-fi system Extron
- Hi-fi system Honor
- Hi-fi system Pioneer
- Hi-fi system AudioControl
- Hi-fi system Panasonic
- Hi-fi system Rotel
- Hi-fi system Audio-Technica
- Hi-fi system Pyle
- Hi-fi system Sencor
- Hi-fi system Roland
- Hi-fi system NAD
- Hi-fi system Auna
- Hi-fi system OSD Audio
- Hi-fi system DataVideo
- Hi-fi system Audizio
- Hi-fi system Bluesound
- Hi-fi system Cambridge
- Hi-fi system Brandson
- Hi-fi system Aplic
- Hi-fi system CSL
- Hi-fi system Hitachi
- Hi-fi system NUVO
- Hi-fi system Tripp Lite
- Hi-fi system Sennheiser
- Hi-fi system Smart-AVI
- Hi-fi system Blaupunkt
- Hi-fi system Denon
- Hi-fi system Ion
- Hi-fi system Tristar
- Hi-fi system JBL
- Hi-fi system Infinity
- Hi-fi system Majority
- Hi-fi system Nedis
- Hi-fi system Klipsch
- Hi-fi system Muse
- Hi-fi system SPL
- Hi-fi system Vivax
- Hi-fi system Apogee
- Hi-fi system Trevi
- Hi-fi system Homedics
- Hi-fi system Anchor Audio
- Hi-fi system Sven
- Hi-fi system Antelope Audio
- Hi-fi system Energy Sistem
- Hi-fi system Vizio
- Hi-fi system ESX
- Hi-fi system Omnitronic
- Hi-fi system Crestron
- Hi-fi system Electro-Voice
- Hi-fi system Proscan
- Hi-fi system Accsoon
- Hi-fi system Belkin
- Hi-fi system Alpine
- Hi-fi system AVM
- Hi-fi system Cyrus
- Hi-fi system Korg
- Hi-fi system RCF
- Hi-fi system Vimar
- Hi-fi system Vocopro
- Hi-fi system Galaxy Audio
- Hi-fi system Duronic
- Hi-fi system AVer
- Hi-fi system Vankyo
- Hi-fi system Harman Kardon
- Hi-fi system Creative
- Hi-fi system Ferguson
- Hi-fi system DAP Audio
- Hi-fi system Music Hall
- Hi-fi system Titanwolf
- Hi-fi system Steinberg
- Hi-fi system Liam&Daan
- Hi-fi system Soundmaster
- Hi-fi system Steelseries
- Hi-fi system Fiio
- Hi-fi system PreSonus
- Hi-fi system Nacon
- Hi-fi system JK Audio
- Hi-fi system Defender
- Hi-fi system Digigram
- Hi-fi system Imperial
- Hi-fi system ART
- Hi-fi system Clatronic
- Hi-fi system Ruark Audio
- Hi-fi system ClearOne
- Hi-fi system Antelope
- Hi-fi system Crystal Video
- Hi-fi system Boston Acoustics
- Hi-fi system Astell&Kern
- Hi-fi system Atoll
- Hi-fi system Esoteric
- Hi-fi system Alto
- Hi-fi system On-Q
- Hi-fi system Lenoxx
- Hi-fi system Sonos
- Hi-fi system Magnavox
- Hi-fi system Bennett & Ross
- Hi-fi system Technical Pro
- Hi-fi system Switchcraft
- Hi-fi system Terratec
- Hi-fi system Audison
- Hi-fi system Auvi
- Hi-fi system The Box
- Hi-fi system Naxa
- Hi-fi system Sangean
- Hi-fi system Krüger&Matz
- Hi-fi system Acoustic Solutions
- Hi-fi system Pronomic
- Hi-fi system Beatfoxx
- Hi-fi system NEAR
- Hi-fi system Irradio
- Hi-fi system Teradek
- Hi-fi system INKEE
- Hi-fi system Vaxis
- Hi-fi system SSL
Nyeste Hi-fi system Manualer
23 September 2025
23 September 2025
22 September 2025
22 September 2025
22 September 2025
21 September 2025
21 September 2025
21 September 2025
21 September 2025
21 September 2025