Sightron S6 5-30x56 Bruksanvisning
Sightron
Ikke kategorisert
S6 5-30x56
Les nedenfor 📖 manual på norsk for Sightron S6 5-30x56 (2 sider) i kategorien Ikke kategorisert. Denne guiden var nyttig for 24 personer og ble vurdert med 4.5 stjerner i gjennomsnitt av 12.5 brukere
Side 1/2
Introduction to Sightron
Your New S6 Riflescope
Focusing your Riflescope
S6 5-30x56 SERIES
RIFLESCOPE
INSTRUCTIONS
Congratulations on the purchase of your new
Sightron S6 Series Riflescope.
Sightron is a leader in developing new products
for the outdoor enthusiast.
This instruction sheet is designed to provide you
with the proper fundamentals for using your
S6 Series Riflescope.
If you have any questions, please feel free to
contact us at info@sightron.com,
www.sightron.com, or by phone at
+1-919-562-3000.
Before mounting your new Sightron S6 5-30x56
Series
Scope please check to make sure it is the
correct
model and includes the following
accessories:
1-Set of Front and Rear Lens Covers
1-Three-inch Sunshade
1-1.27 MM Allen wrench
1-2.0 MM Allen wrench
1-Lens Cloth
1-Instruction Sheet
1-CR2032 Battery for the illumination Switch
1- Reticle Chart
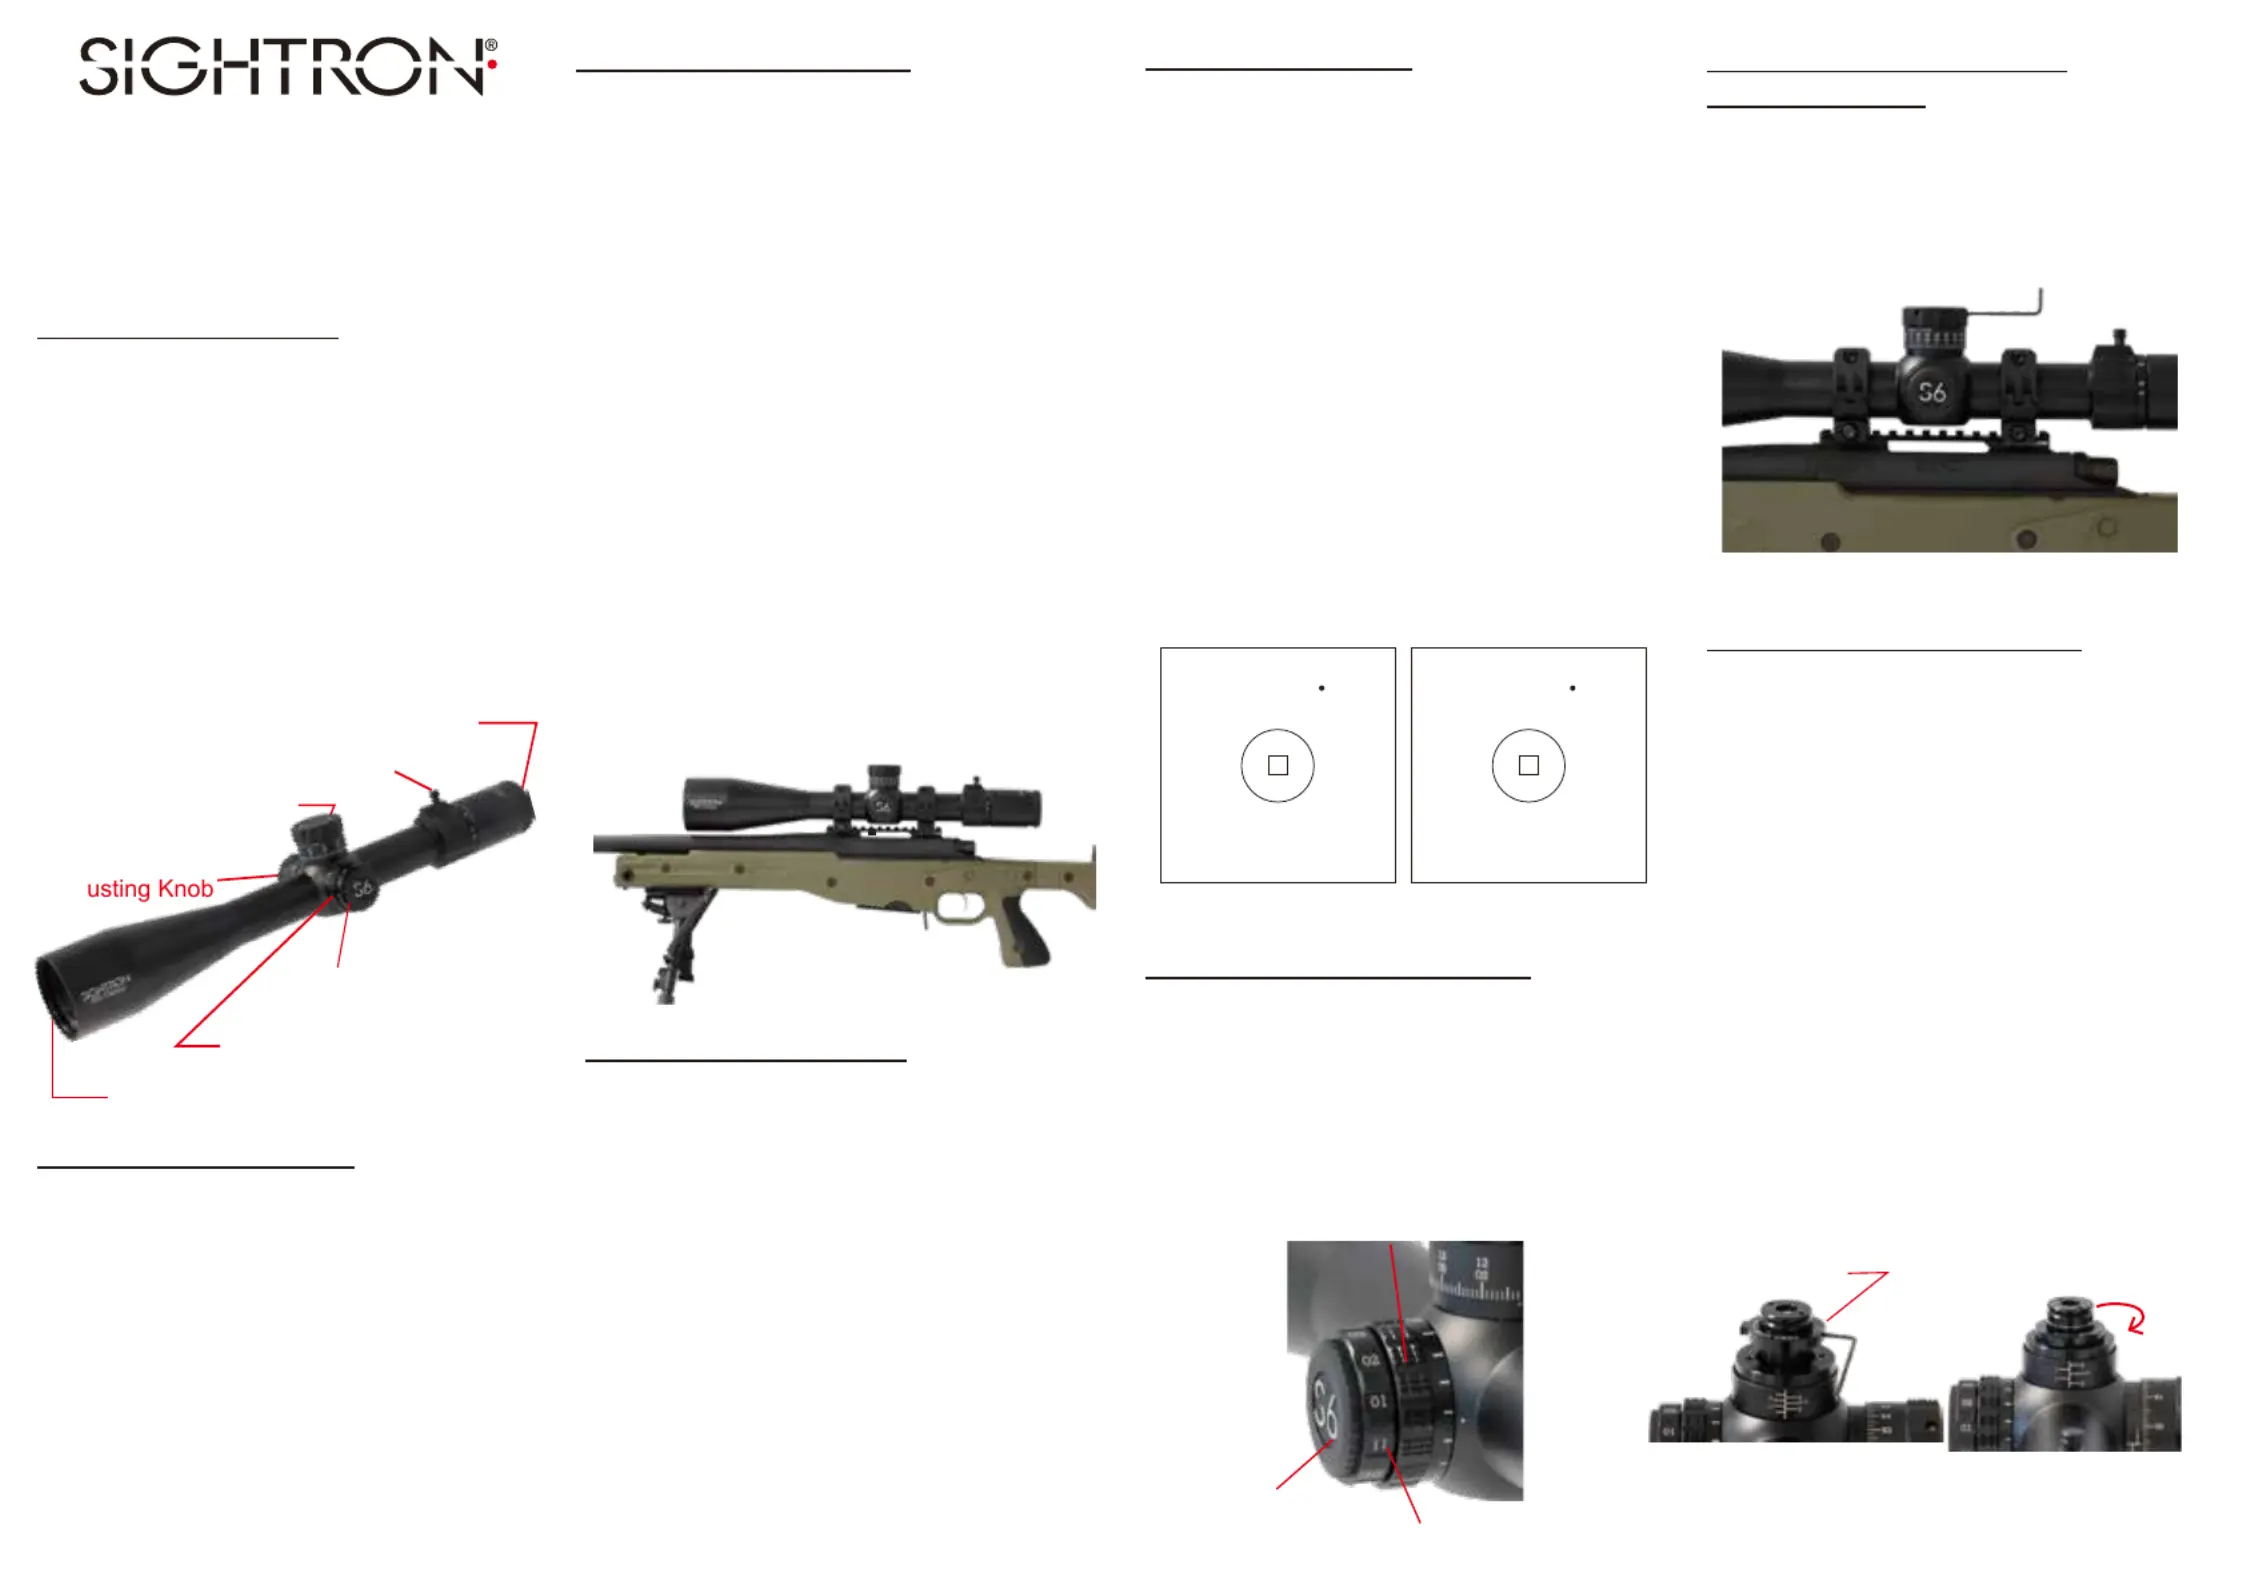
Mounting Your Riflescope
Your new scope has been optically centered at the
factory and superior performance will be obtained
with minimal adjustment.
Prior to sighting in your scope it is important to
know the windage and elevation adjustment
specifications of your particular scope model.
A general rule is the more the magnification the
less internal adjustment is available.
Once you have completed the eyepiece / diopter
adjustment, the next step is to turn the side focus
knob on the left side of the scope until the image
or target is clear. Now your scope is adjusted and
ready for shooting.
Note: The focus will need to be adjusted each
time the distance is changed.
Sighting in Your Gun
1. Place a 2 to 3 foot target at 50 to 100 yards
away. Using a bench rest, fire two shots while
aiming at the center of the bullseye.
2.
While re-aiming at the bullseye adjust the reticle
to the bullets impact point by using the turret
adjustments and fire two more shots.
3.
Your scope should now be close to point of aim.
Fire at the bullseye and make the necessary
final adjustments.
4. Adjusting the windage and elevation turret in
the direction of the arrow on the knob, it will
move the bullet impact in the direction indicated.
5. For best optical and mechanical performance
keep the windage and elevation travel as
centered as possible to allow for maximum
adjustment range for your model of riflescope.
Note: Most sight in problems are caused by
poor ring alignment.
Using your Illumination Reticle
To install the illumination battery, remove the
battery cap located at the end of the side focus
knob by rotating it counterclockwise.
Insert the CR2032 battery with the positive side
up and retighten finger tight.
Rotate the illumination switch to the required
setting for the lighting conditions.
Using your Internal Zero Stop
NOTE: The zero stop comes from the factory
set at the full range of elevation travel.
1. To set the zero stop, sight in the gun at the
desired range.
2. Loosen the three 2.0 MM hex screws from
the elevation turret and remove the turret.
3. Loosen the 1.27 MM hex screw on the Zero
Stop collar until it is loose.
4. The Zero Stop collar will then drop to meet
the main turret body.Turn the Zero Stop
clock wise until it stops.
5. Retighten the 1.27MM hex screw.
6. Retighten the three 2.0 MM hex screws on
elevation turret.
Once your scope is sighted in for the required
distance, loosen the three 2.0 MM hex screws.
Rotate the turret so the zero on the turret aligns
with vertical index mark on the revolution scale.
Retighten the three 2.0 MM hex screws.
Fi t Shotrs
First Adjustment
Adjust
reticle
to this
point
Battery Cap (CR2032)
Illumination Switch
Side Focus Knob
Resetting your Windage and
Elevation Turrets
Full Travel
Position
Zero Stop Collar
Zero Stop
Locked Position
Ocu ar Lel ns
Di pt justi Rio er Ad ng ng
Elevation Adjusting Knob
Windage
Adj
Zoom Ring Lever
(Removeable)
Ba ry C 2 2)tte ap (CR 03
Parallax and Illumination
Adjusting Knob
Objective Lens
CAUTION: ALWAYS ENSURE YOUR
WEAPON IS UNLOADED PRIOR TO MOUNTING
YOUR SCOPE.
USE EYE AND HEARING PROTECTION AND
FOLLOW PROPER SAFETY RULES WHEN
HANDLING OR FIRING YOUR WEAPON.
Place both rings on your mount base or receiver,
and tighten. Remove the top half of the rings
and place the riflescope in the bottom half of
the rings.
Once you have determined proper ring spacing
and eye relief, align the reticle with a vertical
line preferably a plumb line.
Tighten the top half of the rings to between
15 to 18 inch pounds or
169 to 203 Newton
Centimeters and adjust the
diopter or eye piece
focus so the reticle is crisp
and clear.
Note: The only purpose of the diopter is to focus
the reticle sharp and clear.
Produkspesifikasjoner
| Merke: | Sightron |
| Kategori: | Ikke kategorisert |
| Modell: | S6 5-30x56 |
Trenger du hjelp?
Hvis du trenger hjelp med Sightron S6 5-30x56 still et spørsmål nedenfor, og andre brukere vil svare deg
Ikke kategorisert Sightron Manualer

2 April 2025
Ikke kategorisert Manualer
- Grimm Audio
- Sebo
- Smart Media
- Haeger
- Dexibell
- Schumacher
- Appsys ProAudio
- Leica
- Trendnet
- Sharper Image
- SuperTooth
- T-Rex
- Trevi
- Ensemble Designs
- KanexPro
Nyeste Ikke kategorisert Manualer

23 Oktober 2025

23 Oktober 2025

23 Oktober 2025

23 Oktober 2025

23 Oktober 2025

23 Oktober 2025

23 Oktober 2025

23 Oktober 2025

23 Oktober 2025

23 Oktober 2025