Tripp Lite APS1250 Bruksanvisning

Les nedenfor 📖 manual på norsk for Tripp Lite APS1250 (48 sider) i kategorien batteri. Denne guiden var nyttig for 3 personer og ble vurdert med 4.5 stjerner i gjennomsnitt av 2 brukere

Side 1/48
1
Owner’s Manual
Quiet Mobile Power
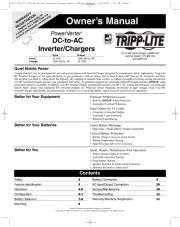
Congratulations! You've purchased the most advanced, feature-rich Inverter/Charger designed as an alternative energy source for residential,
commercial or recreational vehicle applications. Tripp Lite Inverter/Chargers are the quiet alternative to gas generatorswith no fumes, fuel or
noise to deal with! You get AC electricity anywhere and anytime you need it: utility power disruptions, rolling down the highway, dry camping in
majestic back country or parked overnight at a money-saving non-electric site. Inverter/Chargers provide your equipment with utility- or
generator-supplied AC electricity (filtered through premium ISOBAR® surge protection) whenever available. In addition, your Inverter/Charger
automatically recharges your connected battery bank. Whenever blackouts, brownouts or high voltages occur, your Inverter/Charger immediately
and automatically switches to battery power.
Safety 2
Feature Identification 3
Operation 4-5
Configuration 5-6
Battery Selection 7
Mounting 8
Battery Connection 9
AC Input/Output Connection 10
Service/Maintenance 10
Troubleshooting 11
Warranty 12
Español 13
Français 25
Русский 37
PowerVerter
®
DC-to-AC Inverter/Chargers
APSX Models Input Output
Invert: 12 VDC 230V, 50 Hz. AC
Charge: 230V, 50 Hz. AC 12 VDC
APS Models Input Output
Invert: 12 VDC 120V, 60 Hz. AC
Charge: 120V, 60 Hz. AC 12 VDC
WARRANTY REGISTRATION
Register your product today and be
automatically entered to win an ISOBAR
surge protector in our monthly drawing!
www.tripplite.com/warranty
1111 W. 35th Street, Chicago, IL 60609 USA • www.tripplite.com/support
Copyright © 2019 Tripp Lite. All rights reserved. PowerVerter
®
is a registered trademark of Tripp Lite.
Better for
Your Equipment
Premium Protection Levels
• Built-In ISOBAR
®
Surge Protection
Automatic Overload Protection
Ideal Output for All Loads
Frequency-Controlled Output
Automatic Load Switching
Balanced Load Sharing
Better for
Your Batteries
Faster Battery Recharge
High-Amp, 3-Stage Battery Charger
Critical Battery Protection
High-Efficiency DC-to-AC Inversion
Better for
You
Quiet, Simple, Maintenance-Free
Operation
Multi-Function Lights & Switches
Moisture-Resistant Construction*
* Inverter/Chargers are moisture-resistant, not
waterproof.
2
Important Safety Instructions
SAVE THESE INSTRUCTIONS!
This manual contains important instructions and warnings that should be followed during the installation, operation and storage
of this product.
Location Warnings
Although your Inverter/Charger is moisture resistant, it is NOT waterproof. Flooding the unit with water will cause it to short circuit and could
cause personal injury due to electric shock. Never immerse the unit, and avoid any area where standing water might accumulate. Mounting
should be in the driest location available.
Leave a minimum of 2" clearance at front and back of the Inverter/Charger for proper ventilation. To avoid automatic Inverter/Charger
shutdown due to overtemperature, any compartment that contains the Inverter/Charger must be properly ventilated with adequate outside air
flow. The heavier the load of connected equipment, the more heat will be generated by the unit.
Do not install the Inverter/Charger directly near magnetic storage media, as this may result in data corruption.
Do not install near flammable materials, fuel or chemicals.
Do not mount unit with its front or rear panel facing down (at any angle). Mounting in this manner will seriously inhibit the unit's internal
cooling, eventually causing product damage not covered under warranty.
Battery Connection Warnings
The battery should be connected before operating the Inverter/Charger
Multiple battery systems must be comprised of batteries of identical voltage, age, amp-hour capacity and type.
Because explosive hydrogen gas can accumulate near batteries if they are not kept well ventilated, your batteries should not be installed
(whether for a mobile or stationary application) in a “dead air” compartment. Ideally, any compartment would have some ventilation to
outside air.
Sparks may result during final battery connection. Always observe proper polarity as batteries are connected.
Do not allow objects to contact the two DC input terminals. Do not short or bridge these terminals together. Serious personal injury or
property damage could result.
Equipment Connection Warnings
Use of this equipment in life support applications where failure of this equipment can reasonably be expected to cause the failure
of the life support equipment or to significantly affect its safety or effectiveness is not recommended. Do not use this equipment in
the presence of a flammable anesthetic mixture with air, oxygen or nitrous oxide.
You may experience uneven performance results if you connect a surge suppressor, line conditioner or UPS system to the output of the
Inverter/Charger.
Corded Models: Do not modify the Inverter/Charger’s plug or receptacle in a way that eliminates its ground connection. Do not use power
adapters that will eliminate the plug’s ground connection.
Connect your Inverter/Charger only to a properly grounded AC power outlet or hardwired source. Do not plug the unit into itself; this will
damage the device and void your warranty.
The main grounding lug should be connected to earth ground or to the vehicle chassis with a minimum 8 AWG wire.
Operation Warnings
Your Inverter/Charger does not require routine maintenance. Do not open the device for any reason. There are no user-serviceable parts
inside.
Potentially lethal voltages exist within the Inverter/Charger as long as the battery supply and/or AC input are connected. During any service
work, the battery supply and AC input connection (if any) should therefore be disconnected.
Do not connect or disconnect batteries while the Inverter/Charger is operating in either inverting or charging mode. Operating Mode Switch
should be in the DC OFF position. Dangerous arcing may result.
Caution: These models have a failsafe AC pass-through feature where the AC output will be live (if AC input is available)
even though the operating mode switch is set to “DC OFF.”
3
Feature Identification
Identify the premium features on your specific model and quickly locate instructions on how to maximize their use.
1
Configuration DIP Switches: optimize Inverter/Charger
operation depending on your application. See Configuration
section for setting instructions.
2
Operating Mode Switch: controls Inverter/Charger operation.
The "AUTO/REMOTE" setting ensures your equipment receives
constant, uninterrupted AC power. It also enables the Inverter/
Charger to be remotely monitored and controlled with an optional
remote module (Tripp Lite model APSRM4, sold separately). The
"CHARGE ONLY" setting allows your batteries to return to full
charge faster by turning the inverter off which halts battery
discharging. The "DC OFF" setting de-energizes the unit and
connects AC OUT to AC IN. See Operation section for setting
instructions.
3
"LINE", "INVERT", "LOAD" LEDs: show whether the Inverter/
Charger is operating from AC line power or DC battery power. It
also warns you if the connected equipment load is too high. See
Operation section for instructions on reading the indicator lights.
4
"BATT VOLTAGE" LEDs: these three lights will turn ON in several
sequences to show approximate battery level. See Operation
section for instructions on reading the indicator lights.
5
DC Power Terminals: connect to your battery terminals. See
Battery Connection section for instructions.
6
AC Output Receptacles
7A
AC Input Receptacle (230V Models): attach input cord to
connect the Inverter/Charger to any source of utility- or
generator-supplied AC power. The user must provide an
appropriate country-specific input cable for 230V Models. See
AC Input/Output Connection section for instructions.
7B
AC Input Cord (120V Models): plug the Inverter/Charger into a
utility- or generator-supplied AC power outlet.
8
Resettable Circuit Breakers: protect your Inverter/Charger
against damage due to overload or charger failure. See
Operation section for resetting instructions.
9
Remote Control Module Connector: allows remote monitoring
and control with an optional module (Tripp Lite model APSRM4,
sold separately). See remote module owner’s manual for
connection instructions.
10
Main Ground Lug: properly grounds the Inverter/Charger to
vehicle grounding system or to earth ground. See Configuration
section for instructions.
11
Cooling Fan: quiet, efficient fan prolongs equipment service life.
Front View (230V Non-Corded Models) Front View (120V Corded Models)
1
24 39
10
6
5
11
1 24 3
5
6
8
9
11
10
7B
7A
8

Produkspesifikasjoner

Merke: Tripp Lite
Kategori: batteri
Modell: APS1250
Vekt: 10520 g
Bredde: 222.2 mm
Dybde: 228.6 mm
Høyde: 177.8 mm
Opprinnelsesland: China
Pakkevekt: 11020 g
Inngangsspenning: 12 V
Utgangseffekt: 2500 W
Utgangsstrøm: 120 V
Dimensjoner (B x D x H): 222.3 x 228.6 x 177.8 mm
Produktfarge: Sort
Pakkedybde: 259.1 mm
Pakkehøyde: 320 mm
Pakkebredde: 269.2 mm
Harmonisert system (HS)-kode: 8504.40.9570
Masterkassens (ytterkassens) bruttovekt: 11020 g
Masterkassens (ytterkassens) lengde: 259.1 mm
Produkter per masterkasse (ytterkasse): 1 stykker
Masterkassens (ytterkassens) bredde: 269.2 mm
Masterkassens (ytterkassens) høyde: 320 mm

Trenger du hjelp?

Hvis du trenger hjelp med Tripp Lite APS1250 still et spørsmål nedenfor, og andre brukere vil svare deg